Schedules
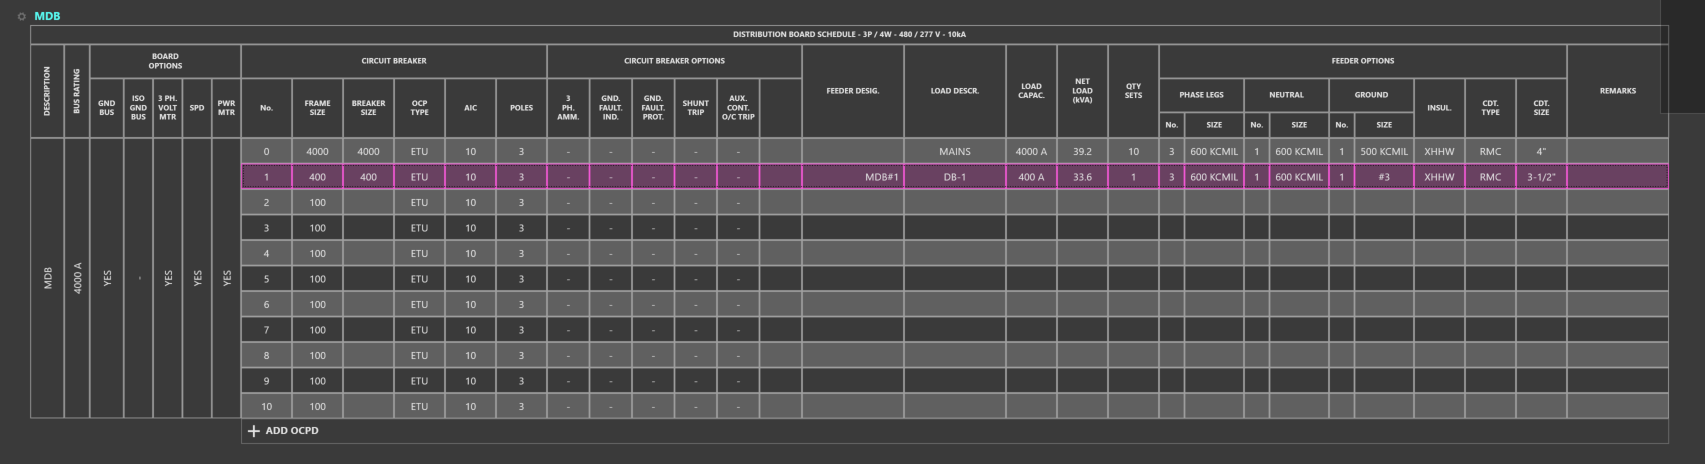
Schedules are a tabular representation of your distribution system. Schedules are primarily used for Distribution Boards, Switchboards, and Panelboards. Not every piece of Equipment has a dedicated Schedule. For example, end-of-line equipment such as motors do not have Schedules.
The top portion of the Workspace shows all open Schedules. Schedules can be exported to .csv or .dwg formats.
Specify Board Options such as Ground Bus, Isolated Ground Bus, etc., by clicking inside the text box. Additional options for breakers can also be specified.
Other circuit properties such as OCPD sizes and conductor sizes are calculated based on the Load Capacity.
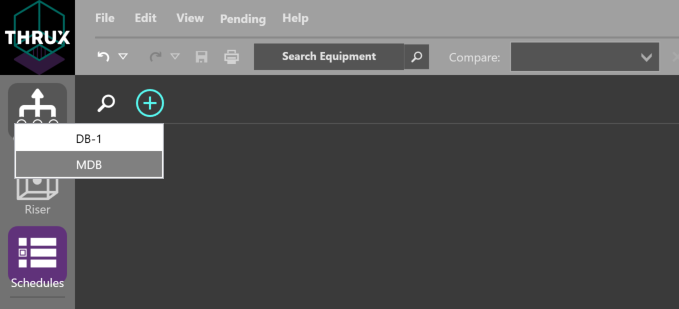
Open Schedule
To open a Schedule use either the Search (magnifying glass icon) button, or use the Add (+) button.
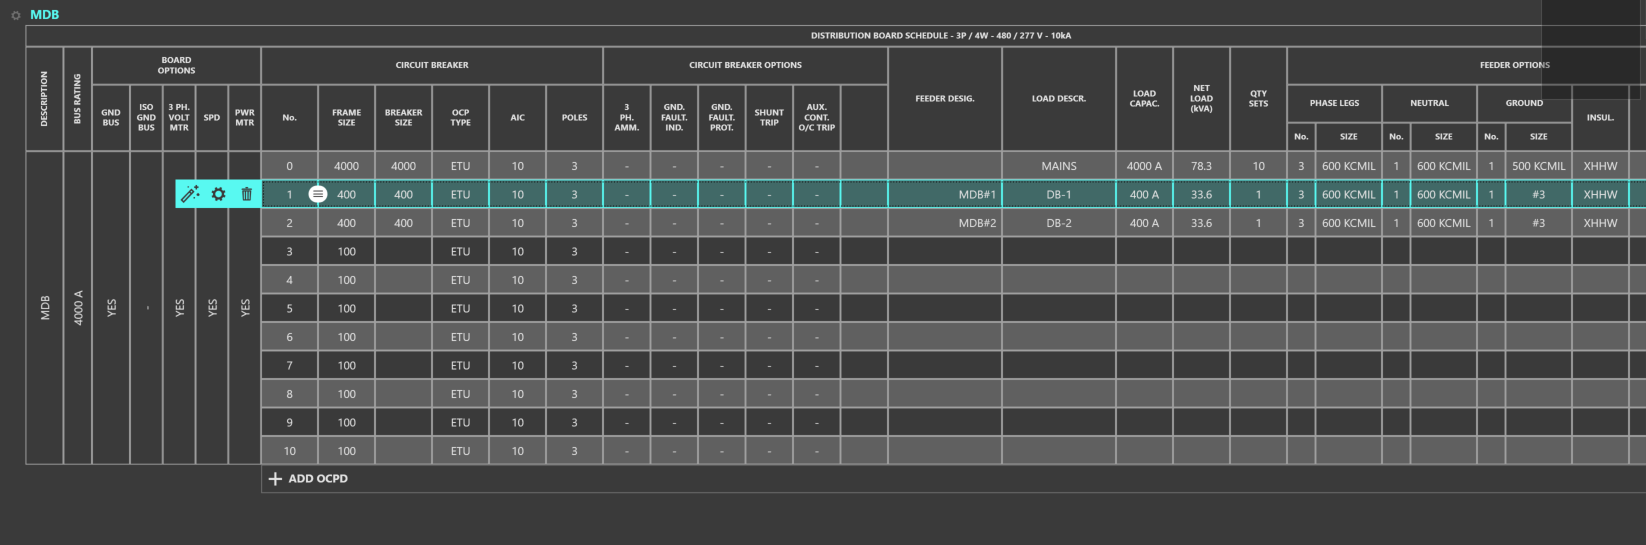
Adding, Deleting, Editing Equipment
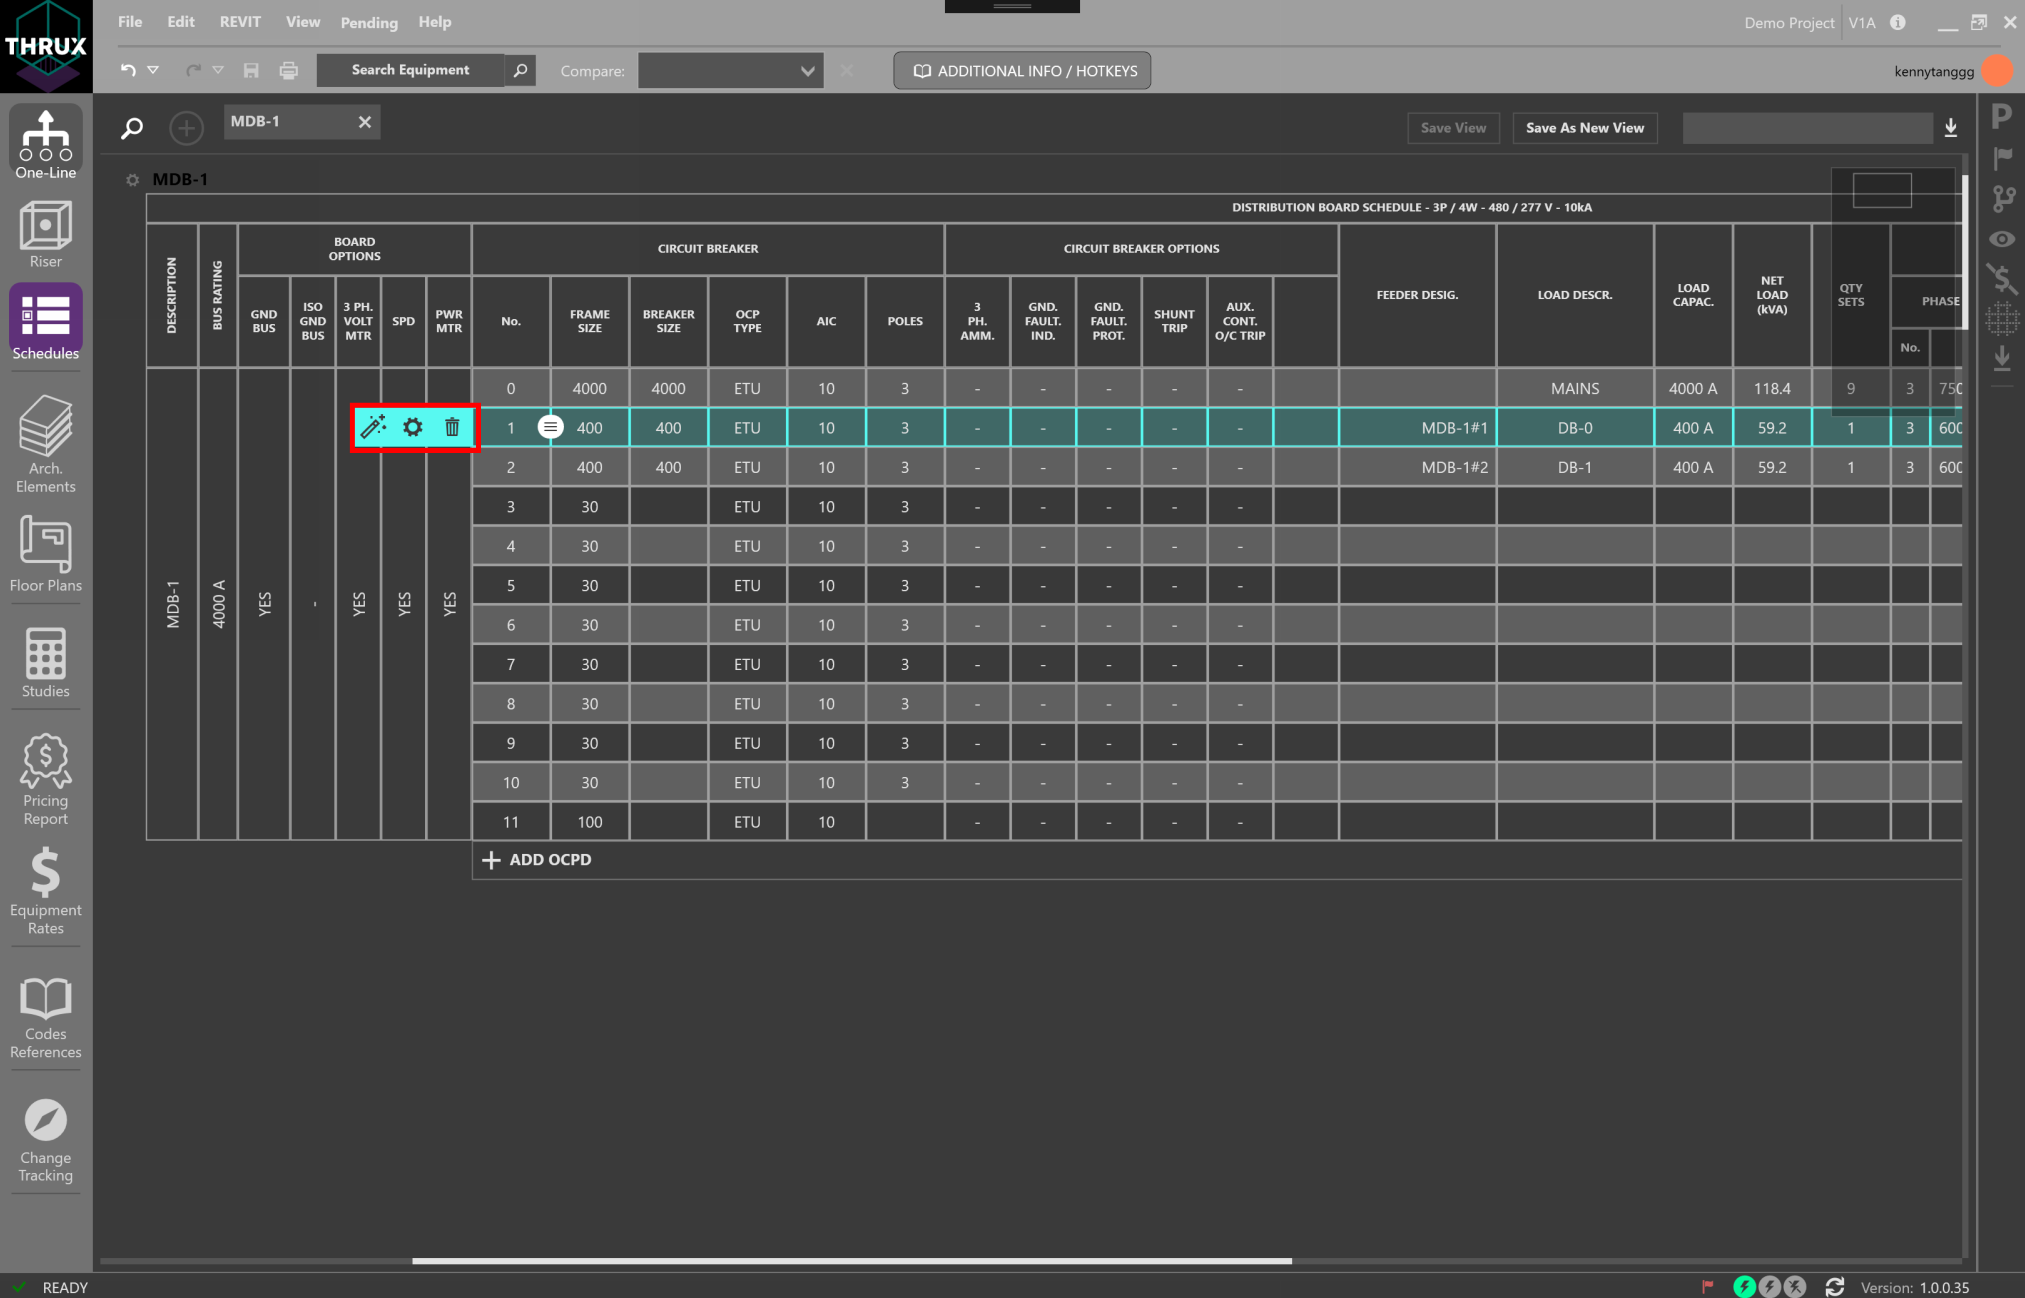
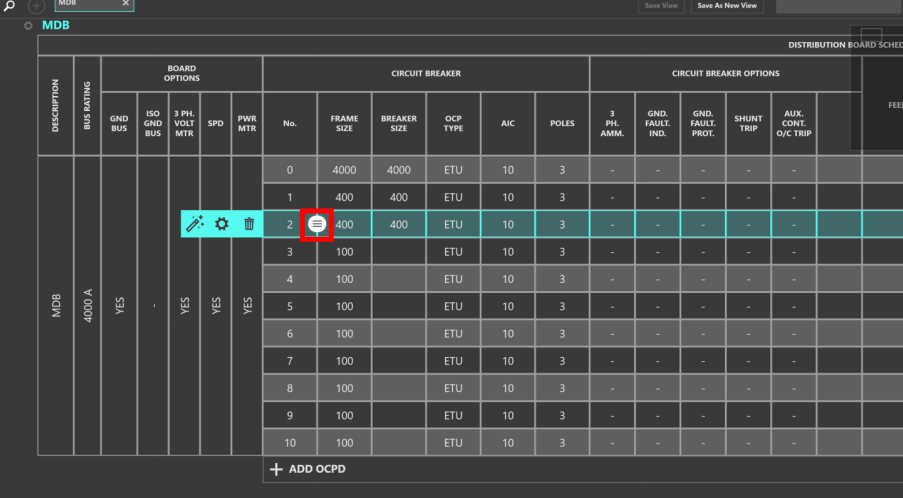
Clicking on a circuit number selects a circuit. With an empty circuit selected, note the options to Add Equipment (+ icon), or Delete (trash icon), or Edit Properties (gear icon).

Copy/Copy/Paste Circuits
Copying, Deleting, and Moving Equipment in the Schedules Workspace is similar to the interactions in the One-Line.
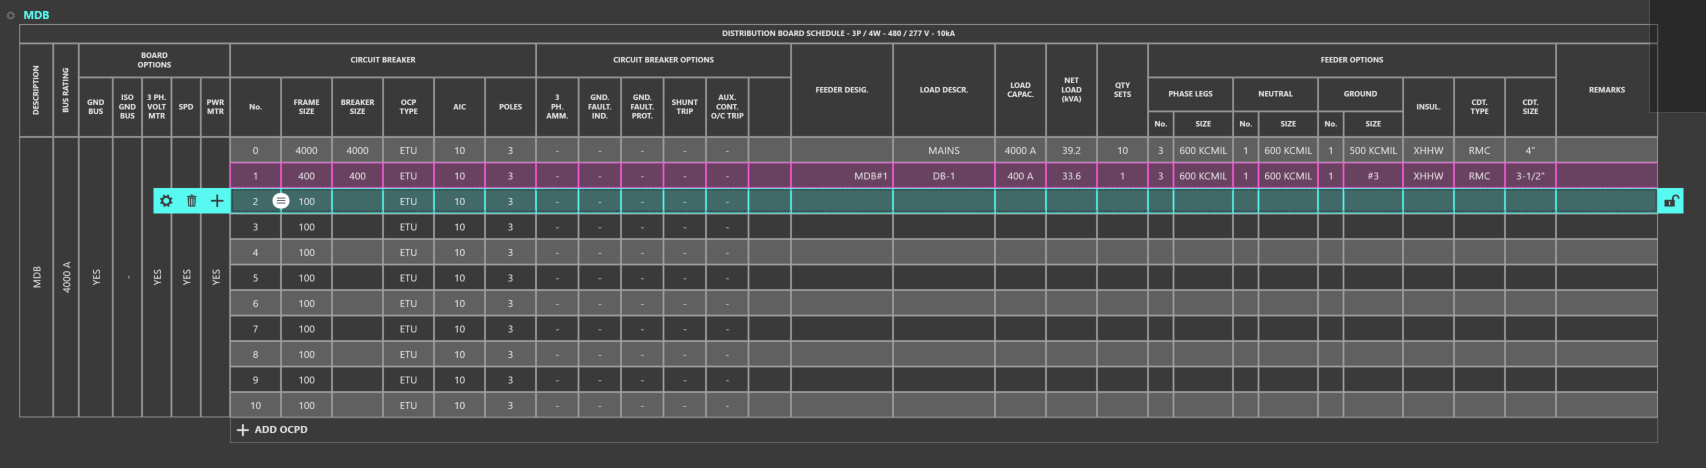
Once a Schedule is open, to copy a circuit, first select the circuit number. Selection will be highlighted in cyan.
Next use CTRL+C to copy or CTRL+X to cut. The selection will highlight purple and be added to the clipboard.
Then, select the source or Equipment to paste to and click Paste or use CTRL+V. Equipment can be pasted between different Schedules.
Reset to Code Minimum
If circuit properties are manually modified, it is possible to create situations which generate Flags and violate a Project’s applicable safety standards. A designer can reset the circuit properties to be the code-minimum value, based on the Load Capacity.
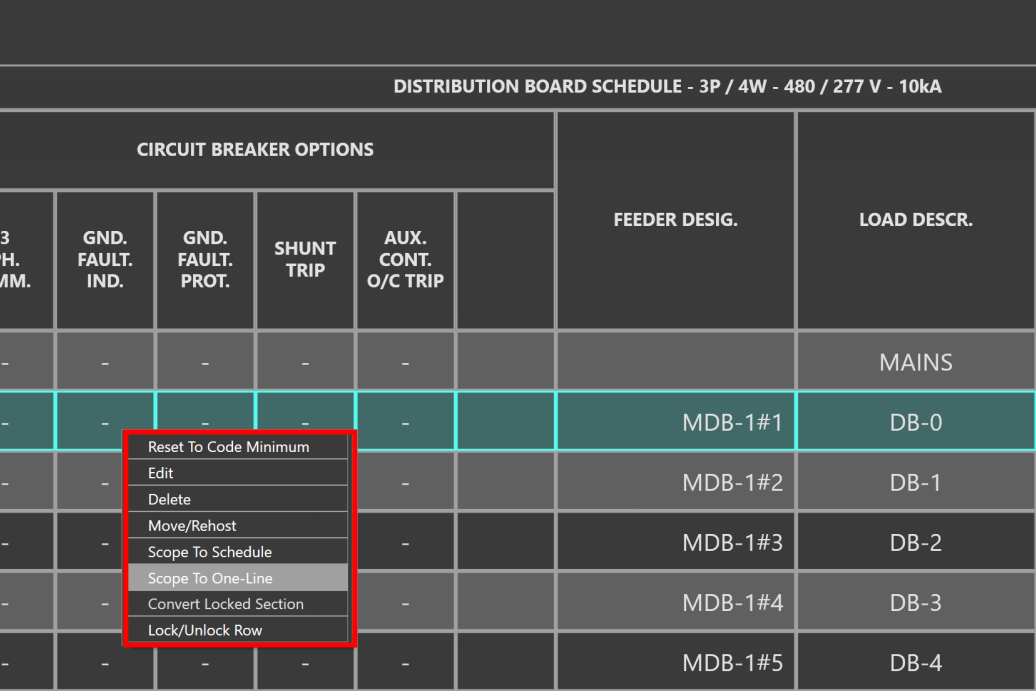
Select the circuit number, then click Reset to Code Minimum (wand symbol). Or, right-click the circuit, and then select Reset to Code Minimum.
With Design Assistance enabled, THRUX will automatically calculate code minimum values based on the Equipment’s Load Capacity.
If Design Assistance is fully disabled, then the designer has complete control of the model. However, Flags will still be generated.
Rehosting Equipment/Reordering Circuits
The ordering of circuits can affect the overall construction of the board. To move circuits or to change a circuit’s source, select the circuit number and then click and drag the Grip (grip icon).

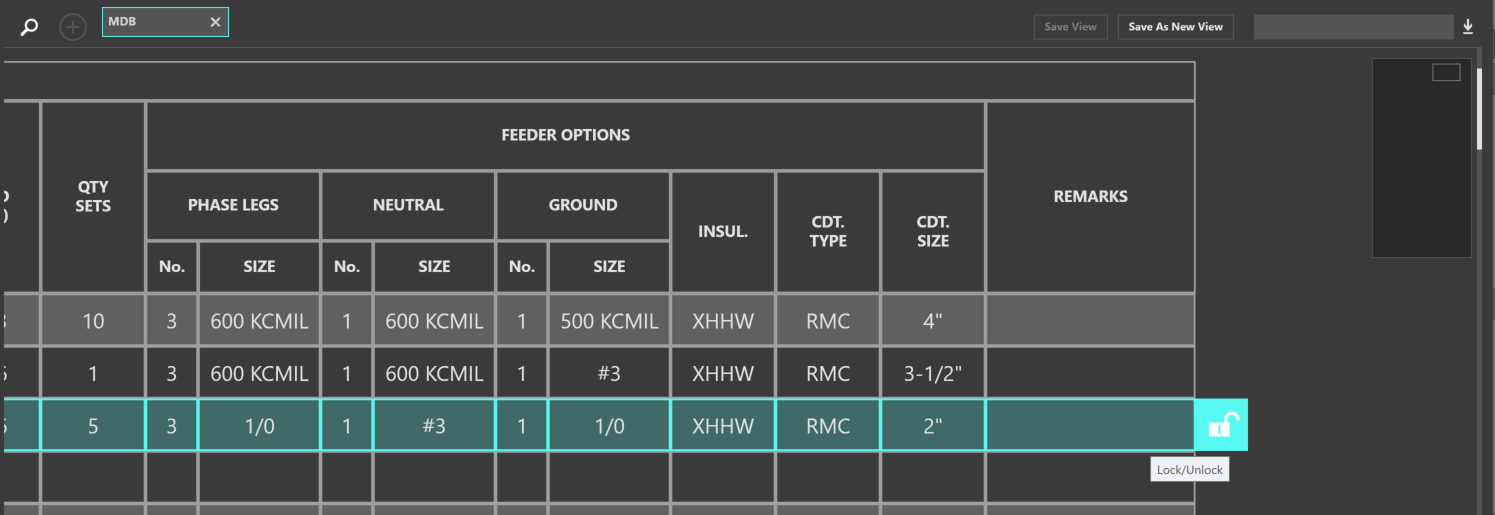
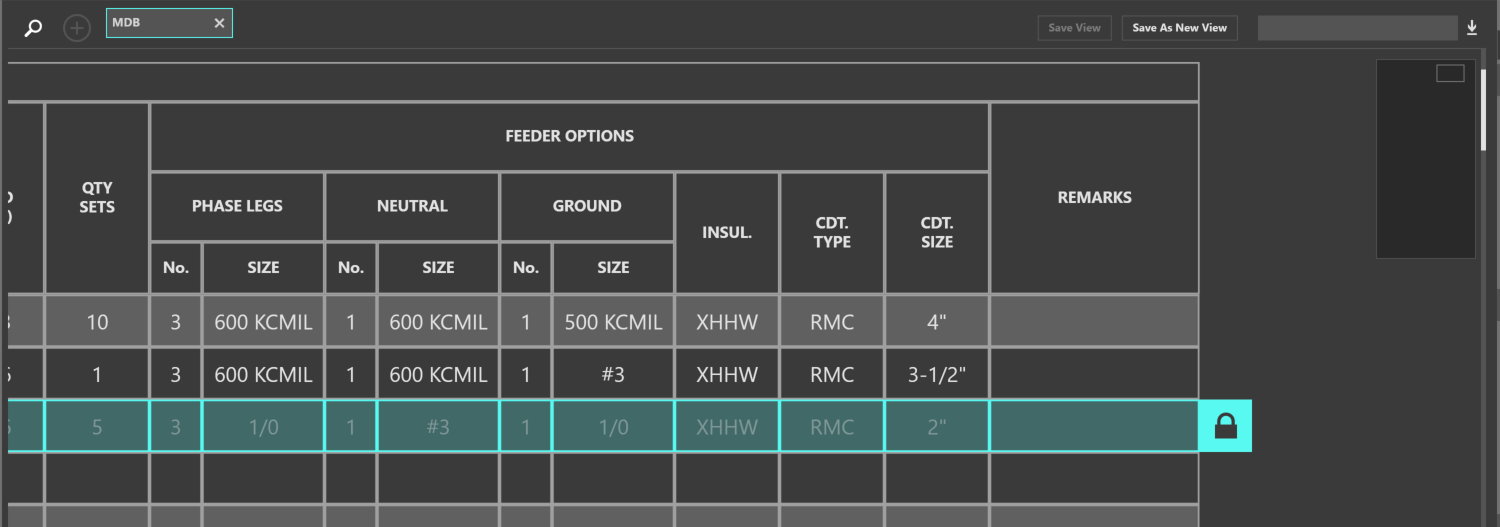
Lock/Unlock
A designer can lock a selection which will prevent elements from being modified. Select a circuit number and then click the Lock/Unlock (lock symbol) button.
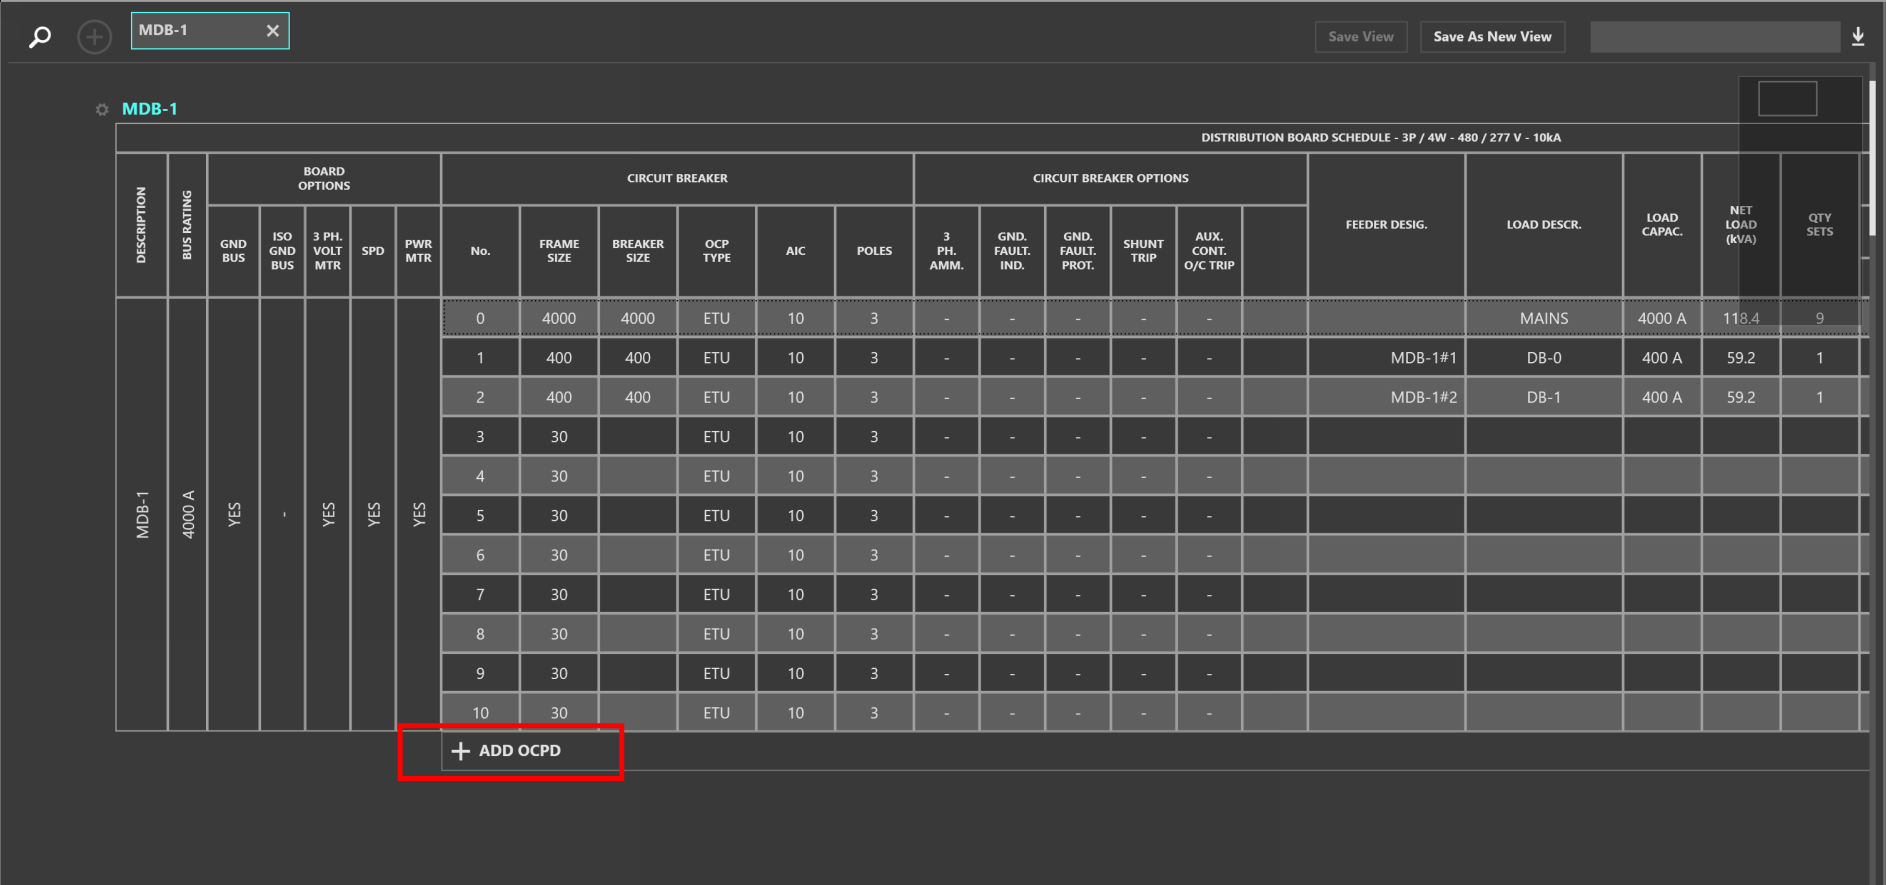
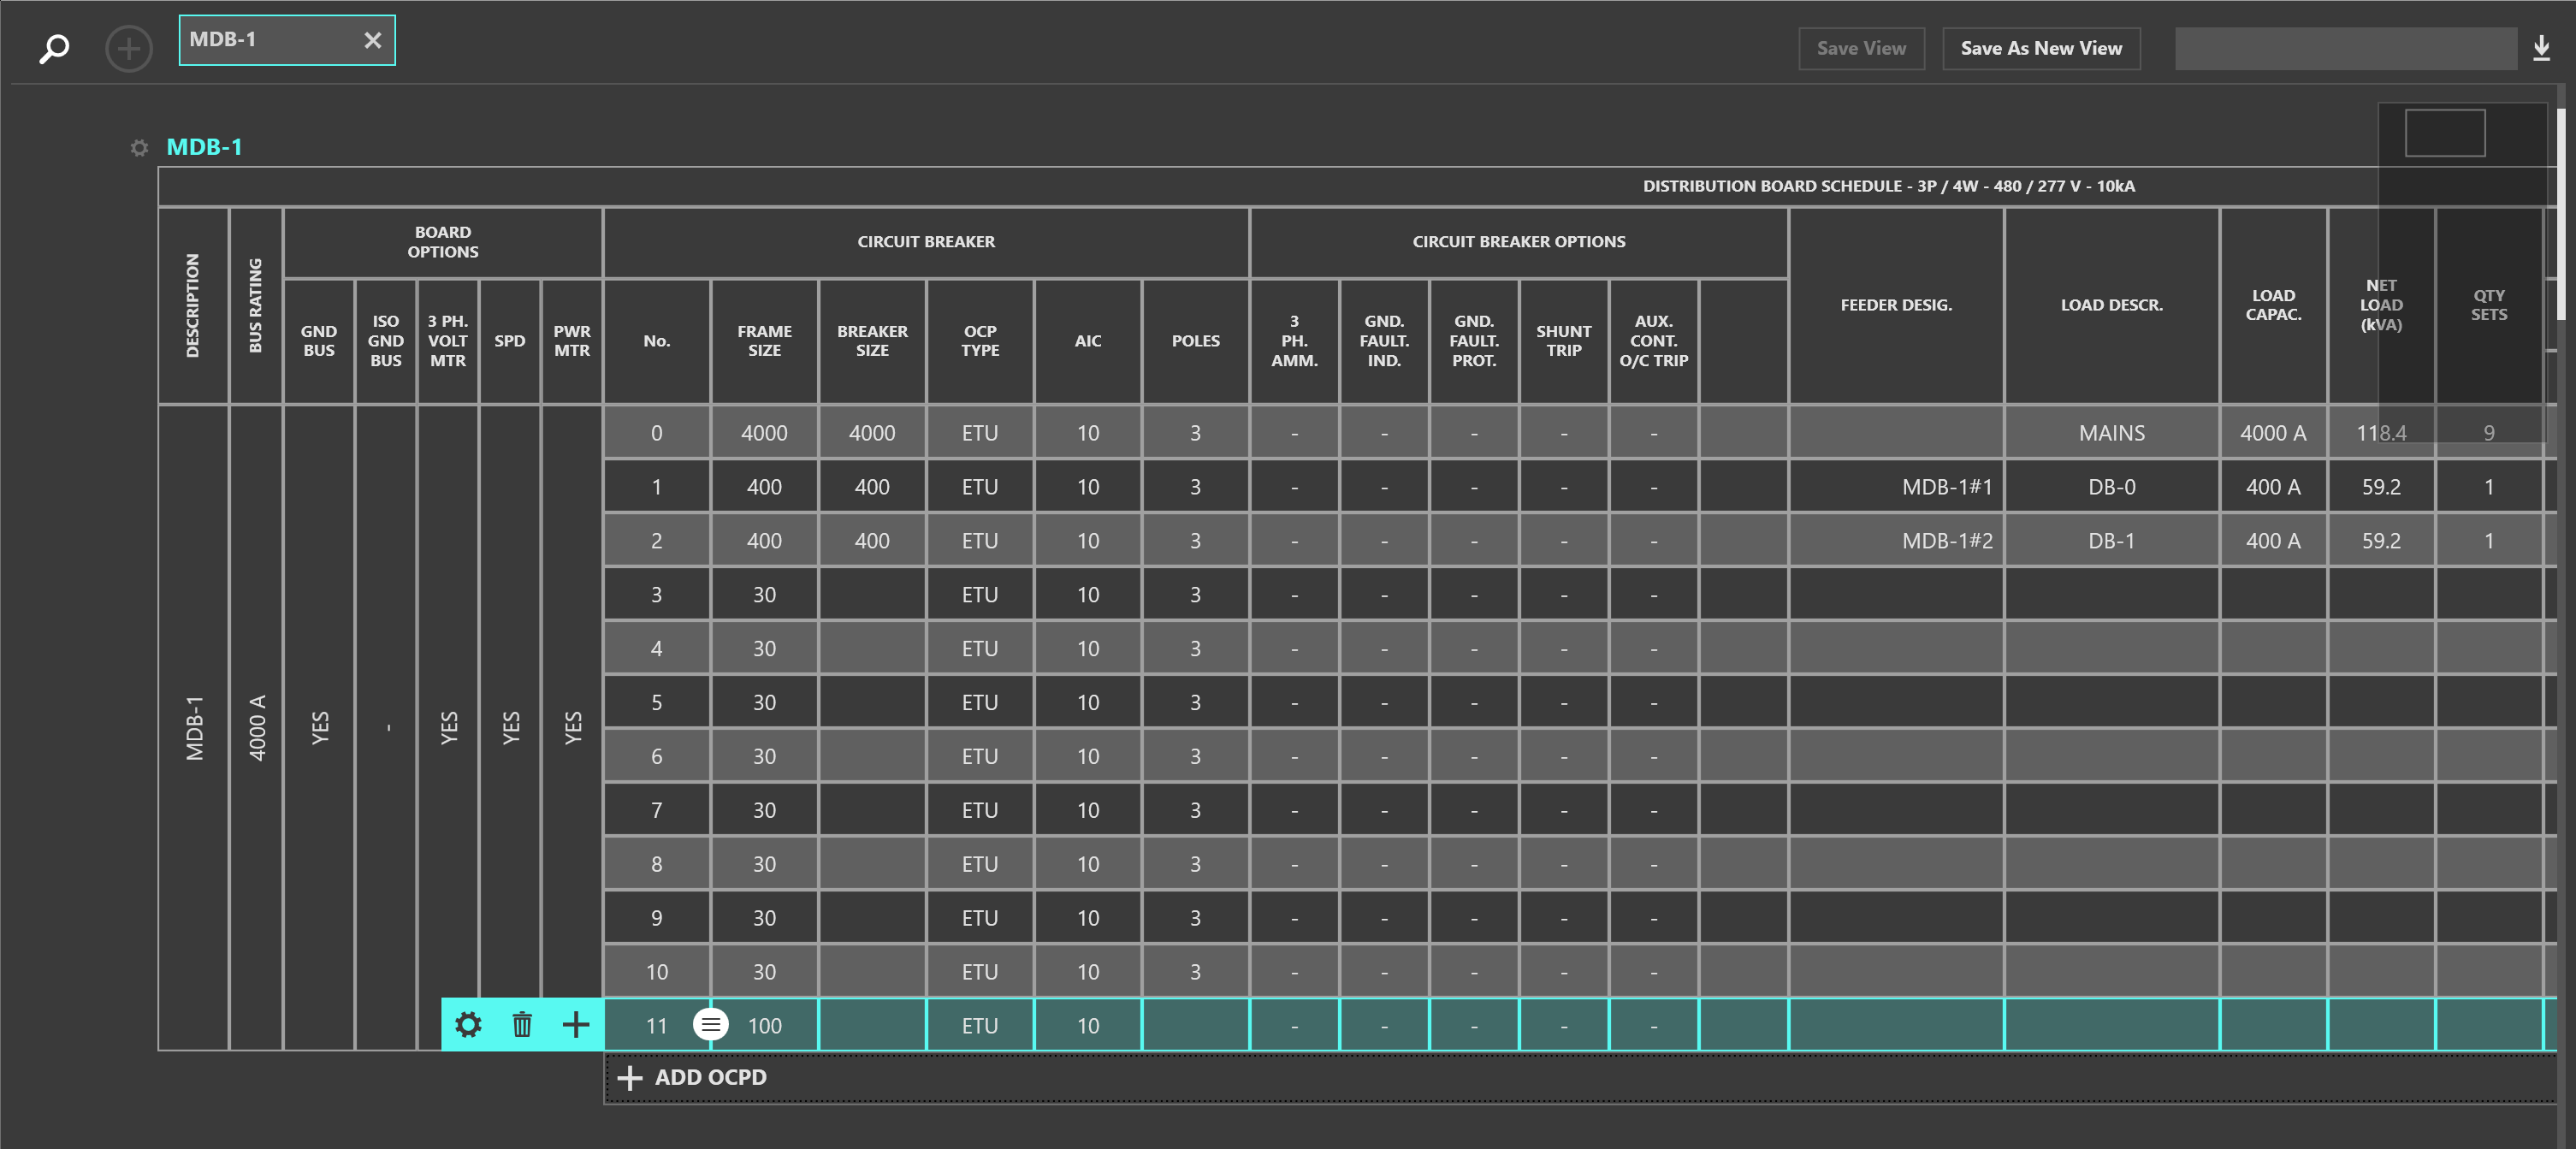
Adding OCPD’s
The amount of protective devices a distribution board supports is proportional to its physical installation. Equipment cannot be added to a distribution board unless there is space alotted.
To add a protective device, click Add OCPD.
Navigate
Right-click on a circuit element to open a utility menu. A designer can navigate to other Schedules or to the One-Line by selecting Scope to Schedule or Scope to One-Line.
Converting Breaker/Switch and Fuse
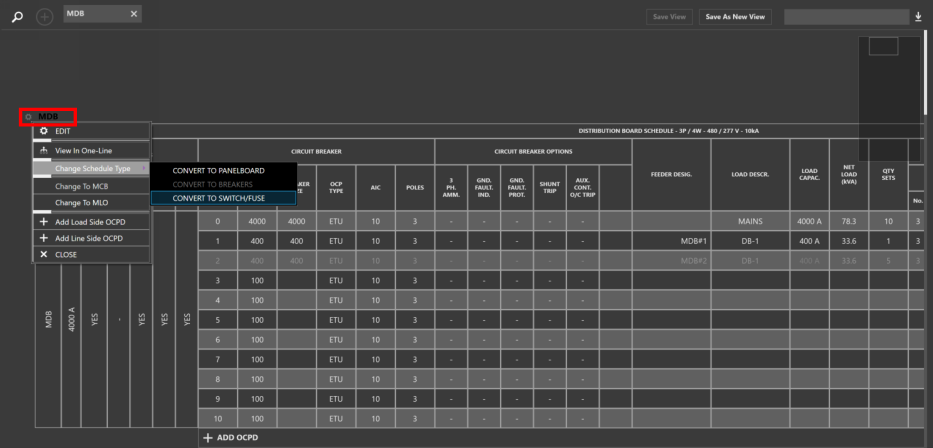
By default, Distribution Boards use breakers as protective devices, while Switchboards use switch and fuse combinations. To convert a board’s protective devices, click the Settings (gear symbol) button in the top left of the schedule. Then, under Change Schedule Type, select Convert to Switch/Fuse.
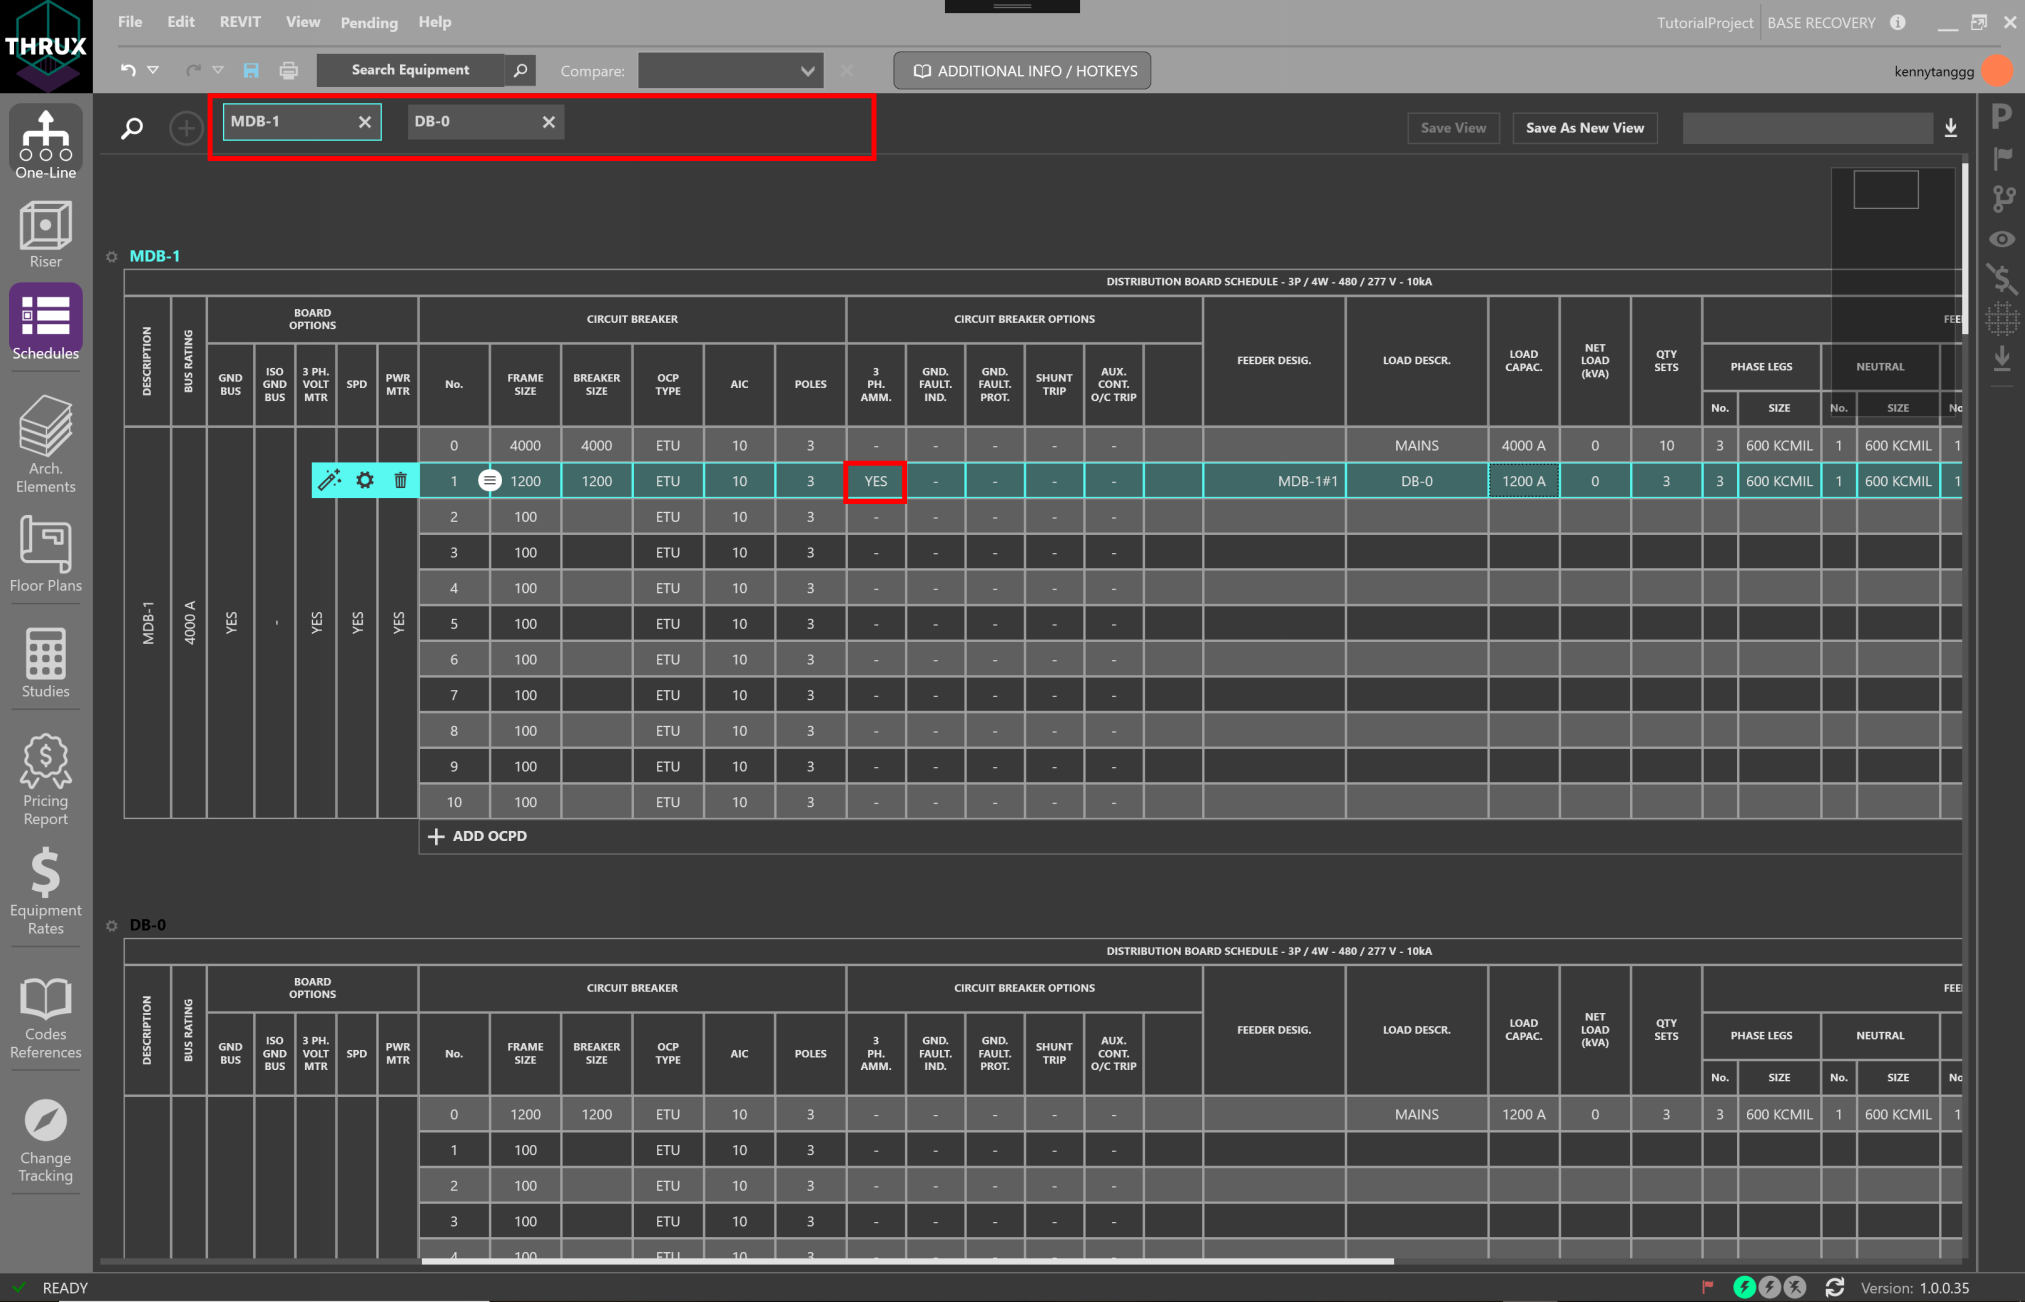
Schedule Views
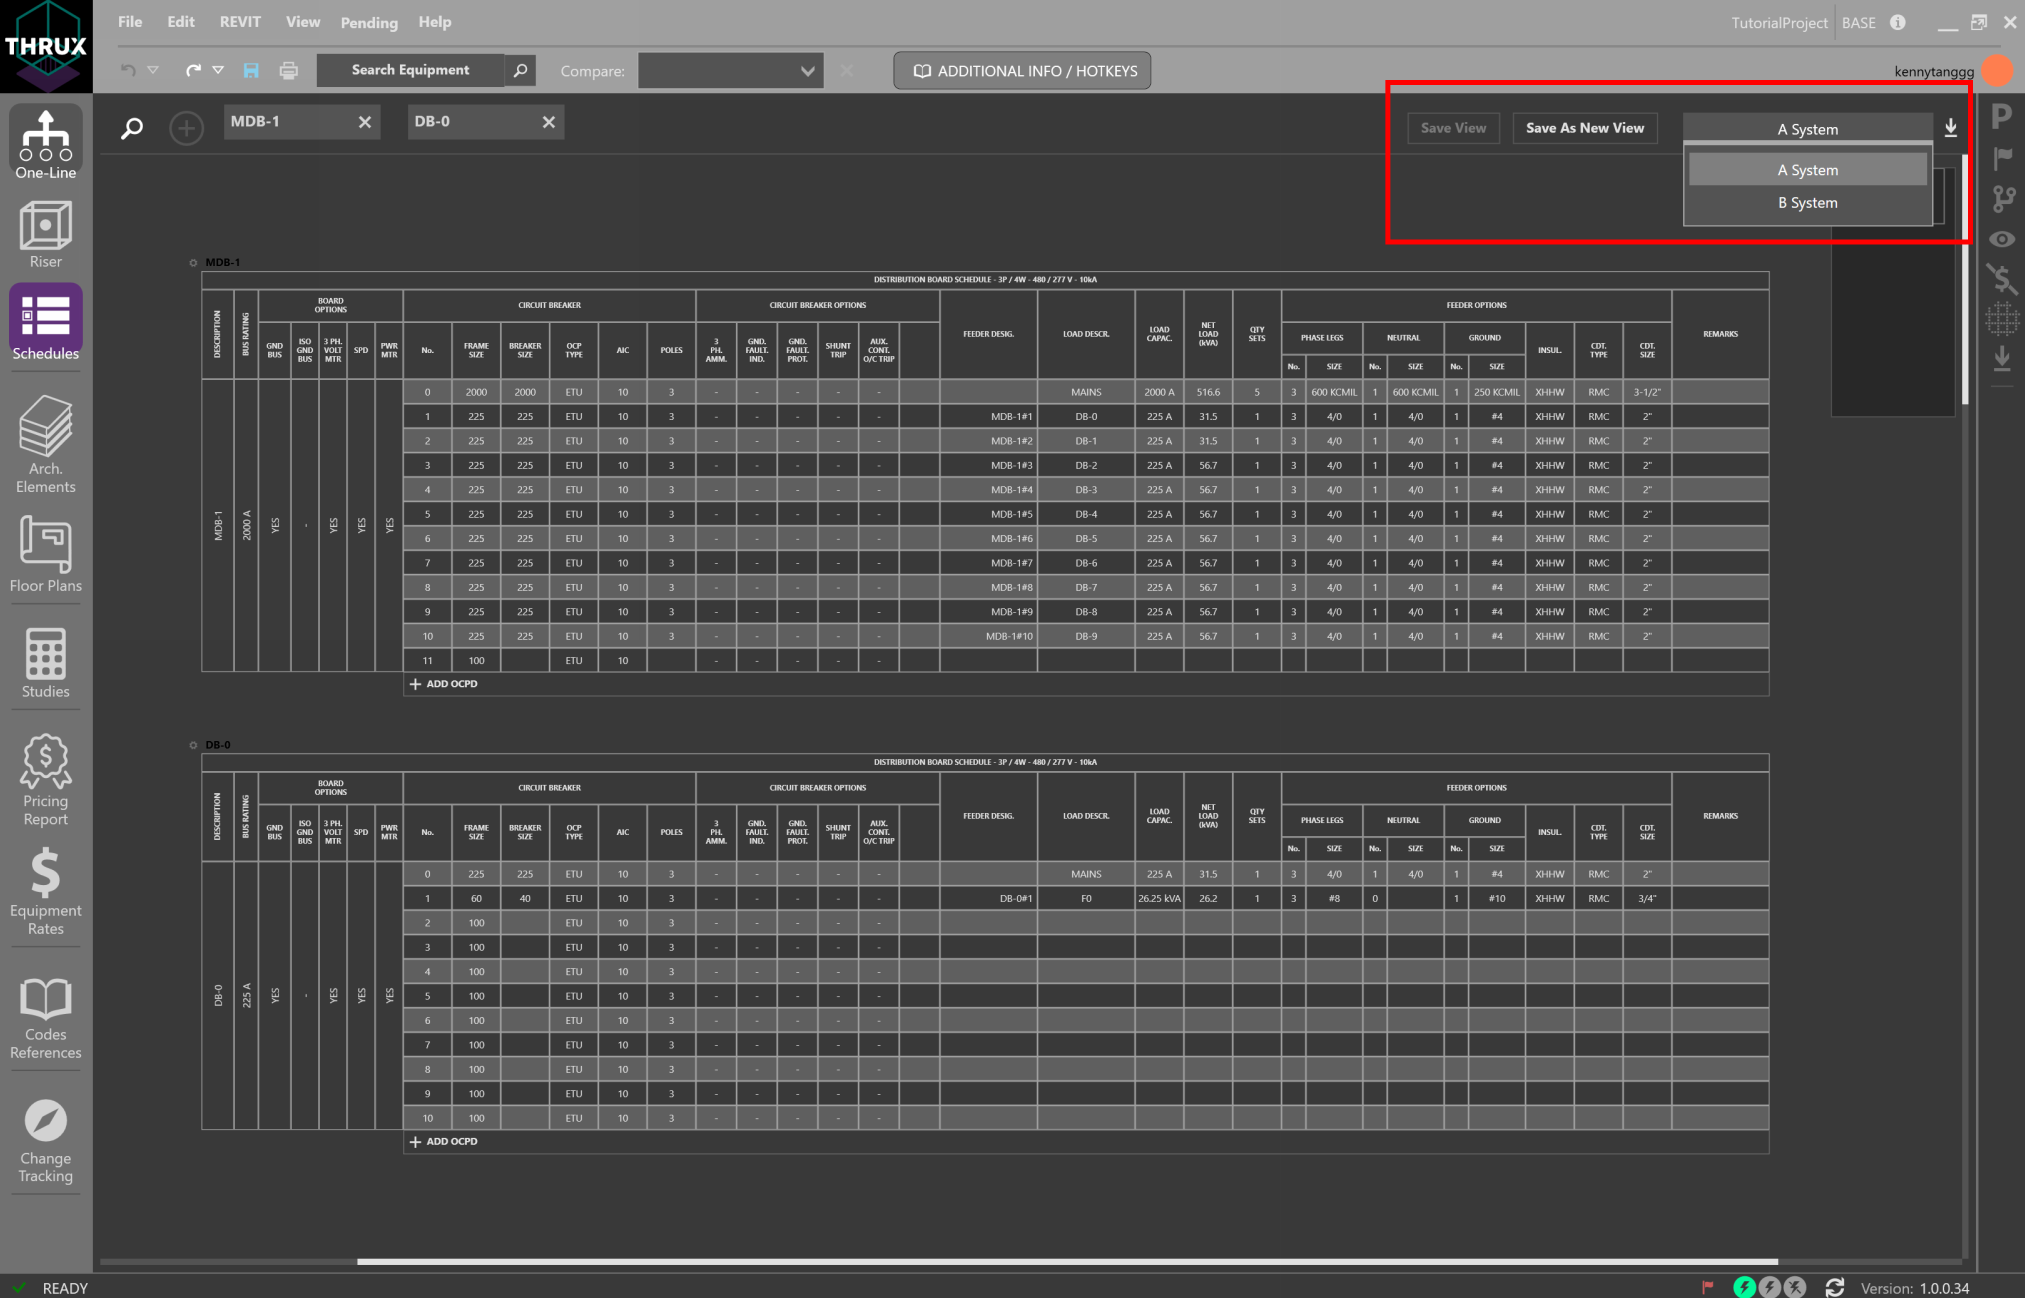
Groups of Schedules can be saved for a later viewing. Open all of the Schedules to be grouped, then click Save As New View, and enter a name. Return to this view at any time.
In this example, two Schedule Views have been created, and a designer can toggle between them.
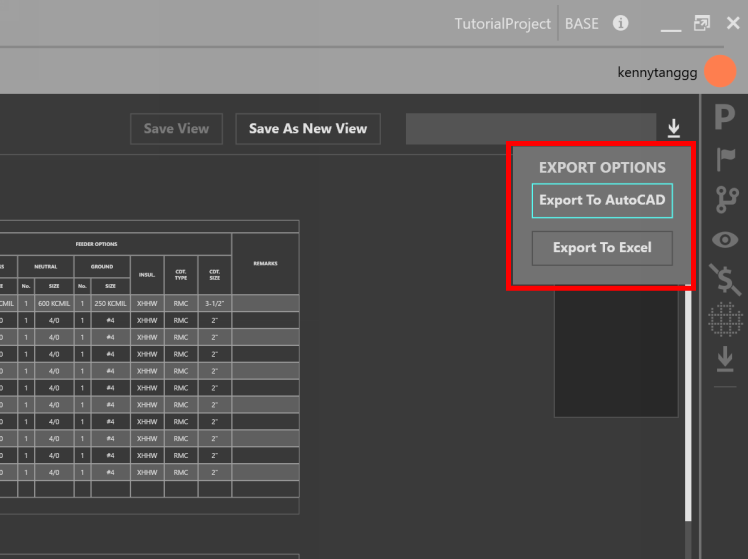
Exporting
To export the active Schedules, click Export (down arrow) button in the top right of the Workspace.
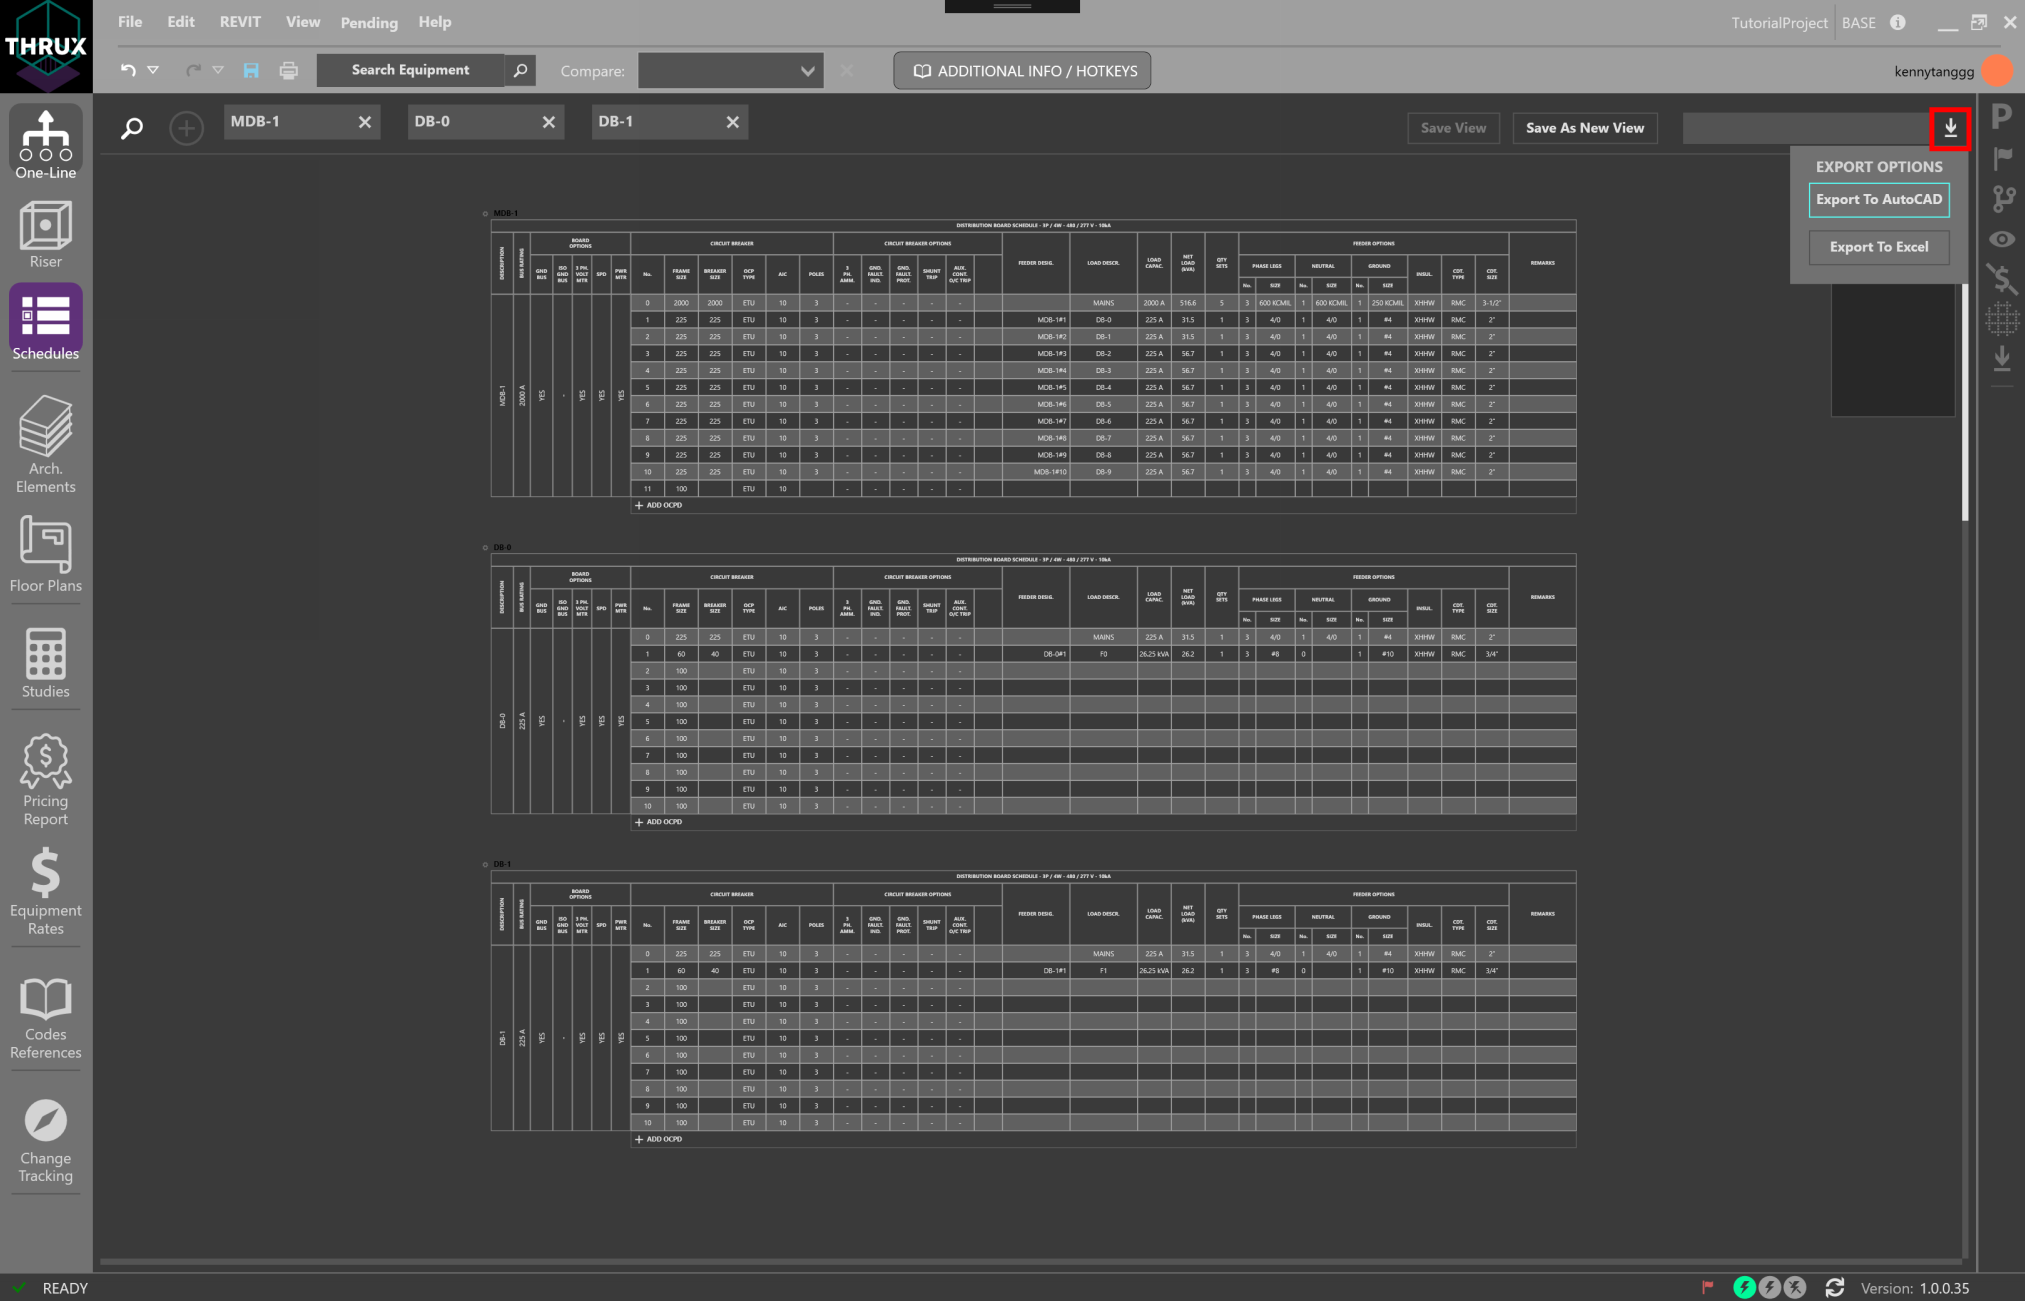
Then choose Export to AutoCAD or Export to Excel to export to .dwg or .csv.