Riser
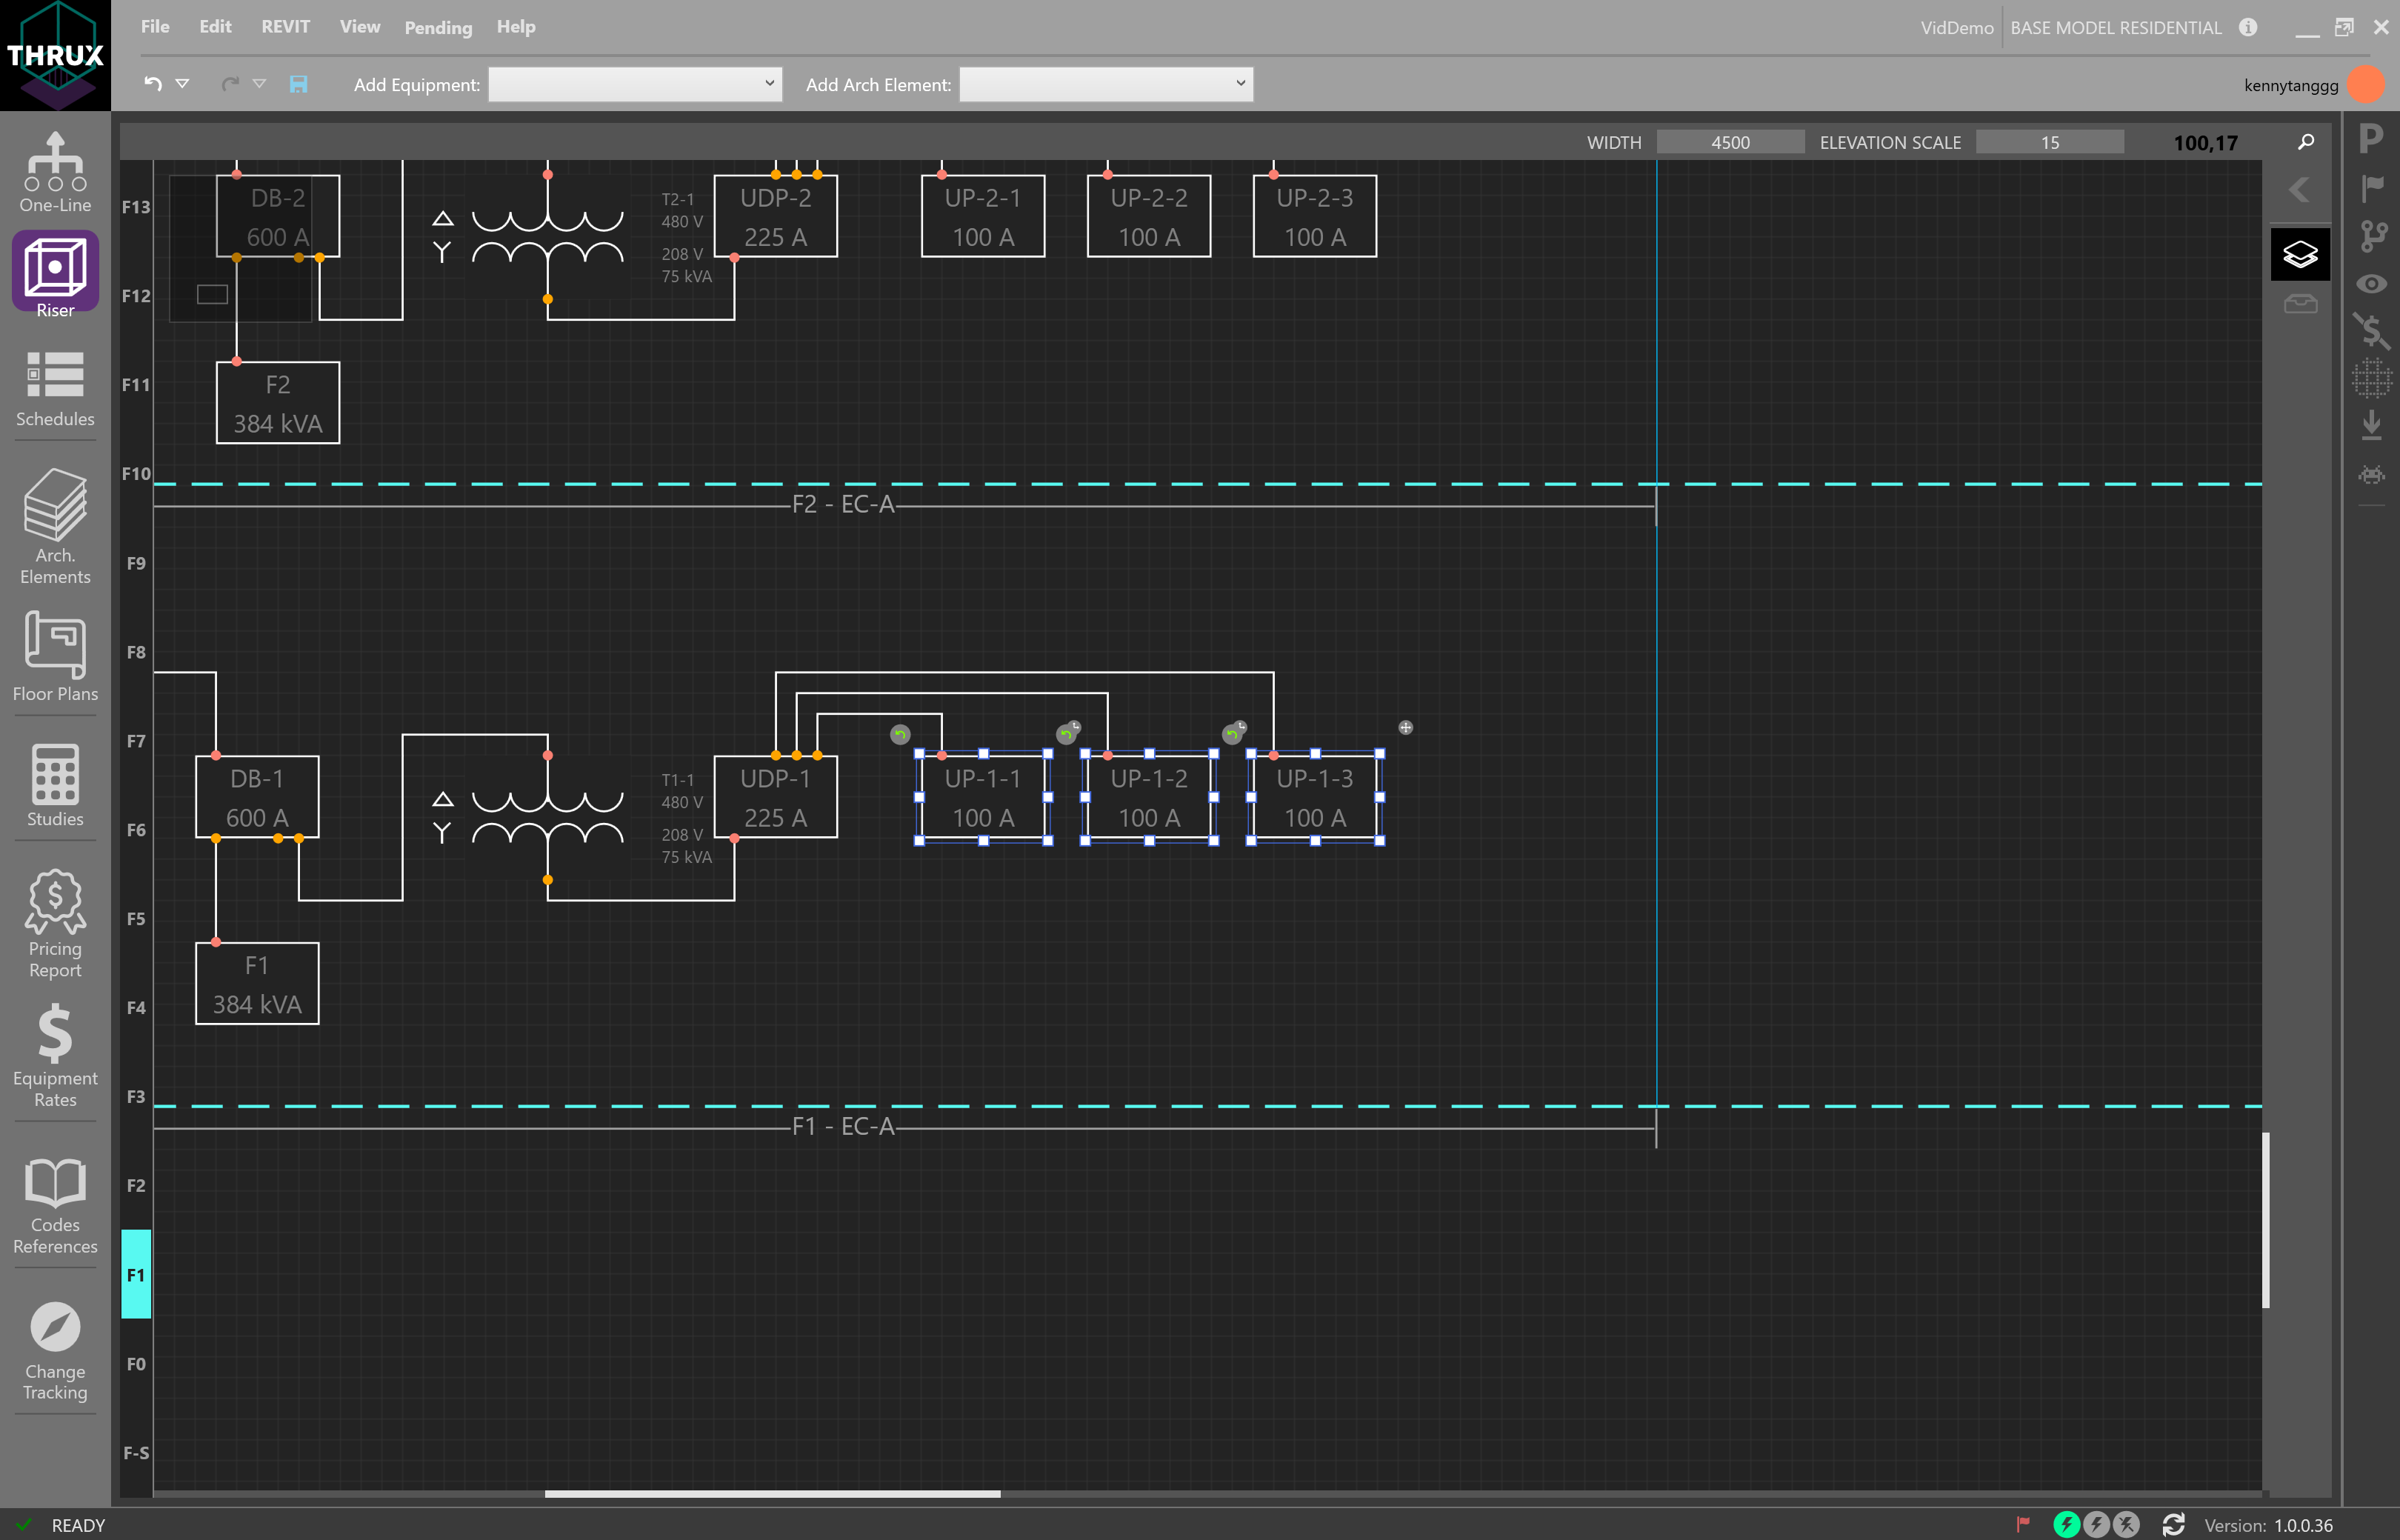
The Riser Workspace is an elevational representation of the distribution system. It is used to depict wiring routes as they disperse through a vertically scaling project.
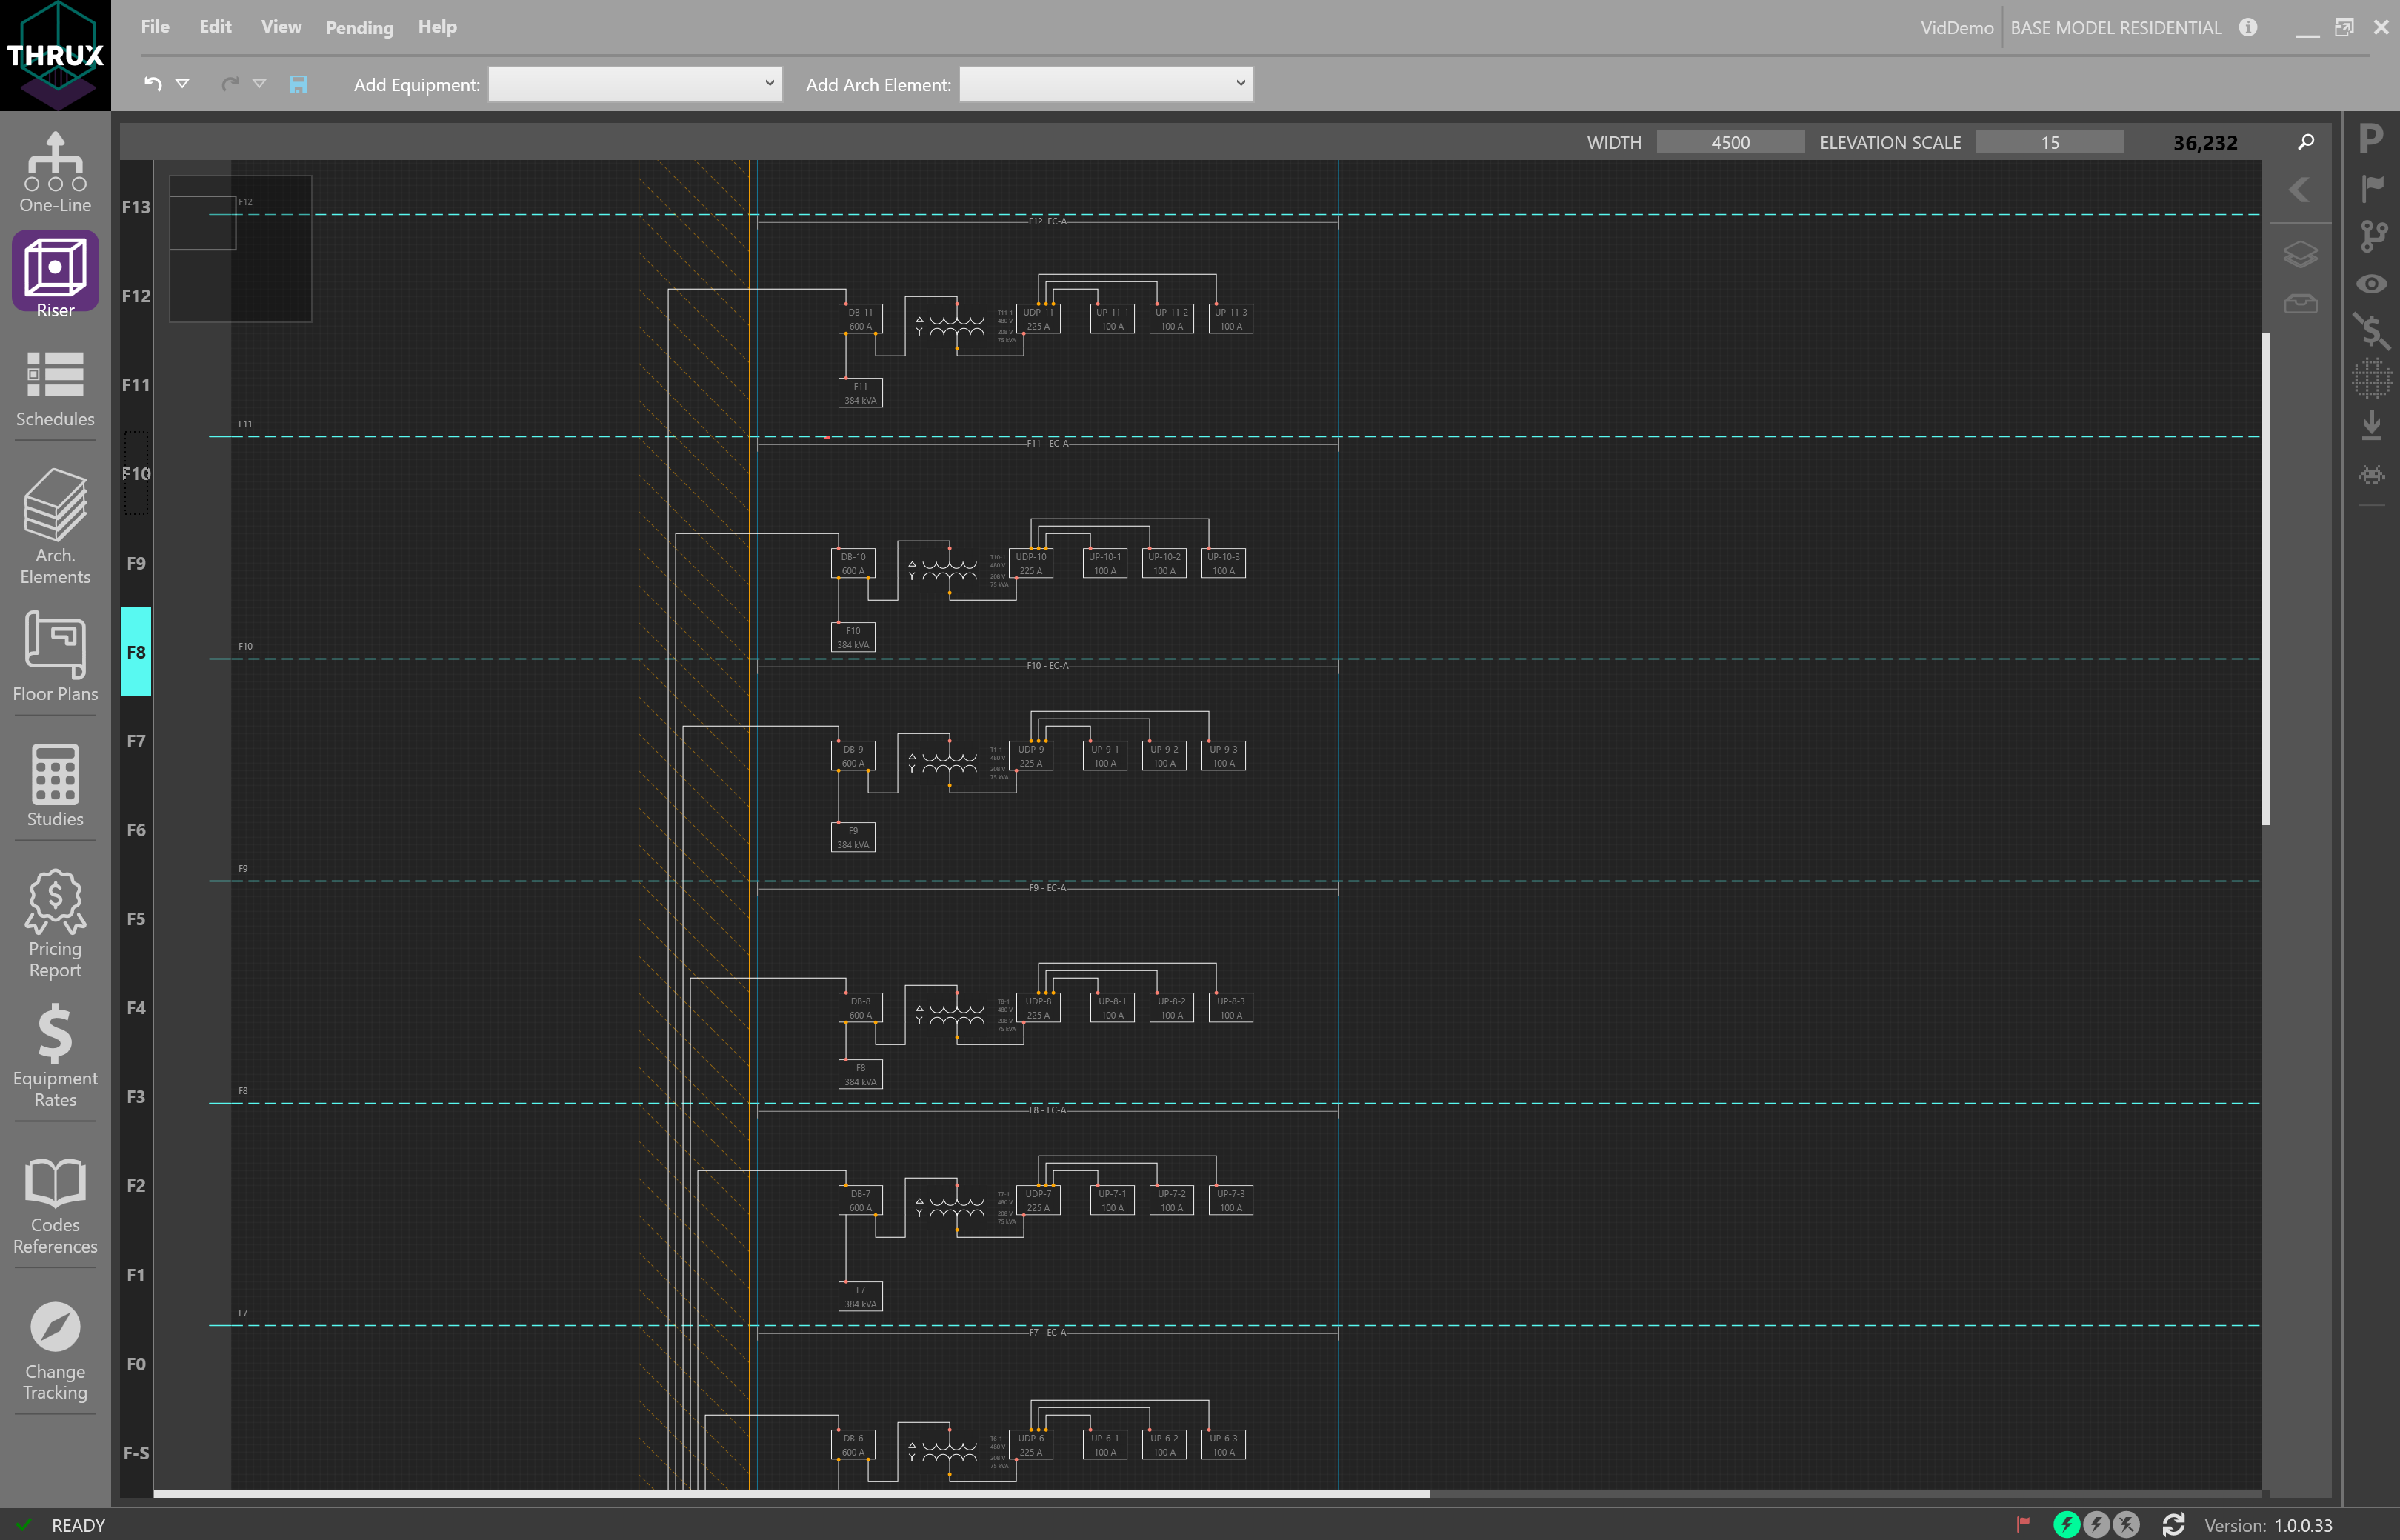
Example Riser Diagram
Note that the interactions between the Riser, One-Line, and Schedules are similar.
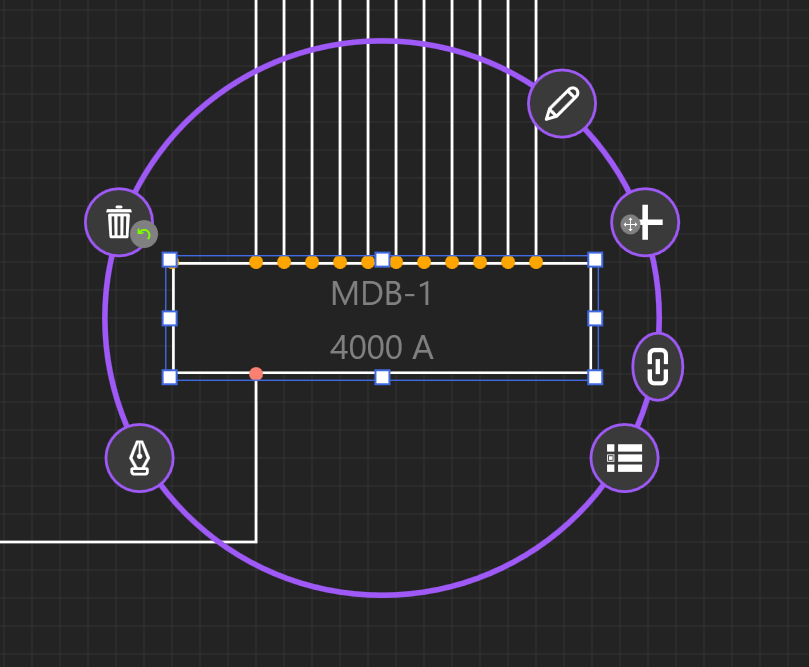
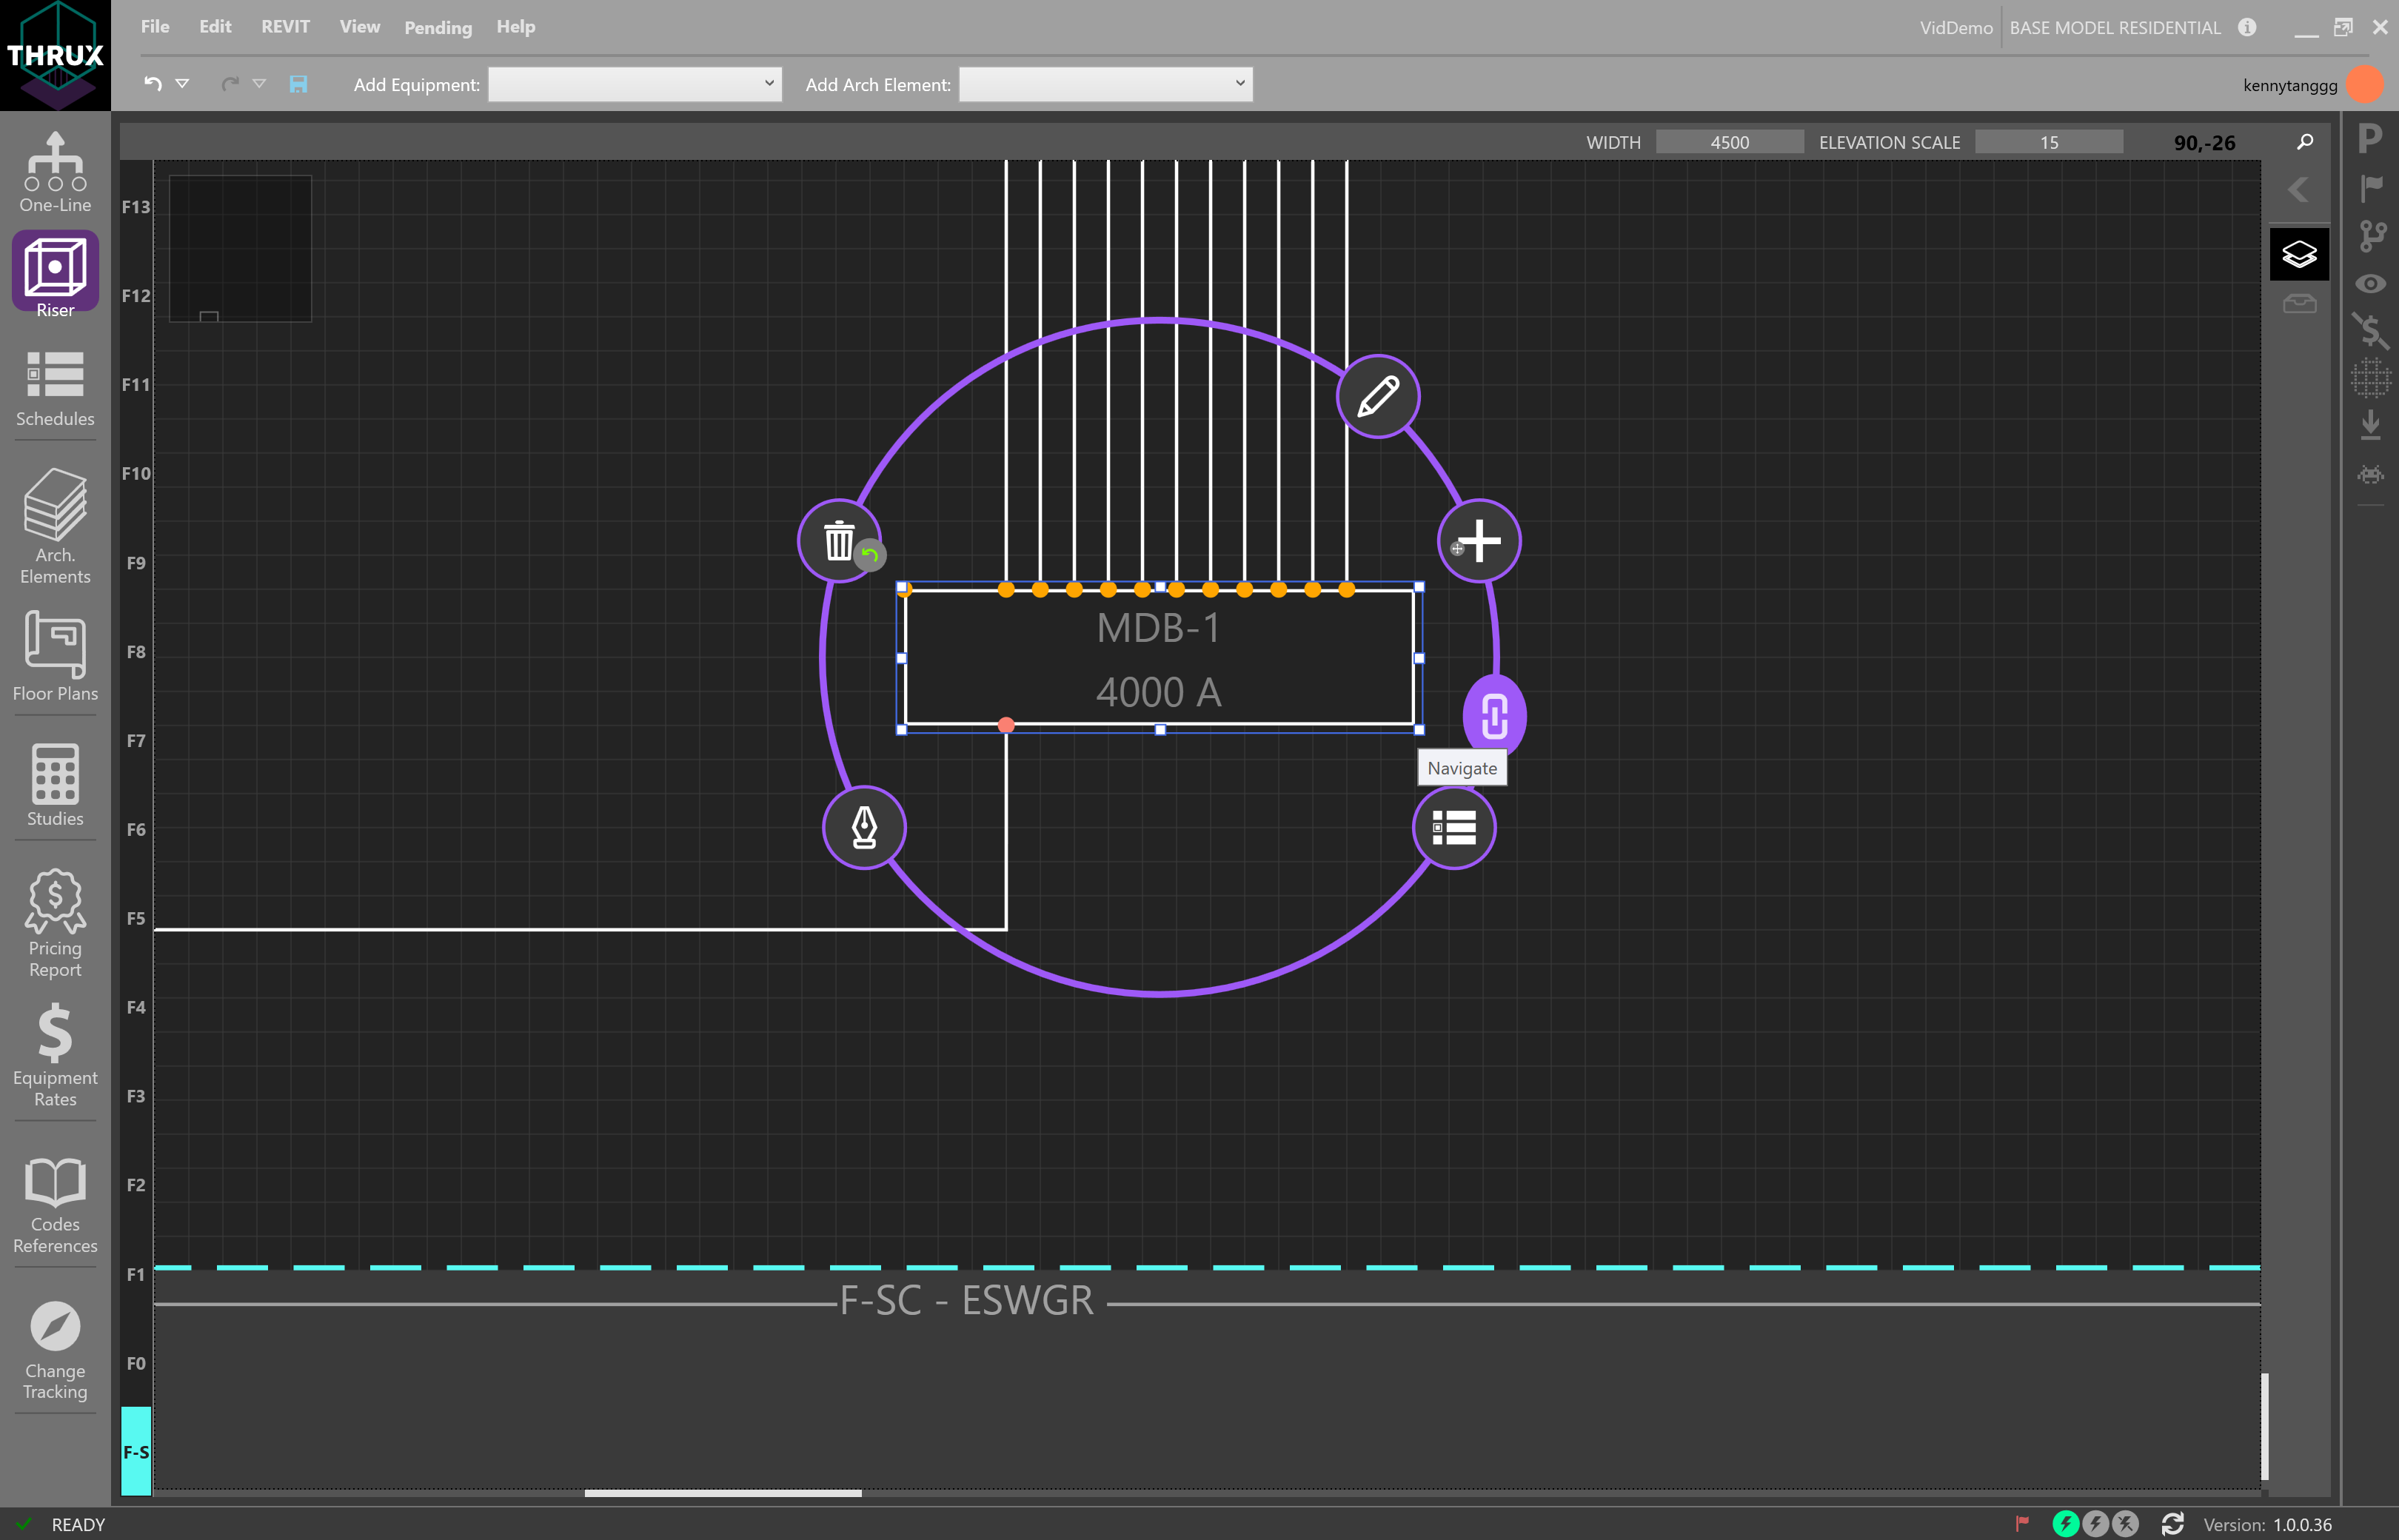
Selection Dial
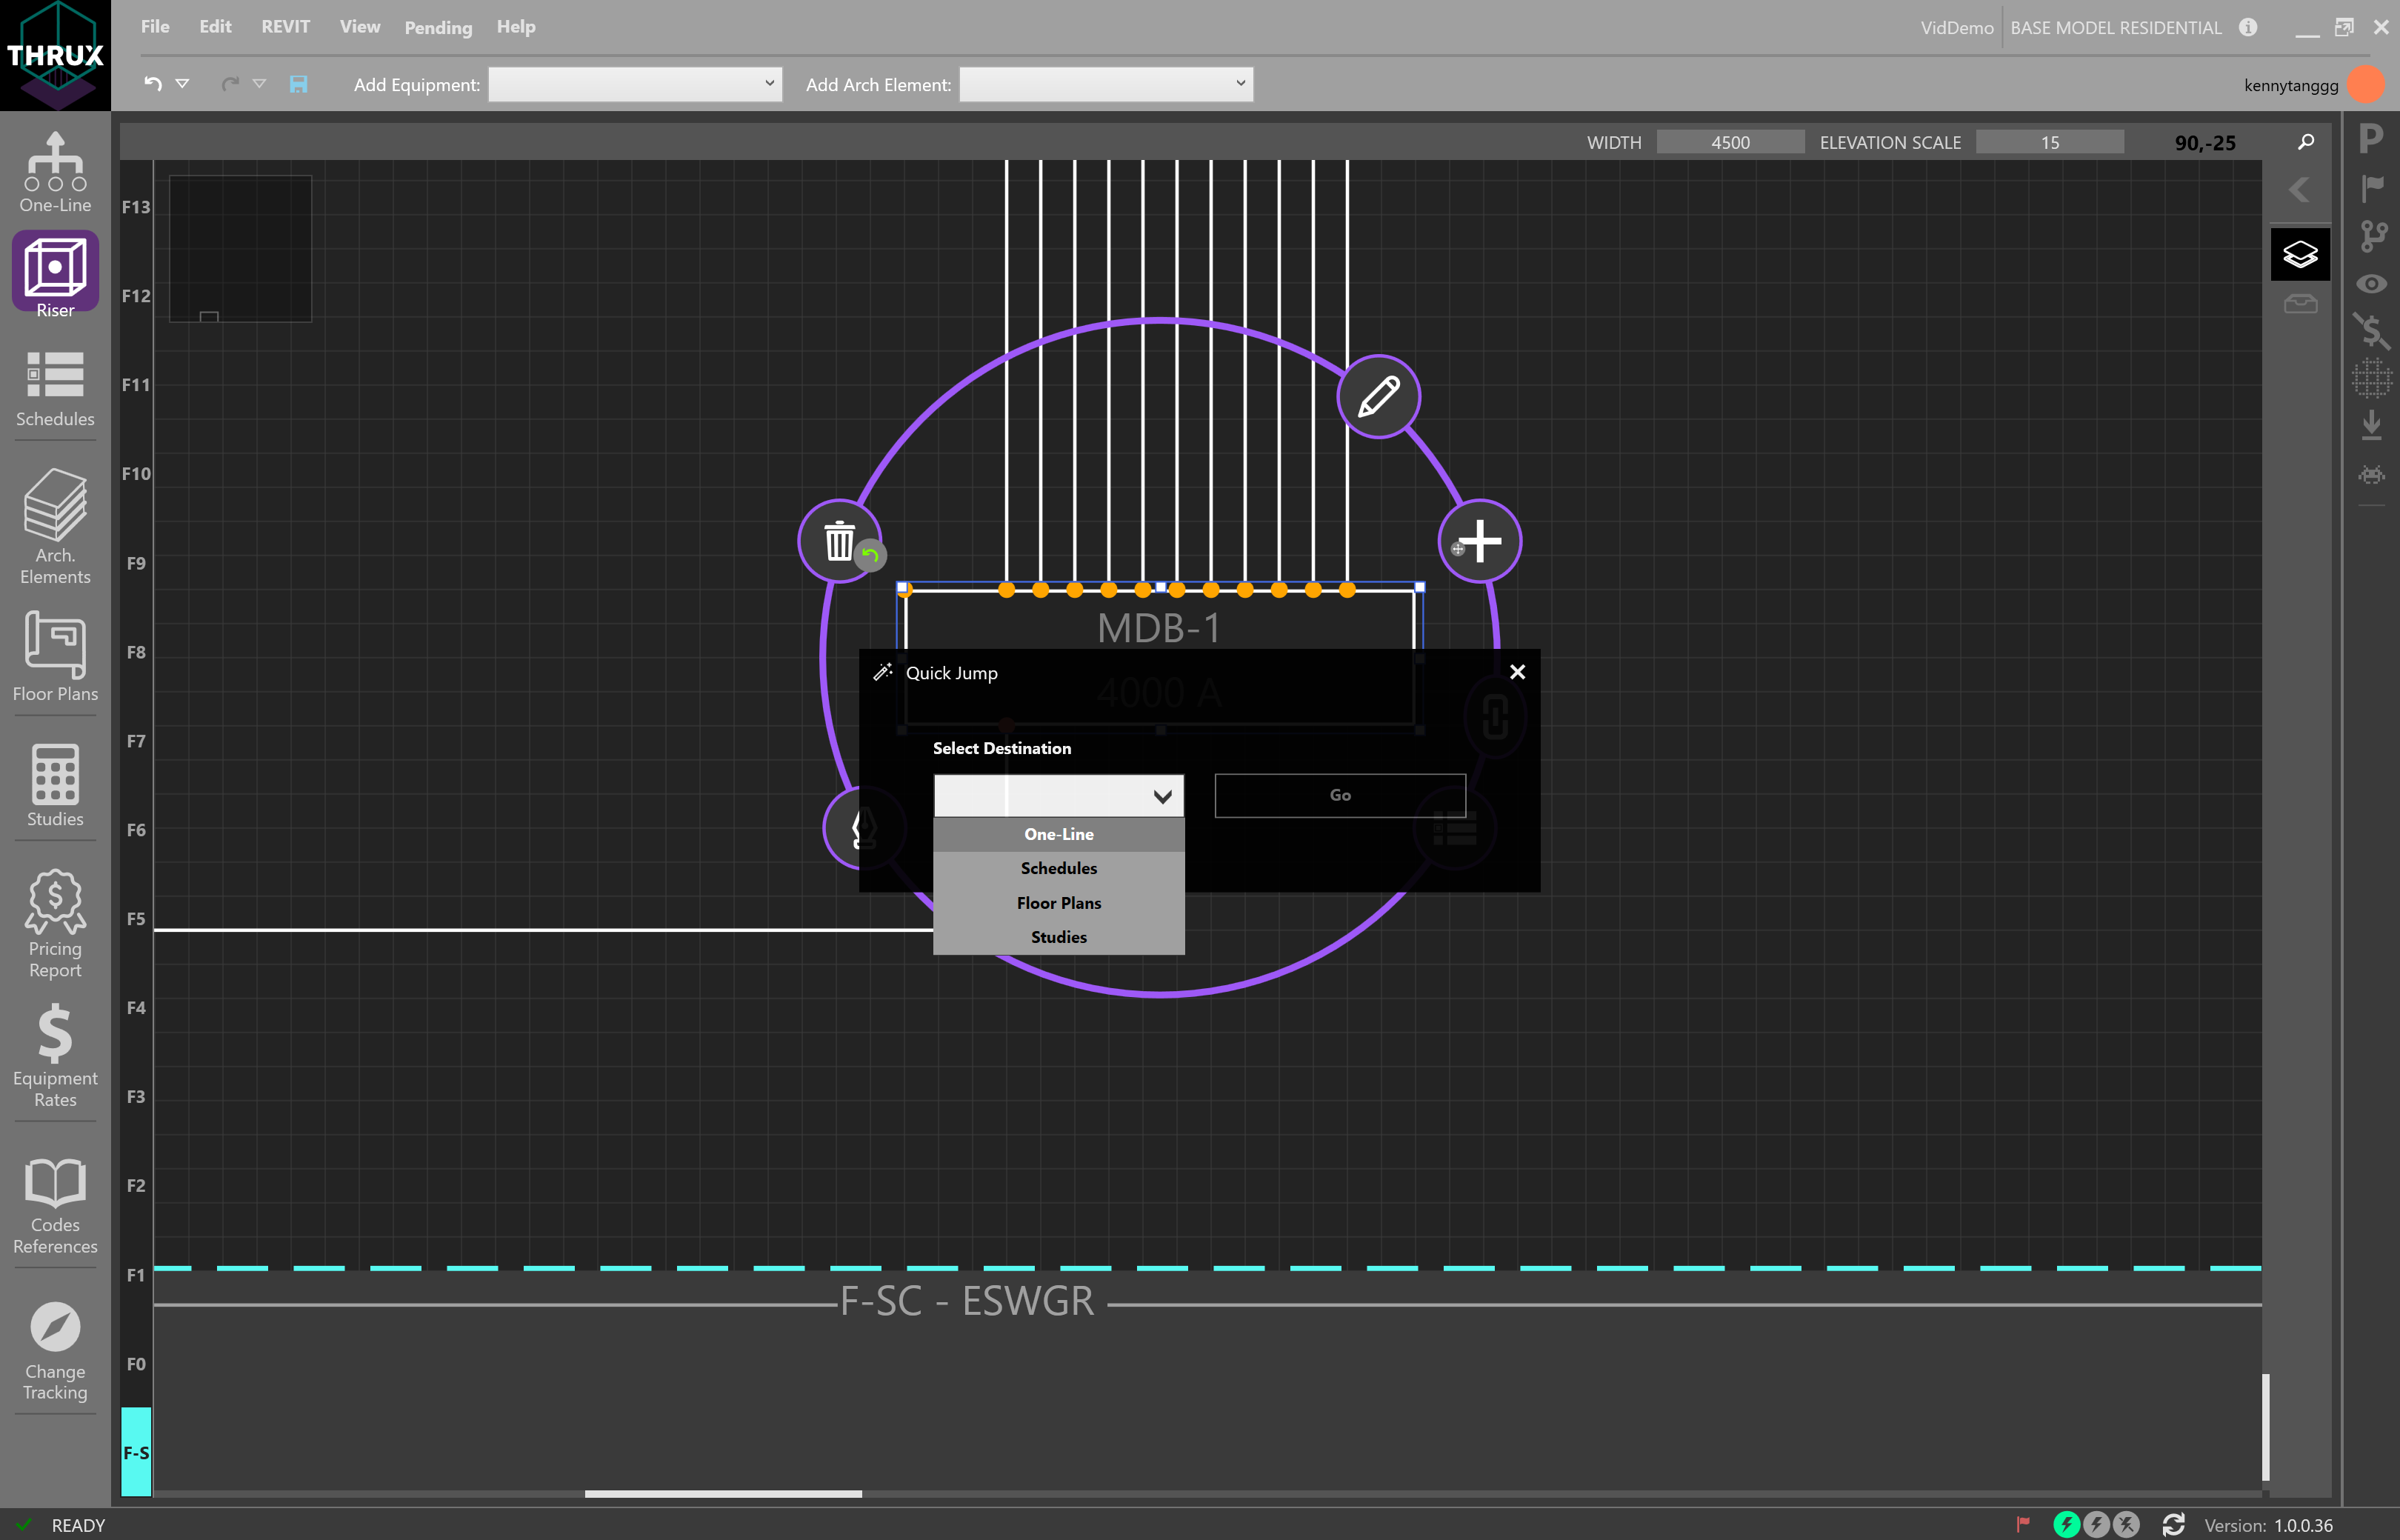
Navigation Overview
Floor Navigator
On the left, is a Floor navigator. It will track and navigate to the selected Floor, highlighted in cyan.
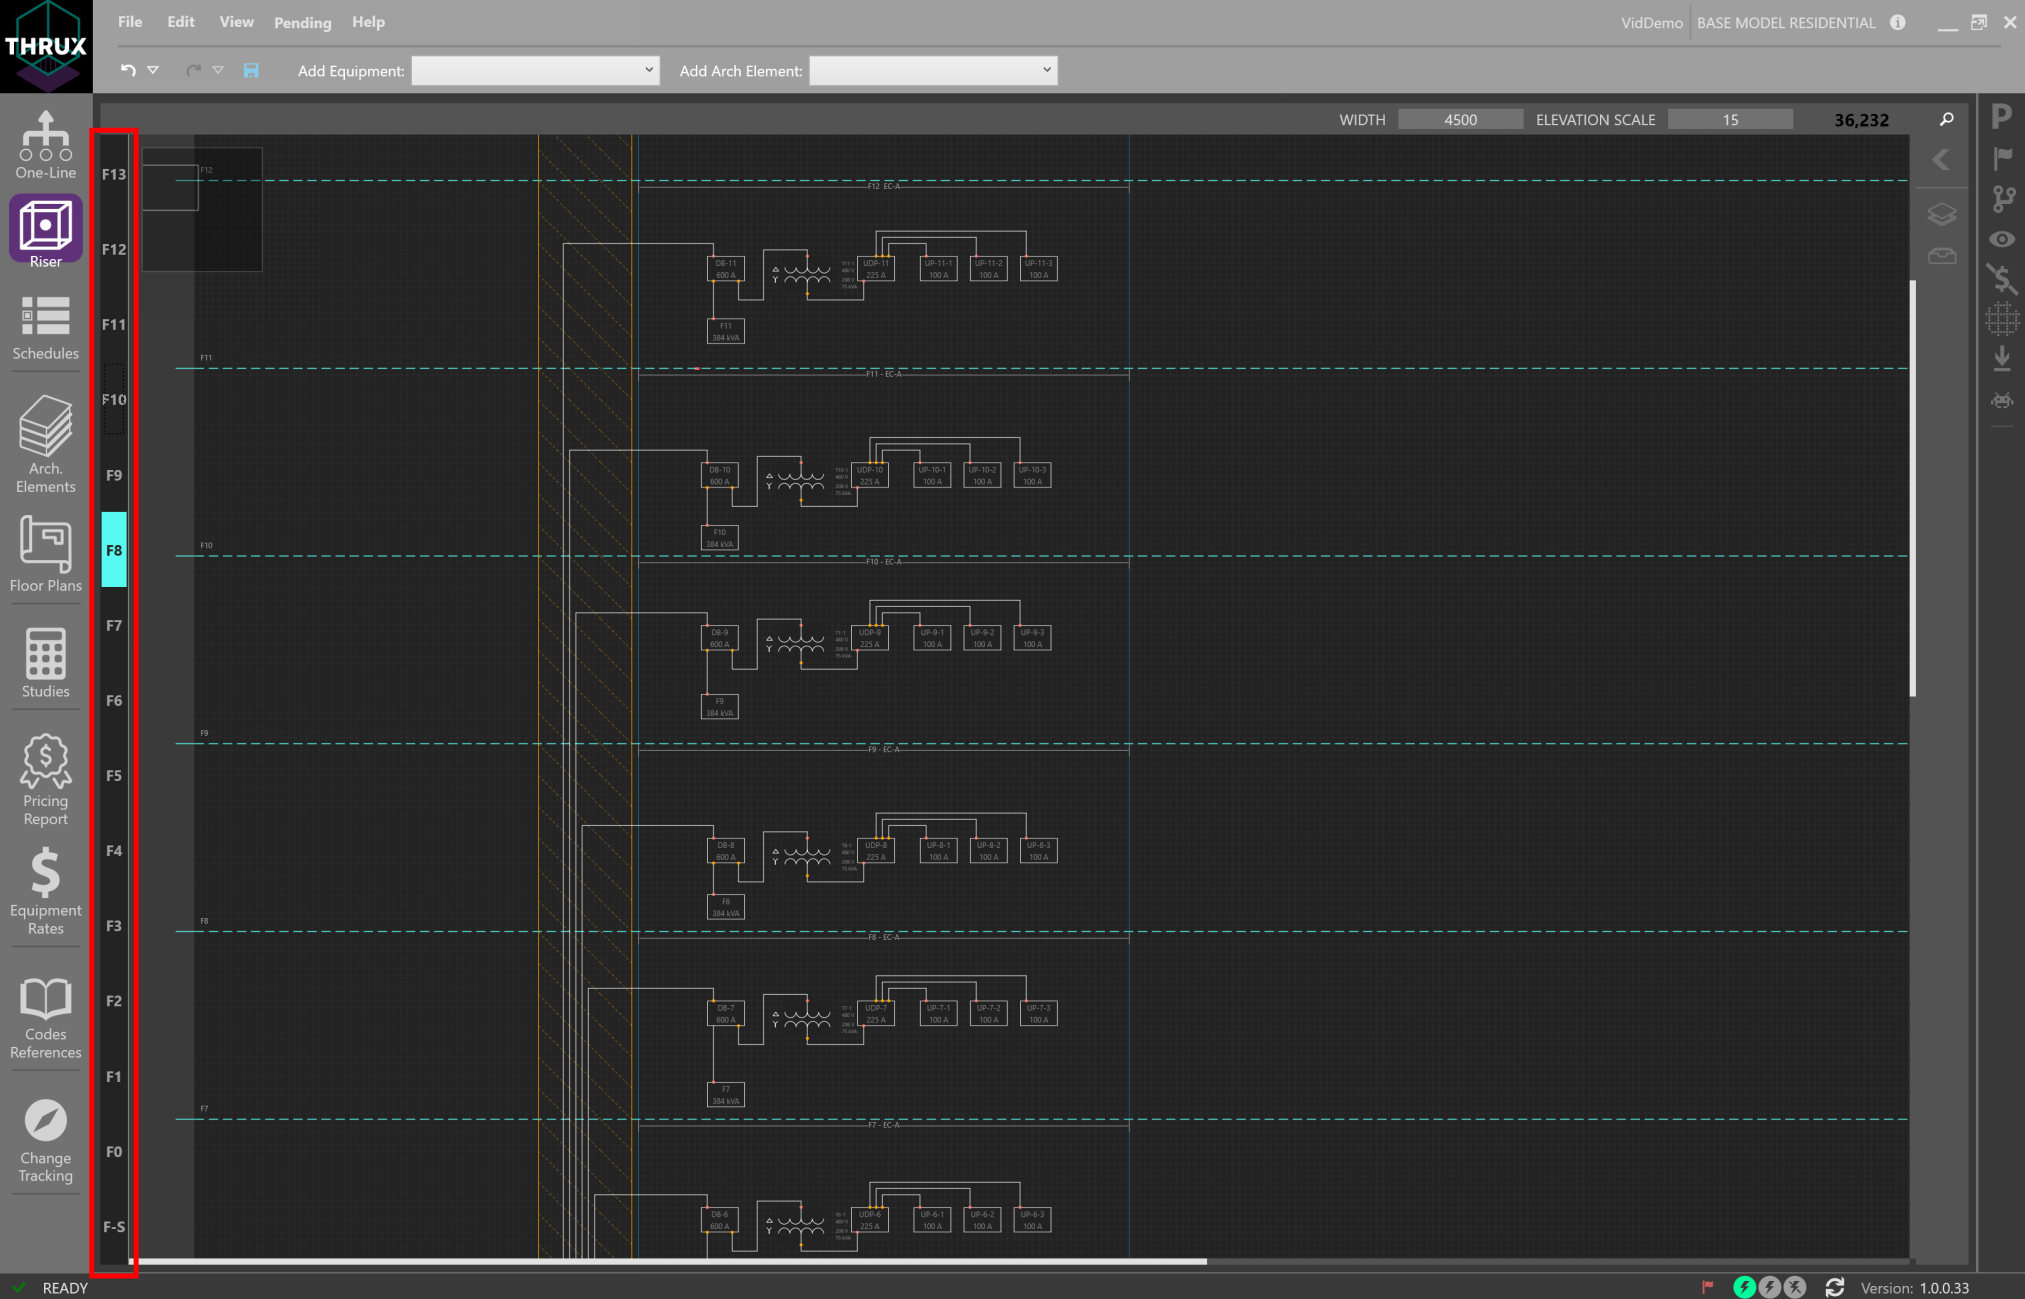
Cycle through Floors using the Floor Navigator
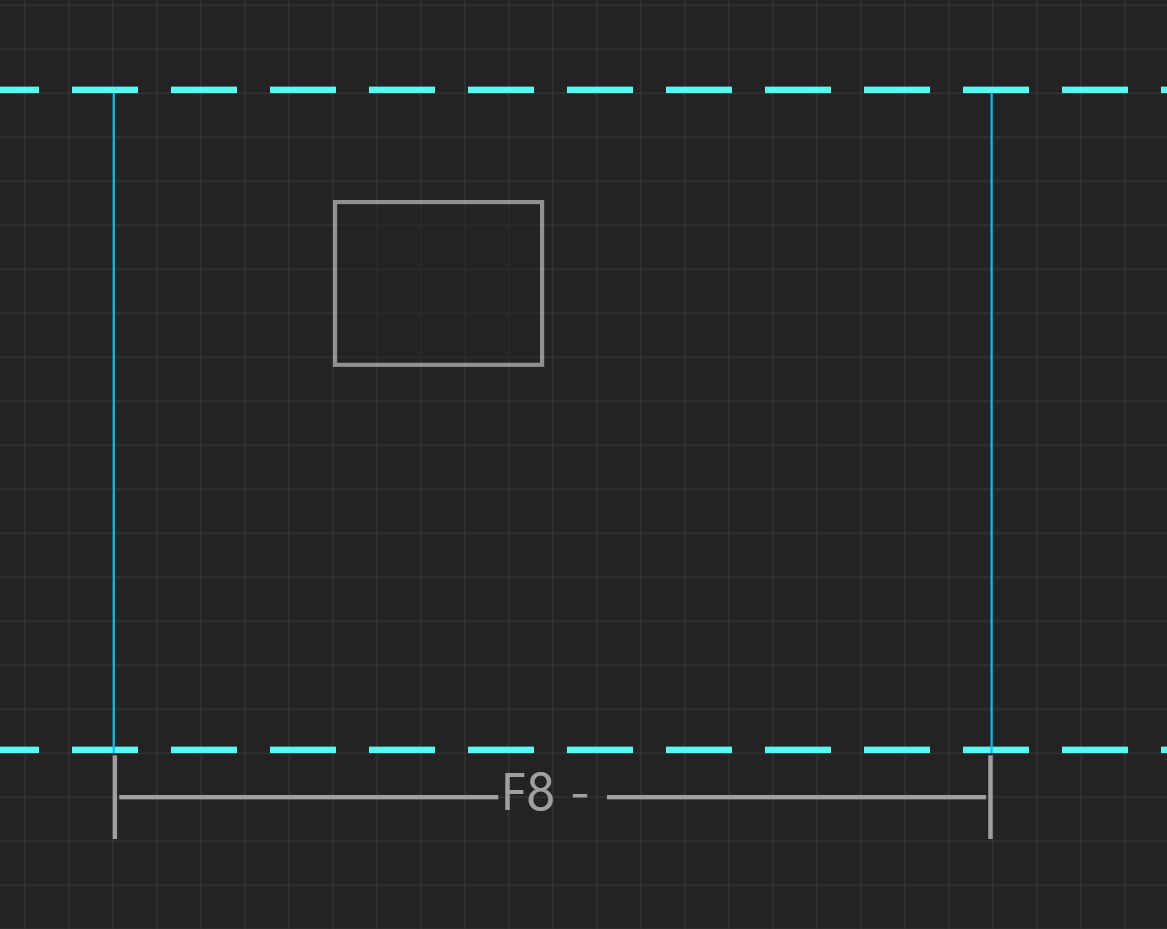
Floors are denoted by the dashed cyan regions, while Rooms are denoted by the solid cyan regions.
Floors vs. Rooms
Riser Toolbox
On the right is the Riser Toolbox, which allows you to search for Equipment, control layers of the circuits between Equipment, and view Unhosted Equipment.
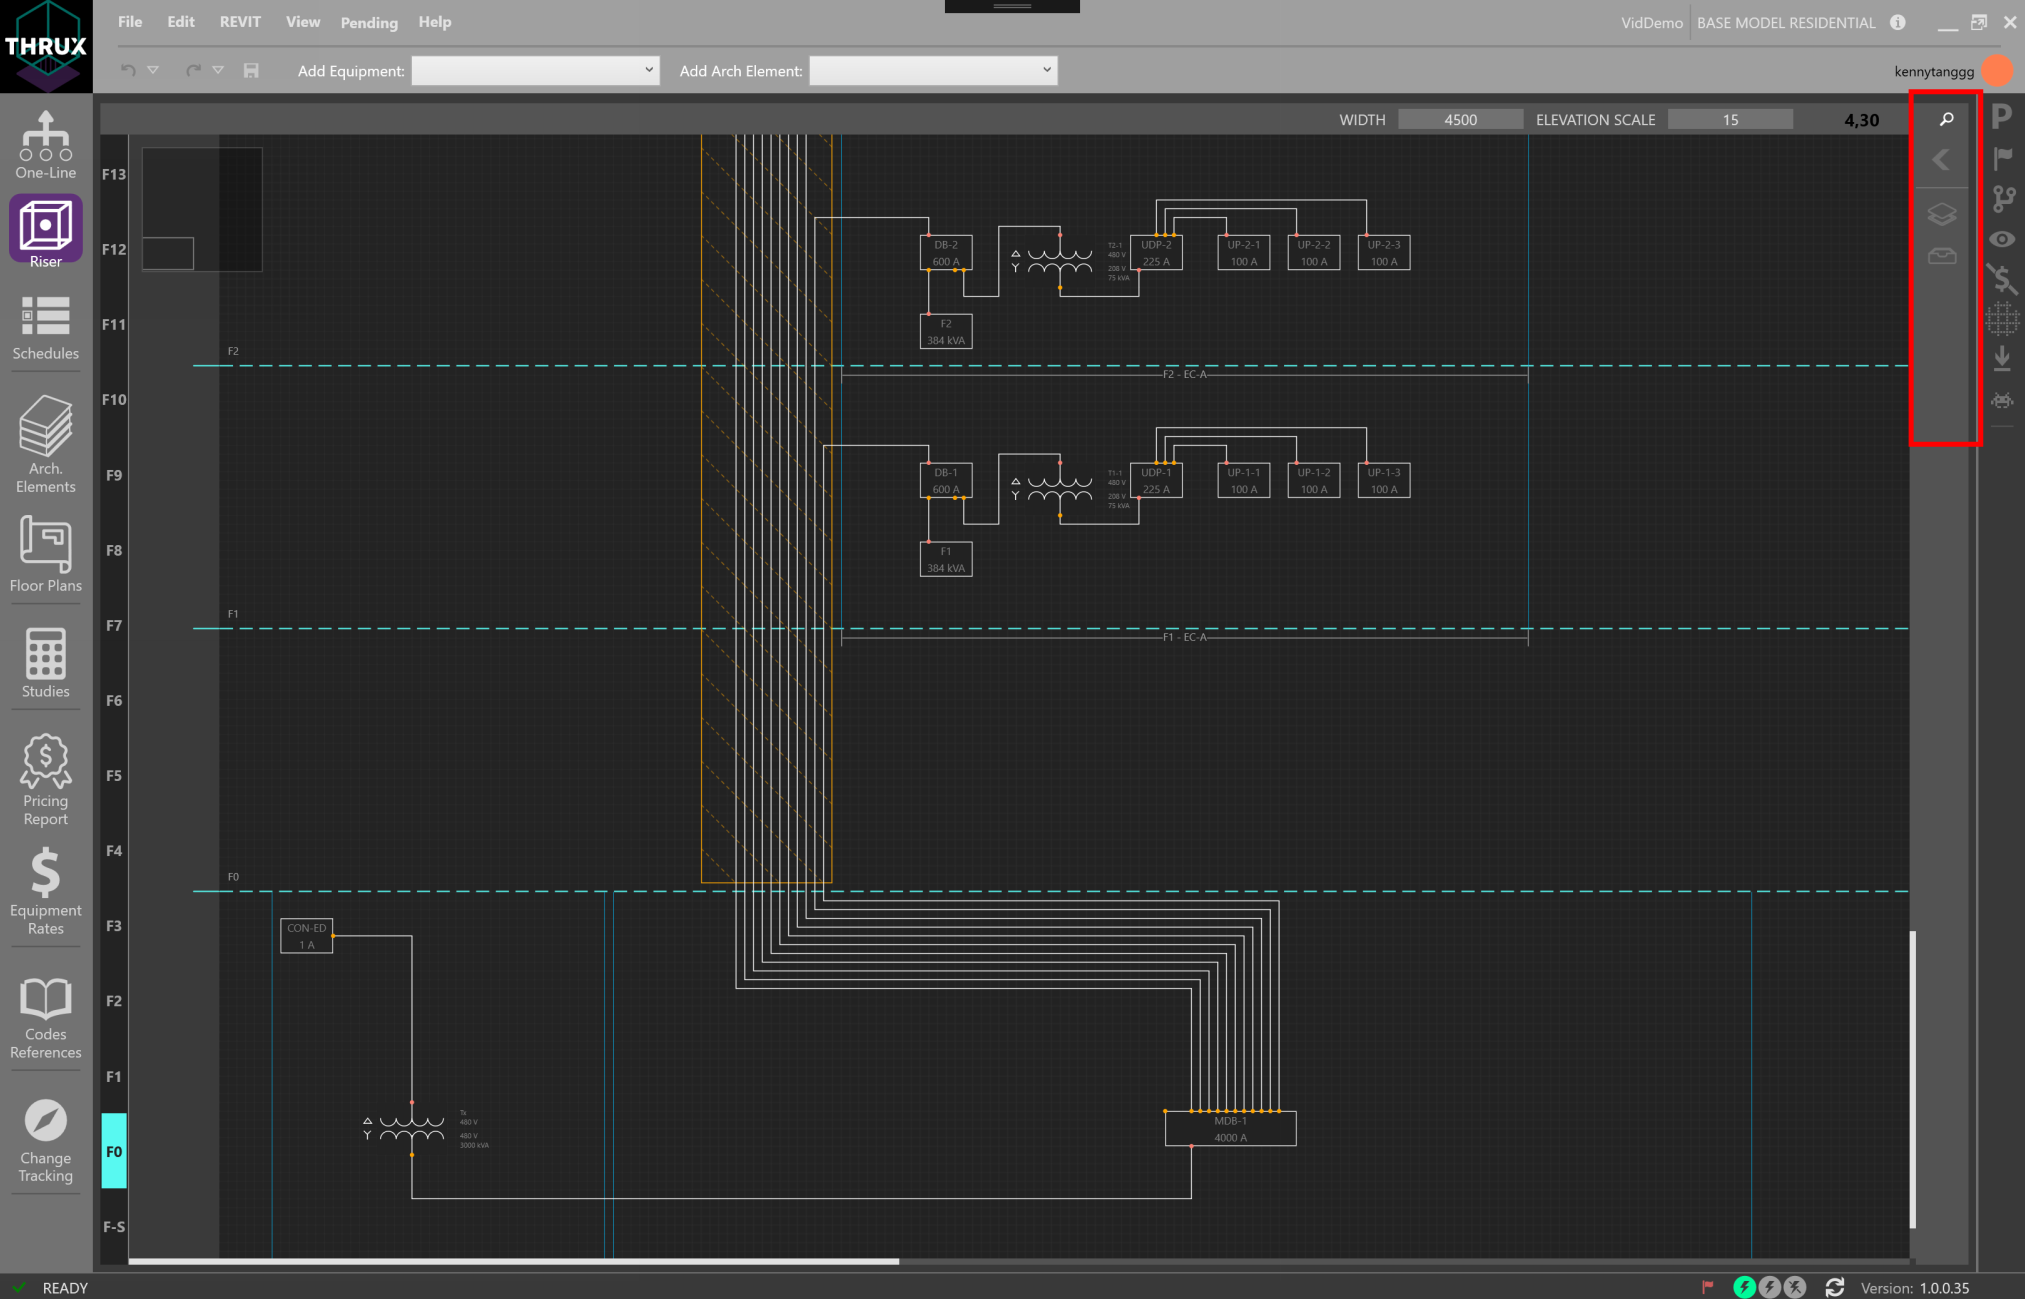
Riser Toolbox
Click on the Filters button (layers icon) to open the Layers filter.
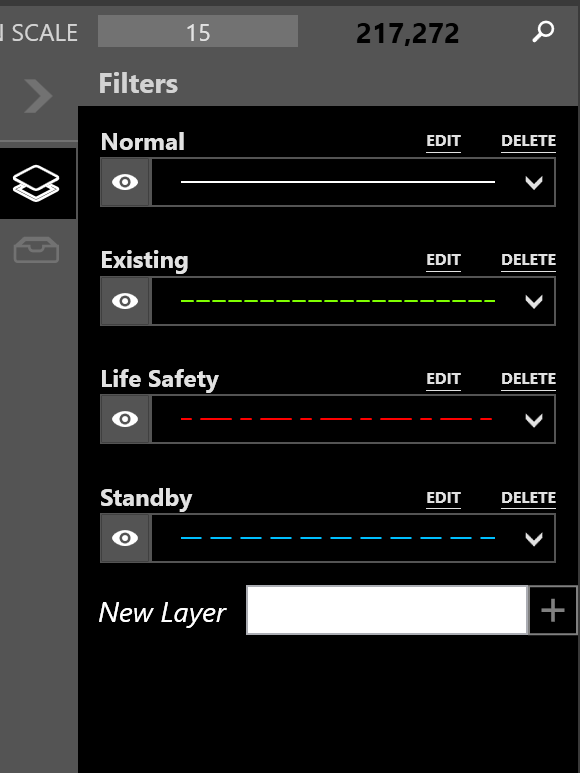
Filters allow greater flexibility with visibility
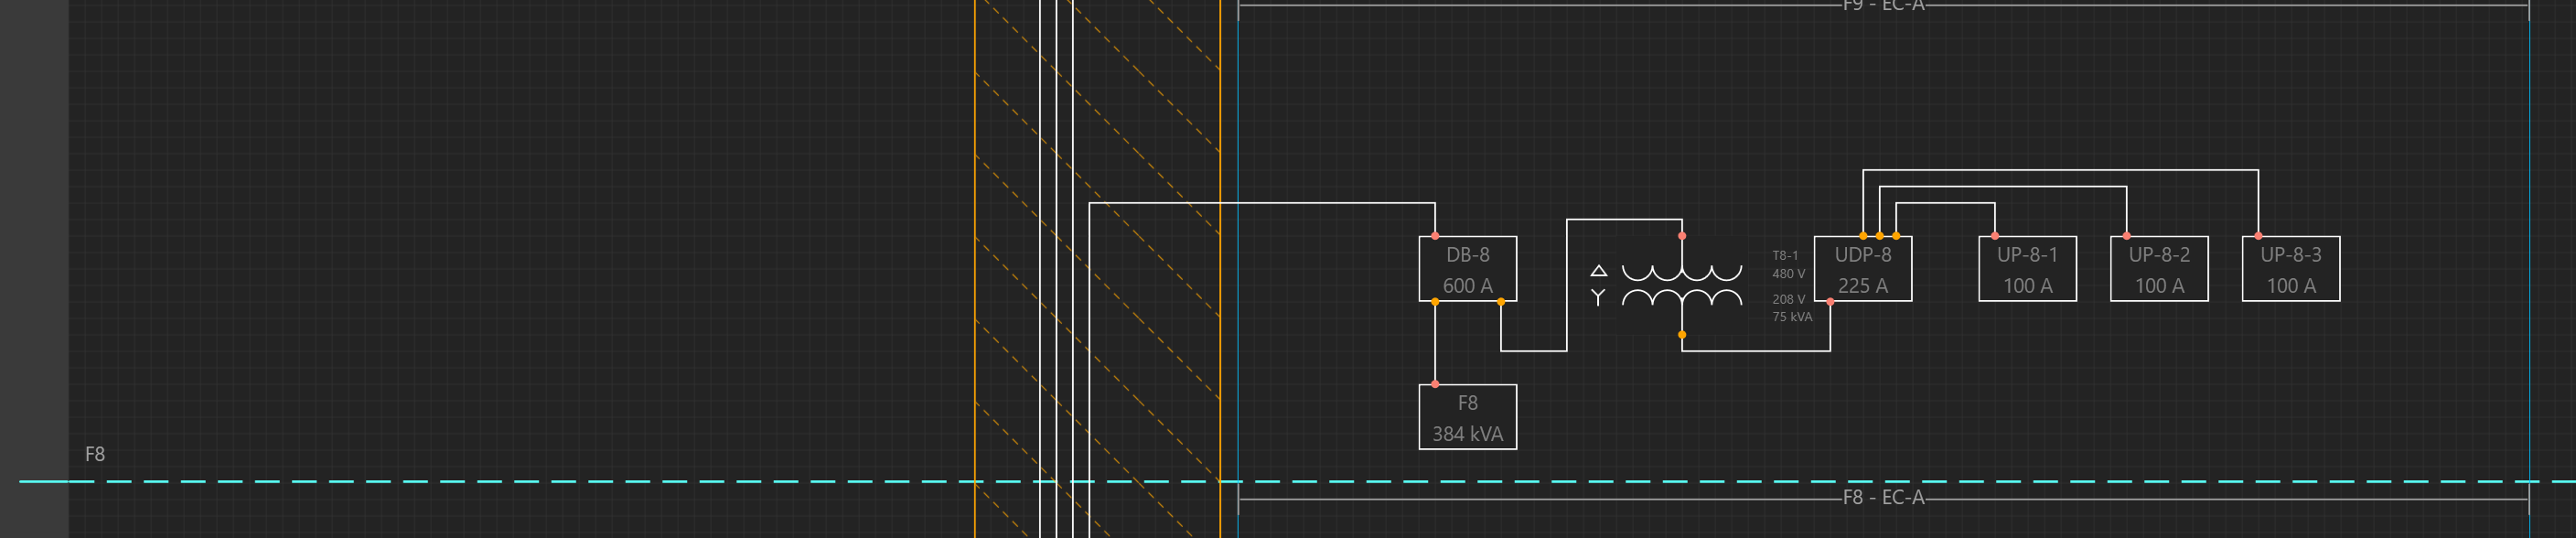
Right-click on a connection to change the layer of an Equipment and note the display.
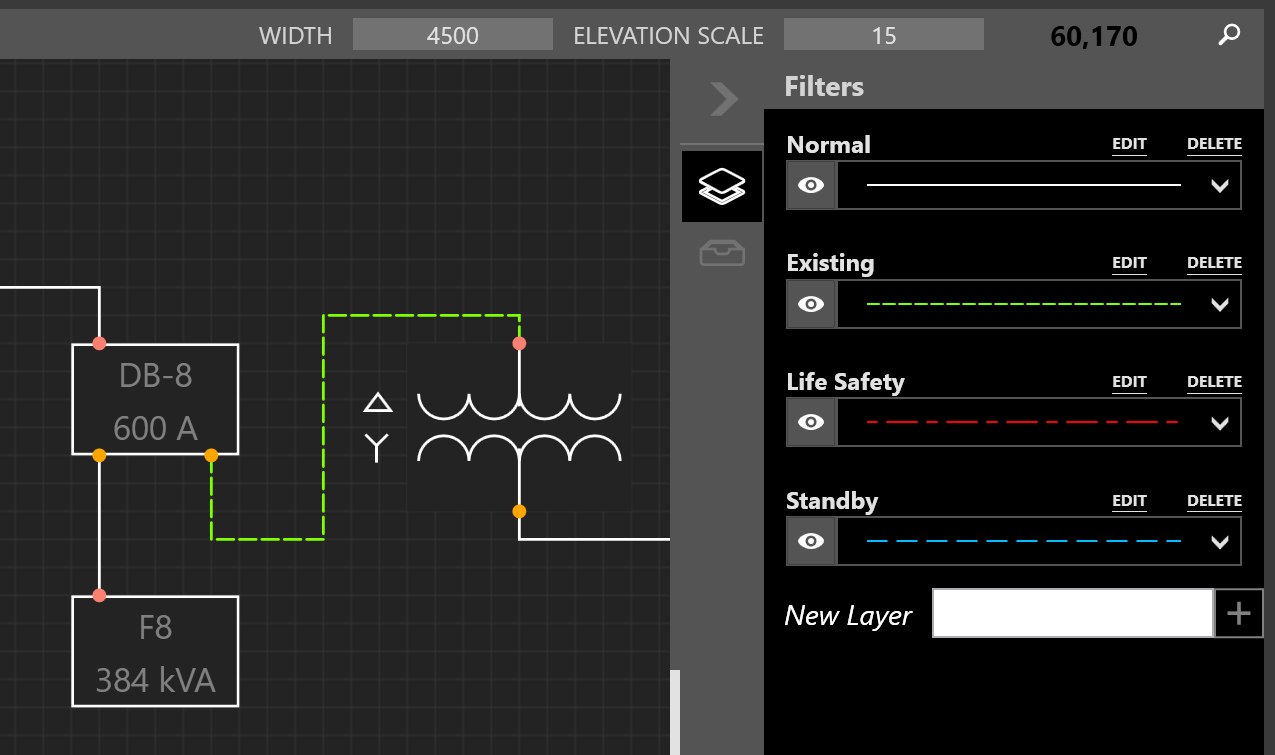
Identifying a circuit as existing
Orphaned Elements are pieces of Equipment which do not have a Room. Drag these Equipment into Room regions to place the Equipment on the Riser.
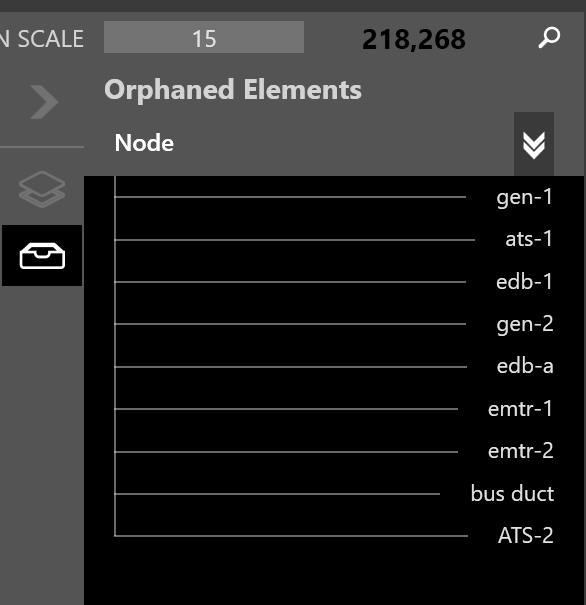
Orphaned Elements
Add Architectural Elements
To add Floors, Rooms, Architectural Elements, or electrical Equipment, use the toolbox at the top.
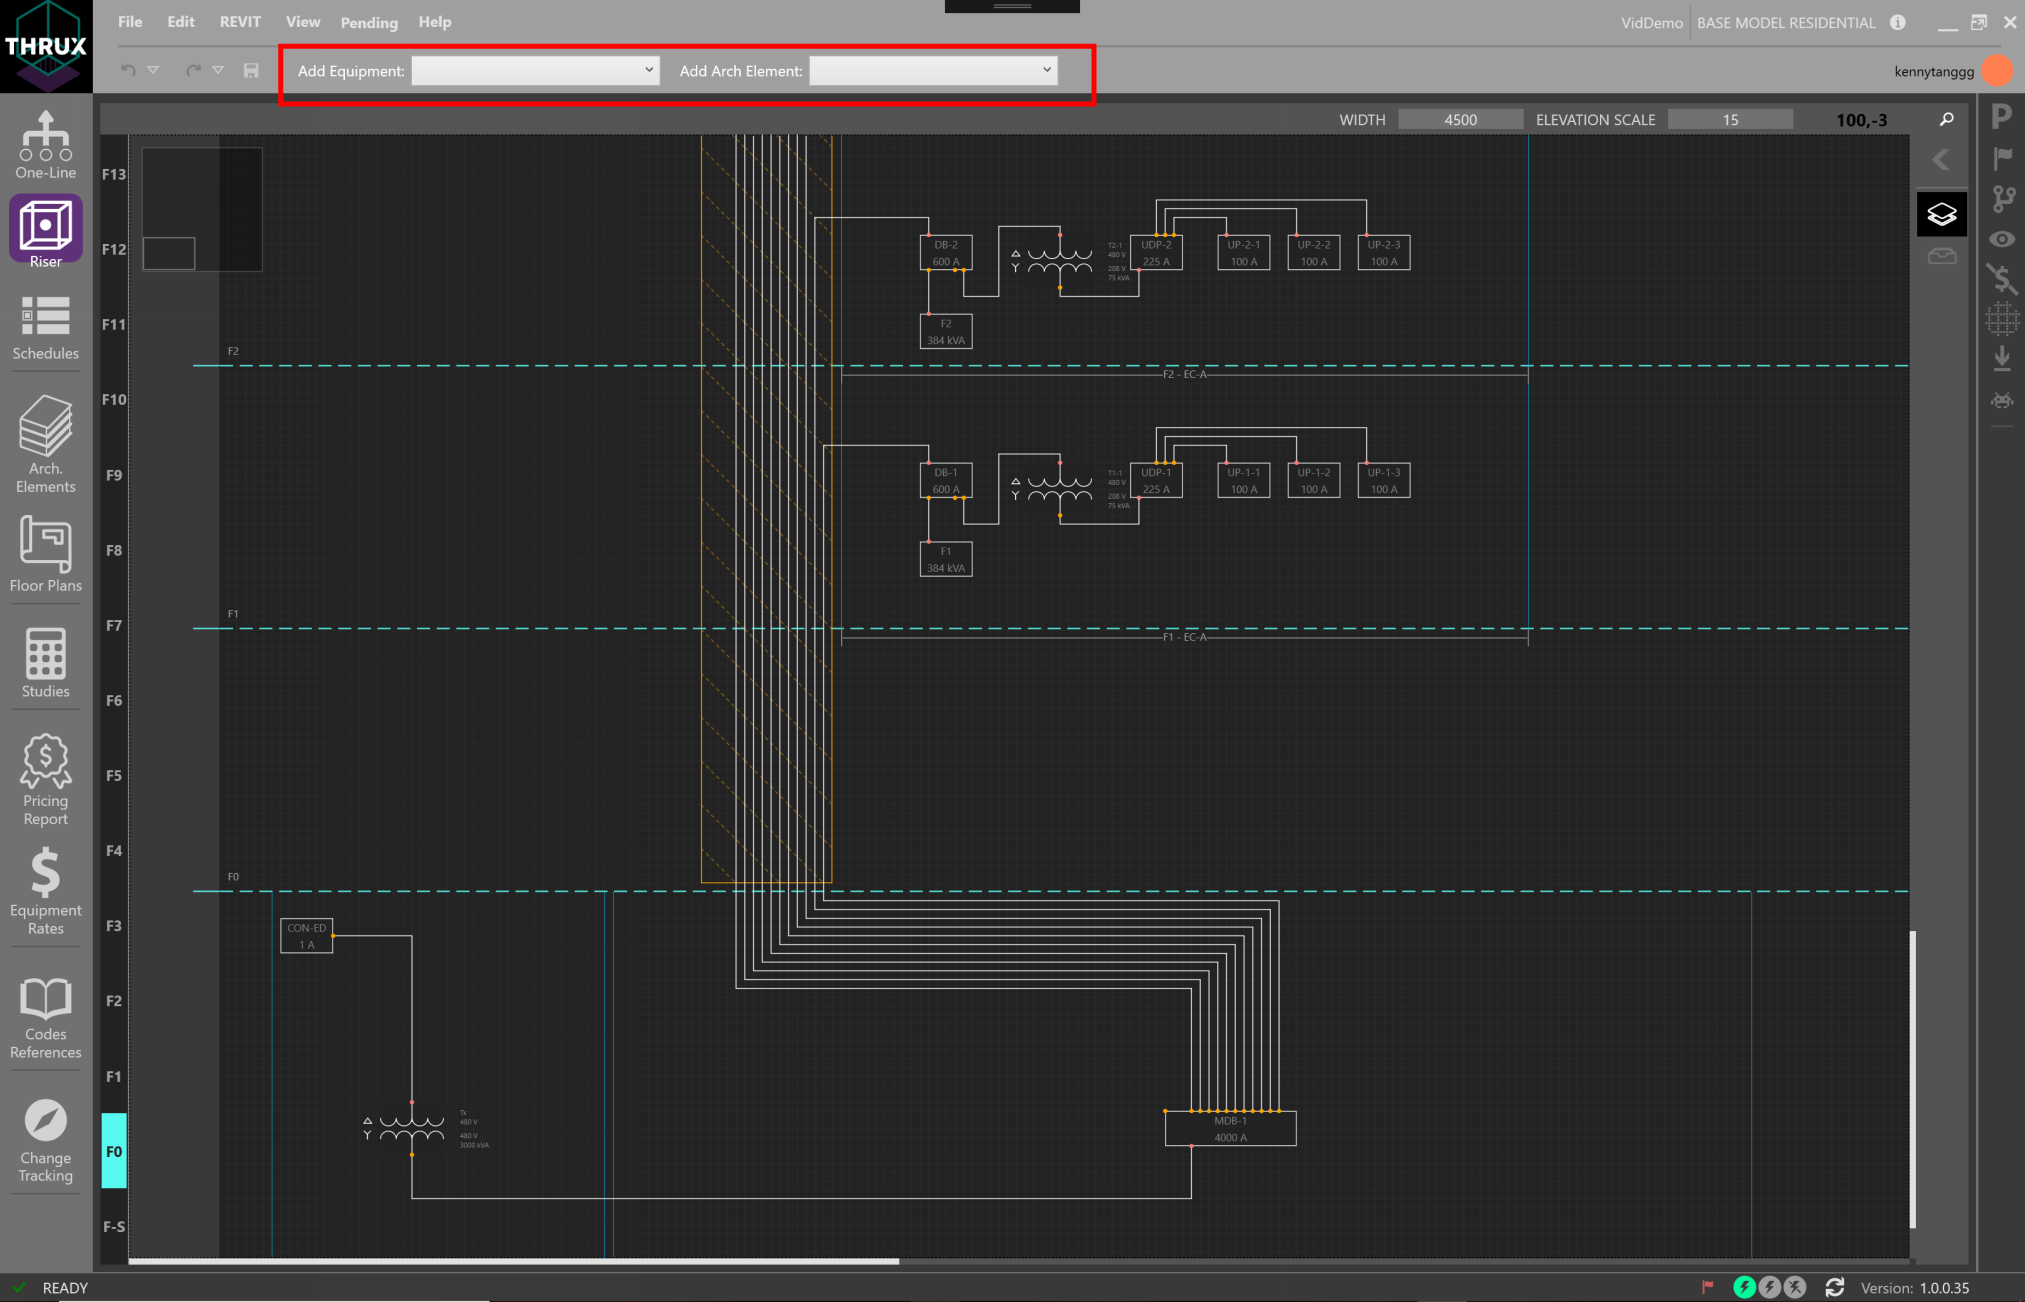
Adding Elements
Drag and drop elements from the toolbox to the Workspace to place elements.

Adding Architectural Elements
Add Electrical Equipment
To place Equipment, drag and drop elements from the toolbox into the Workspace.
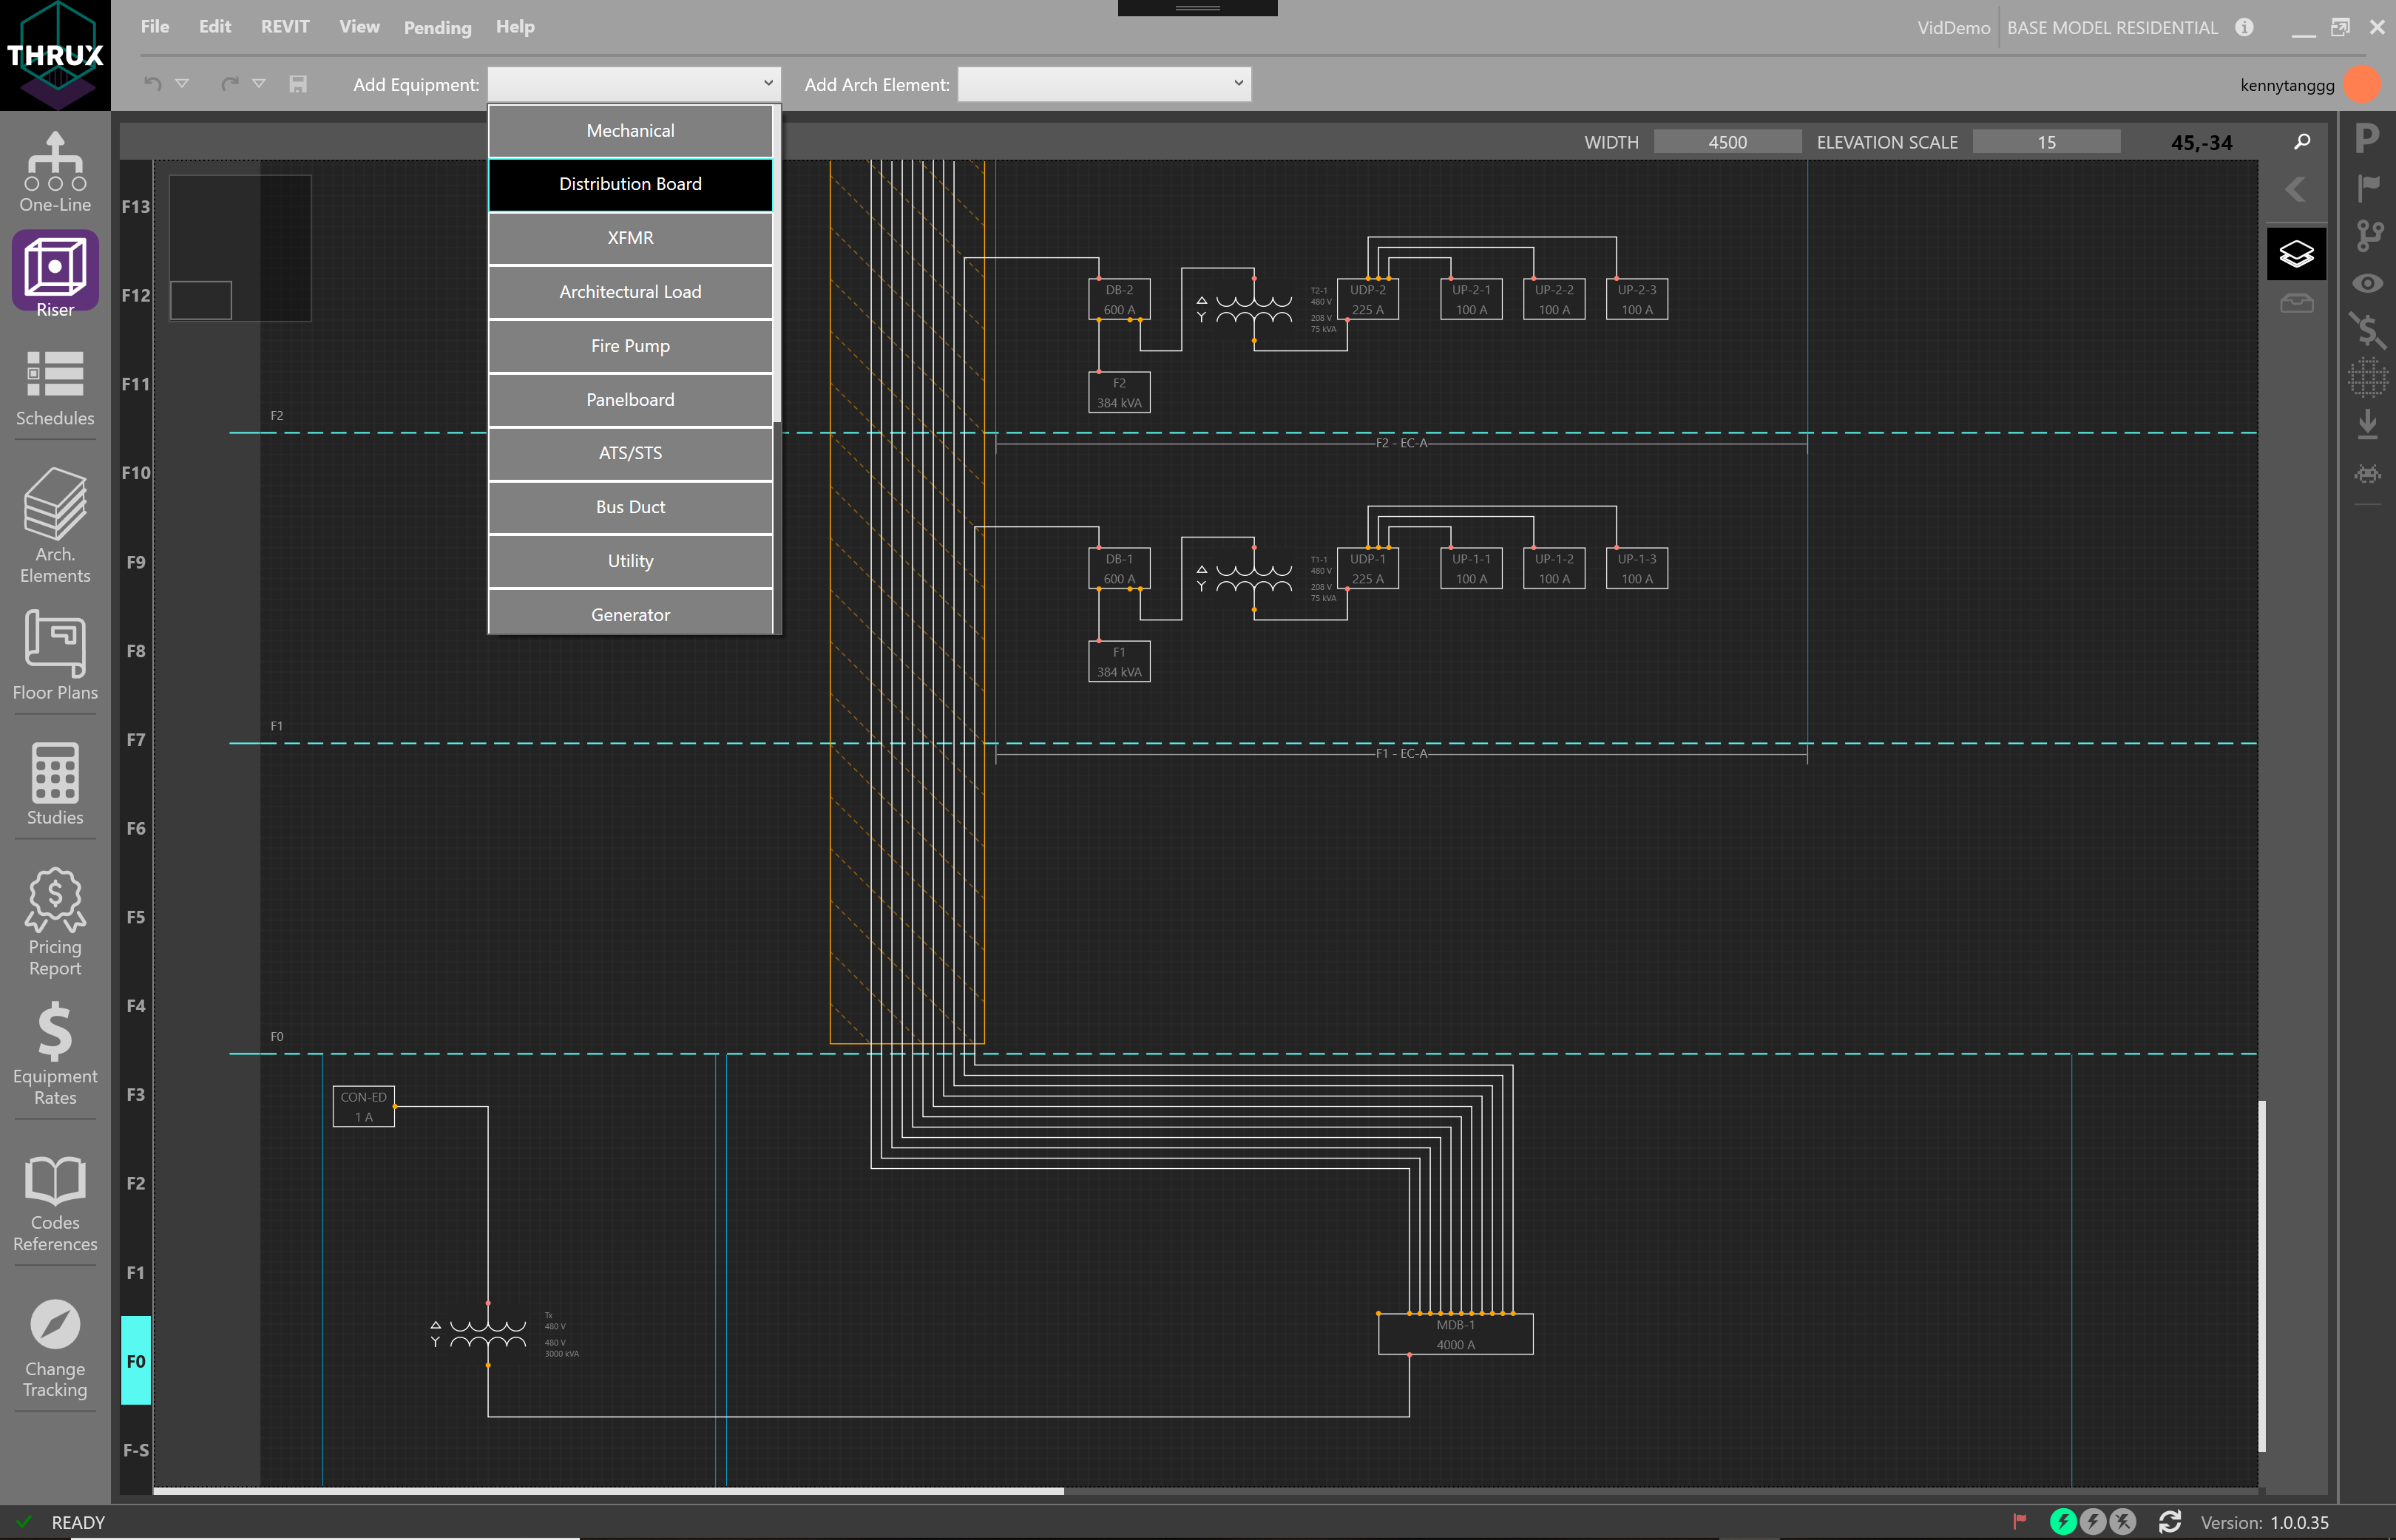
Adding Electrical Equipment
To place an Equipment in a Room, drag the Equipment into the Room region.
Equipment placed in a Room
Connecting Equipment
There are three different types of connections between Equipment: Outbound, Tie, and Infed. These are also known as Load, Tie, and Source, respectively.
To create a connection between Equipment, select the Equipment. Then choose Create Connection.
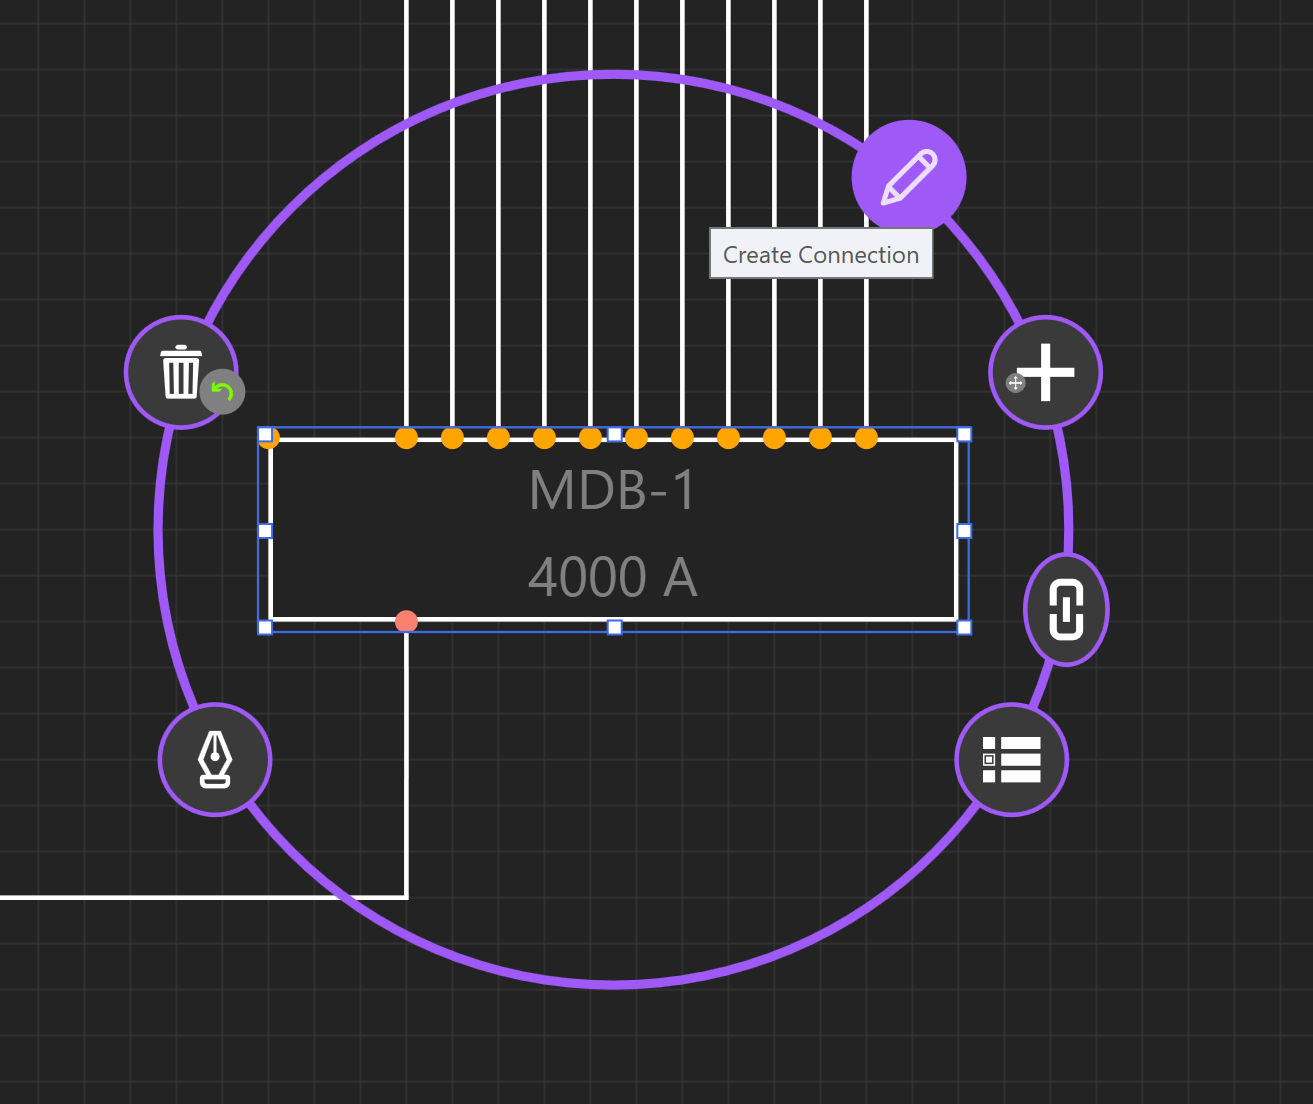
Using the Selection Dial to create connections
Then choose Outbound connection. This will create a new circuit from the equipment to the load.
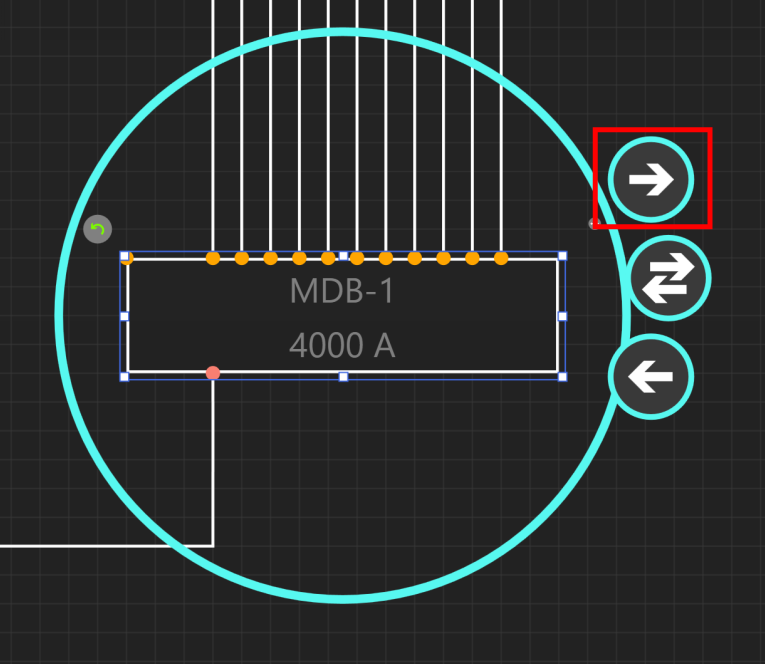
Creating an outbound connection
Draw out the connection using the mouse and choose Drop New Equipment.
Click the + button for Drop New Equipment.

Placing the Equipment
Copying Equipment
Select the Equipment and use CTRL+C to copy.
Copying multiple pieces of Equipment
Use CTRL+V to paste.
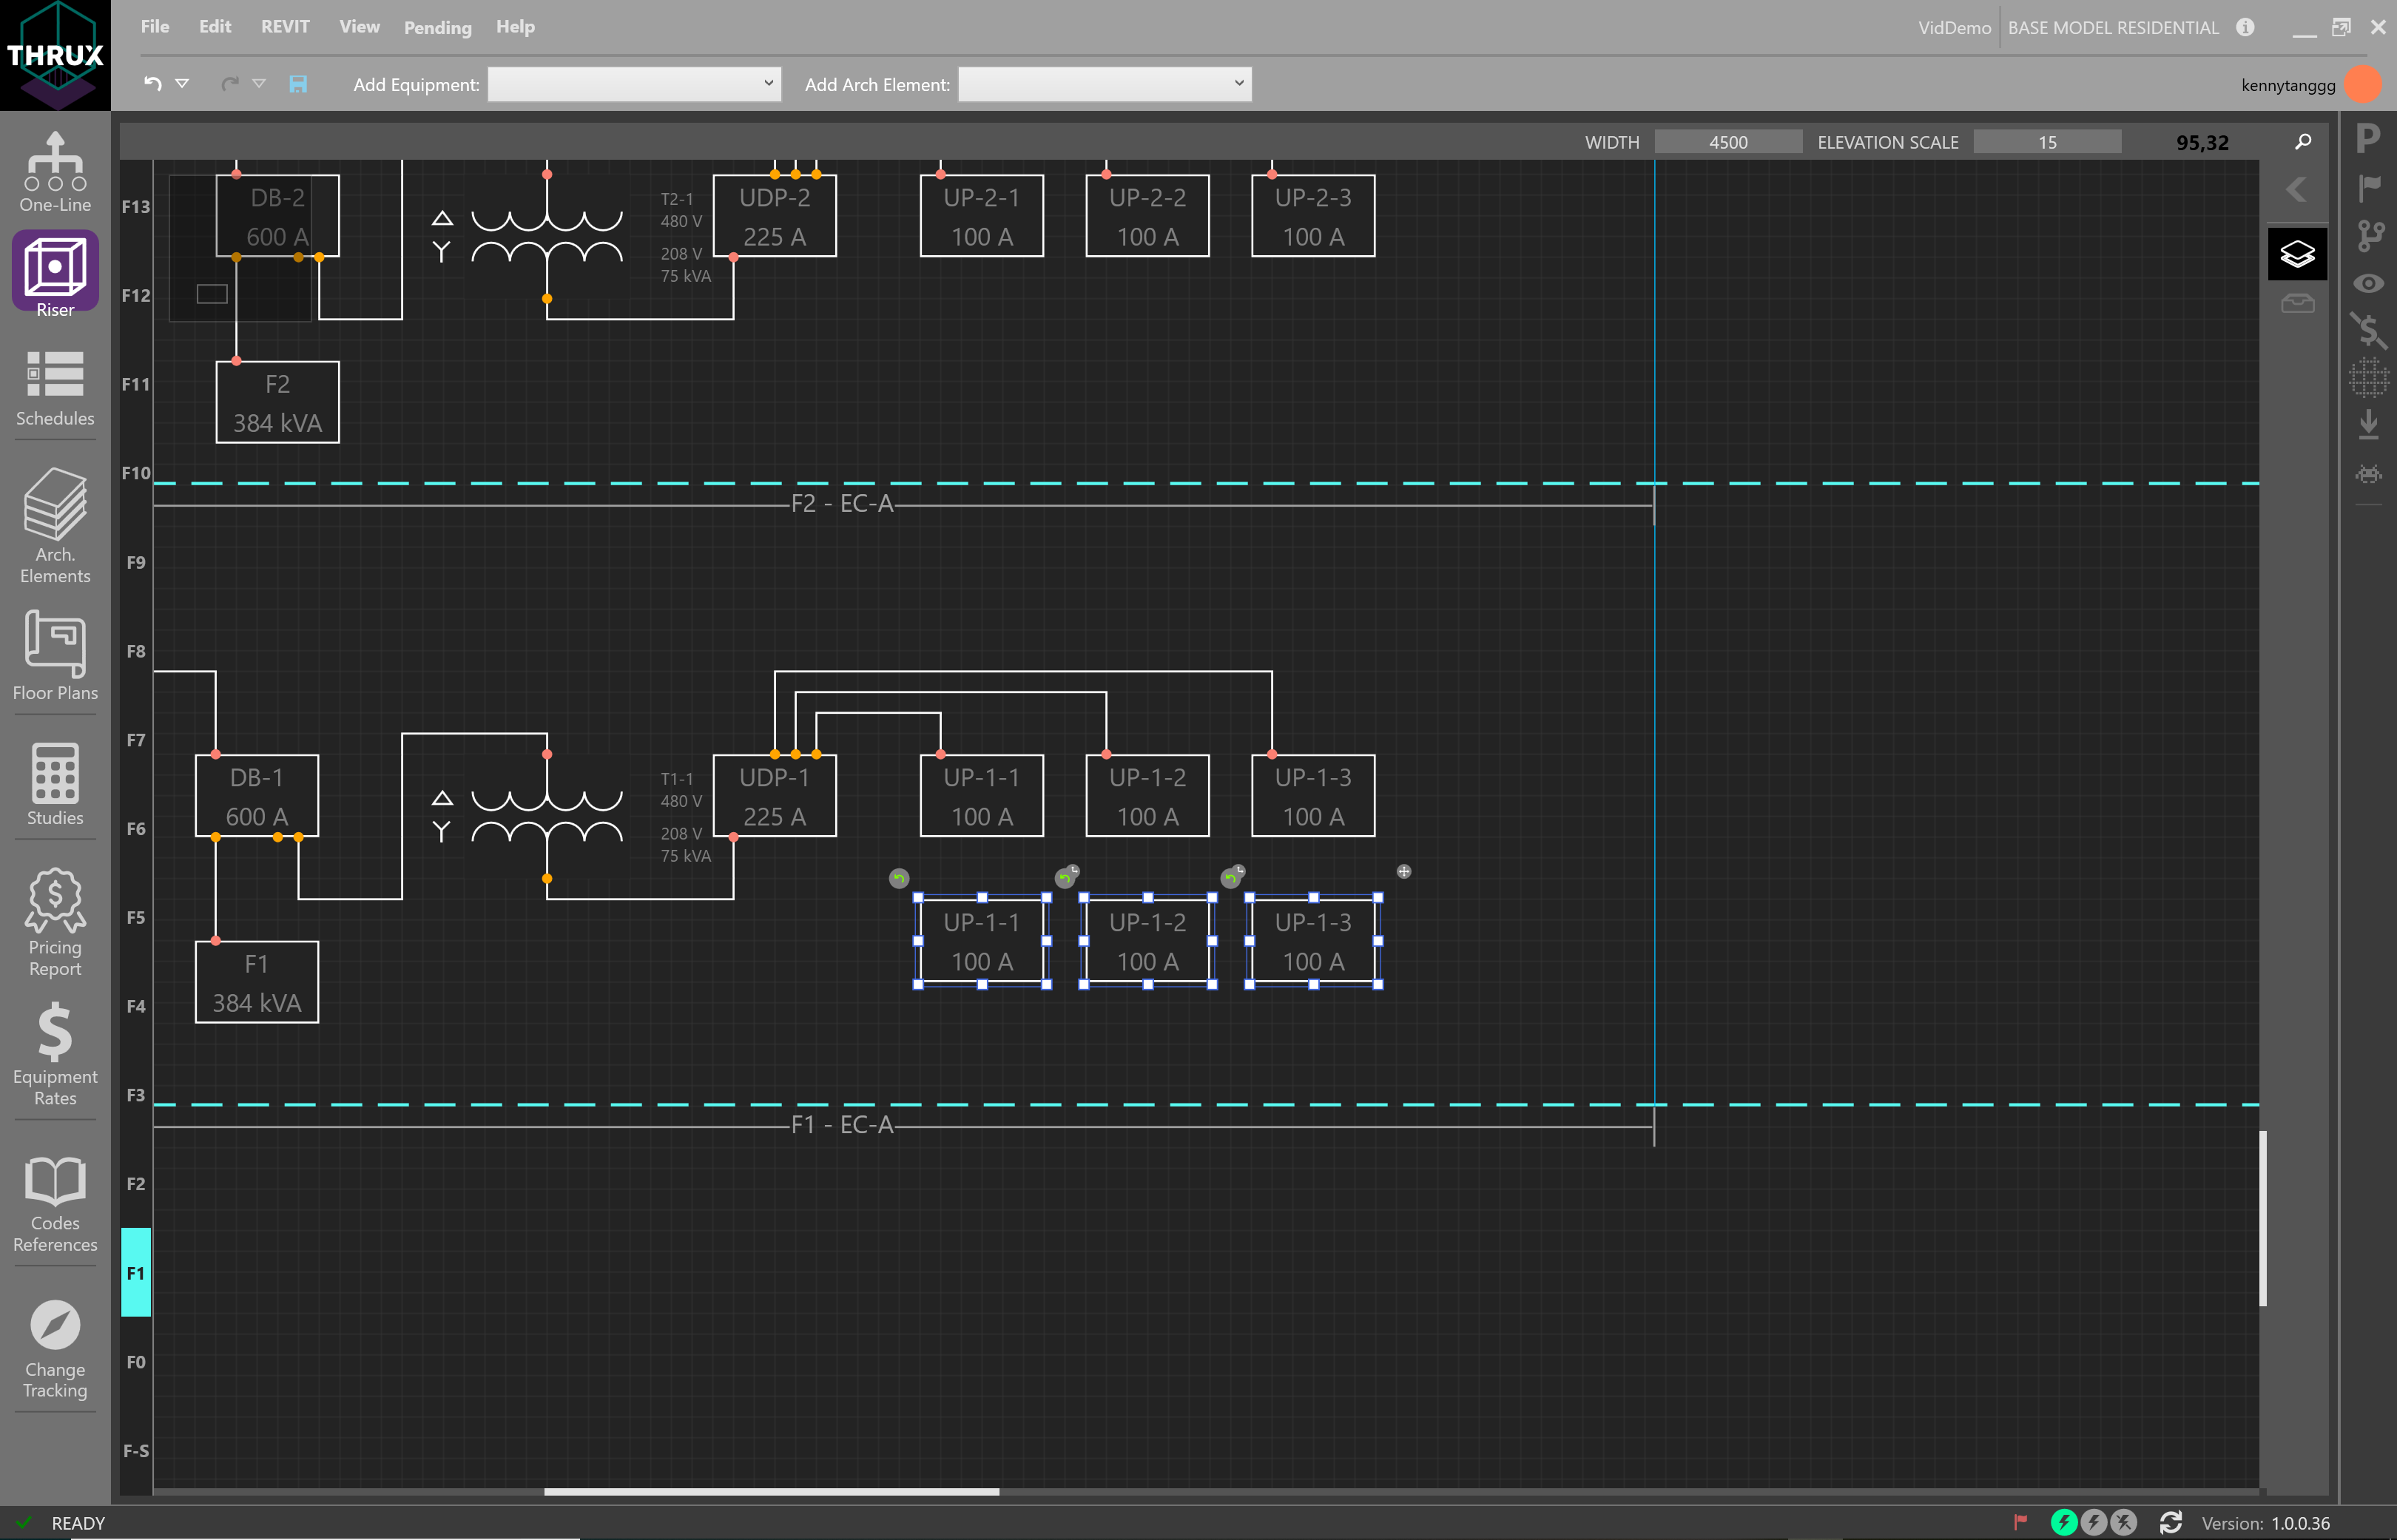
Pasting multiple pieces of Equipment
Moving Equipment
It is possible to move Equipment by an individual or a group basis.
Select a single Equipment or select multiple by using CTRL+Click, or drag and drop a selection box.
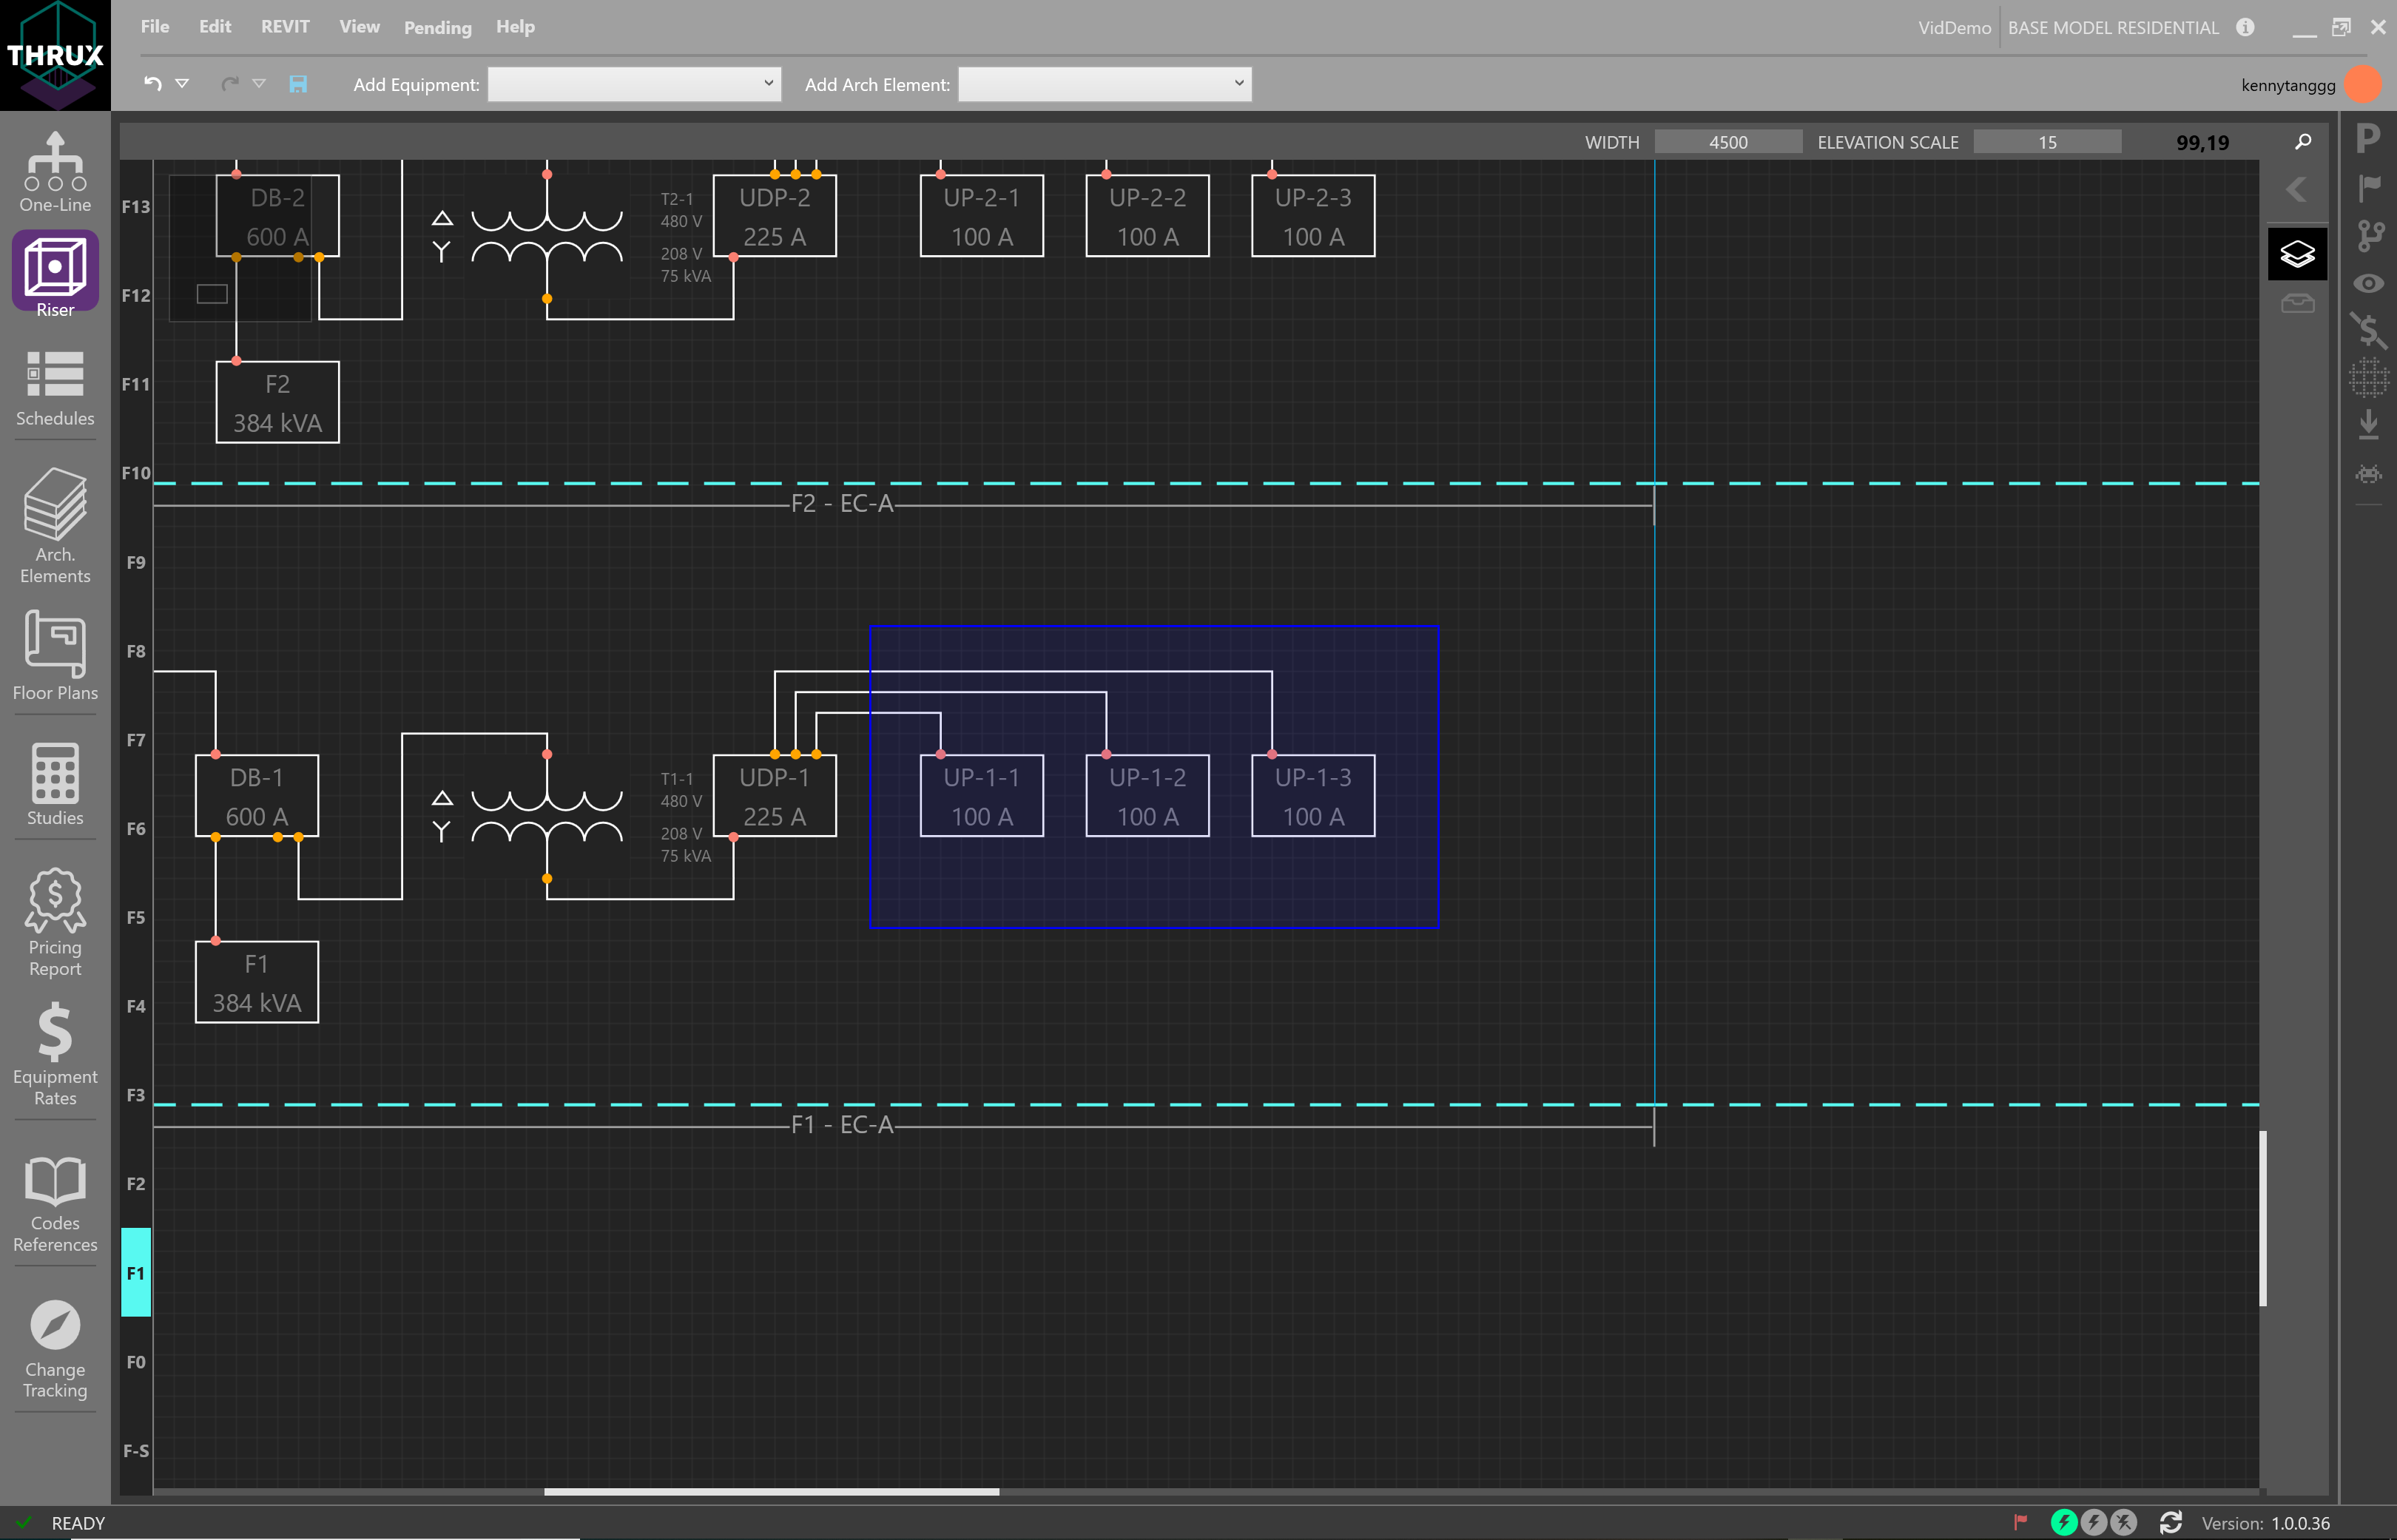
Selecting multiple pieces of Equipment
Then drag the grip to shift Equipment Room locations.

Using the grip to move Equipment