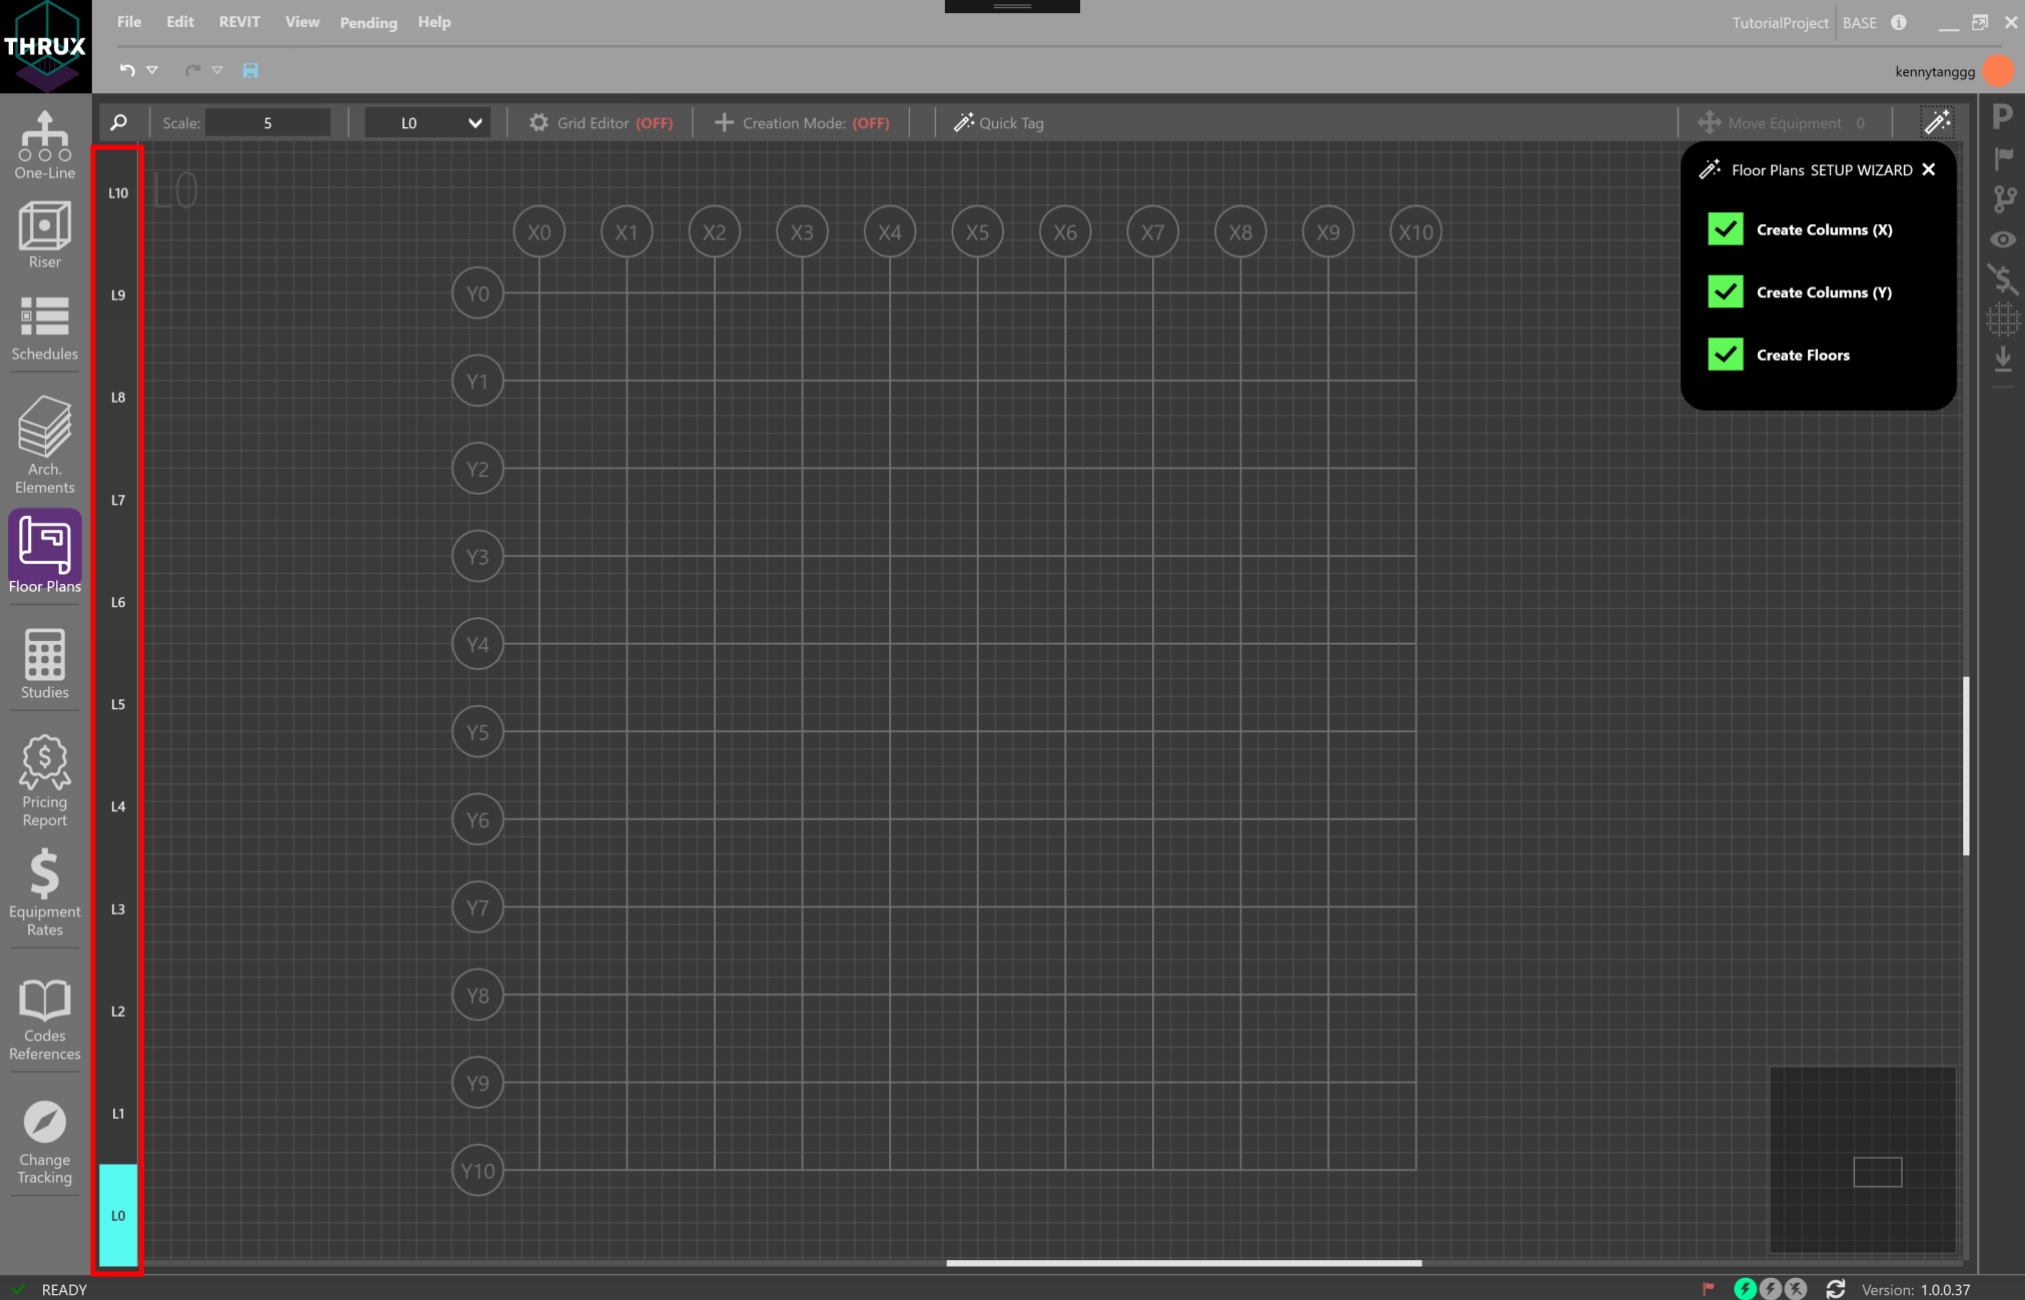
Setup Wizard
Use the Setup Wizard located on the right to start to create columns and Floors. Any entity created using the wizard can also be created or modified in the Arch. Elements Workspace.
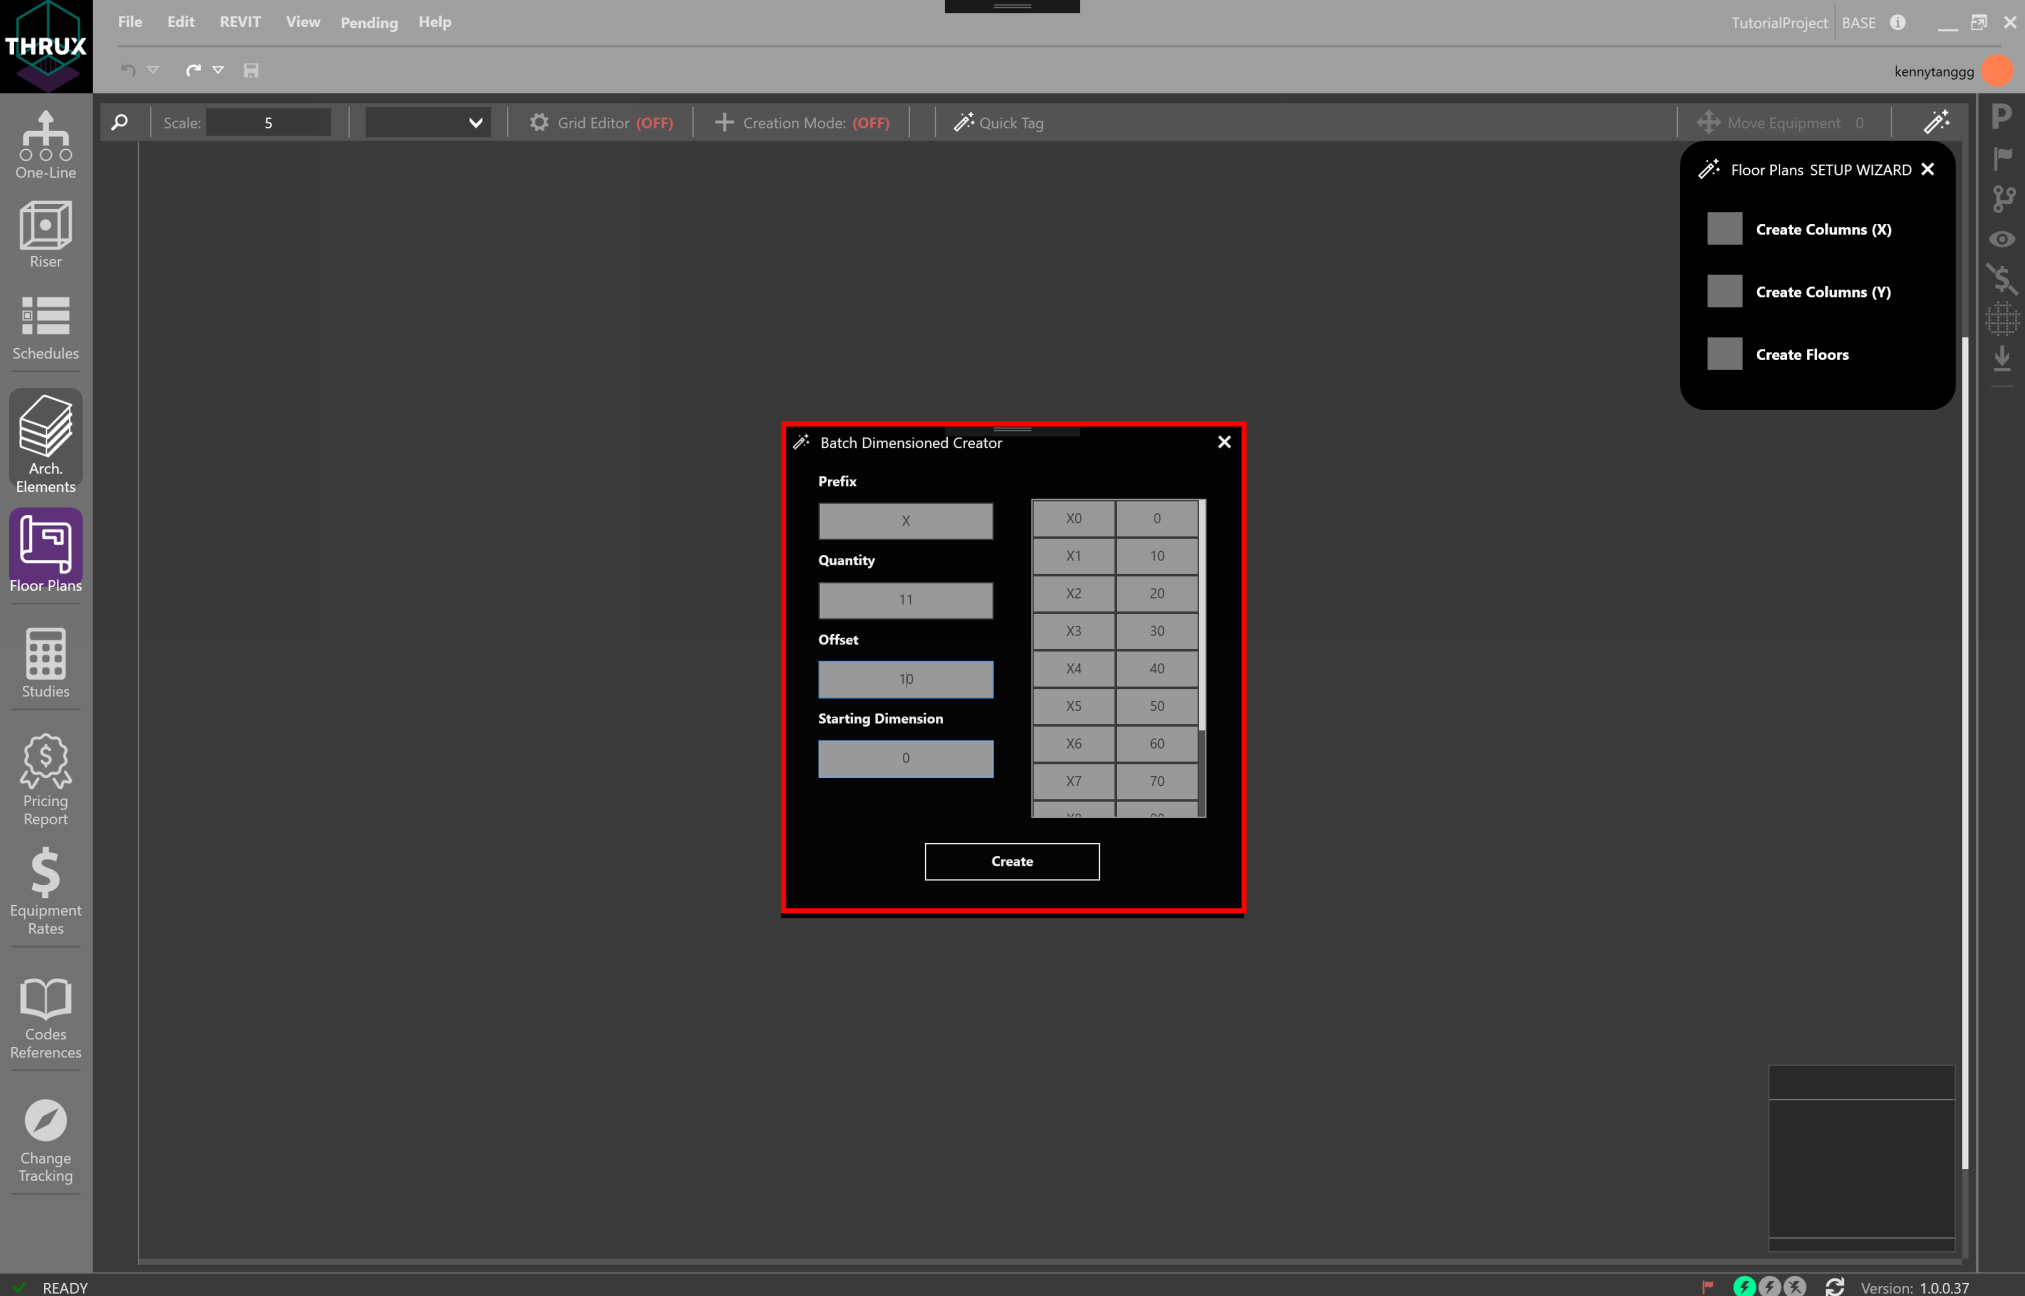
Selecting Create Columns will create multiple columns at a time, and Create Floors will create multiple Floors at a time.
Click on Create Columns (X) and a wizard will prompt asking for a Prefix, Quantity, Offset, and Starting Dimension.
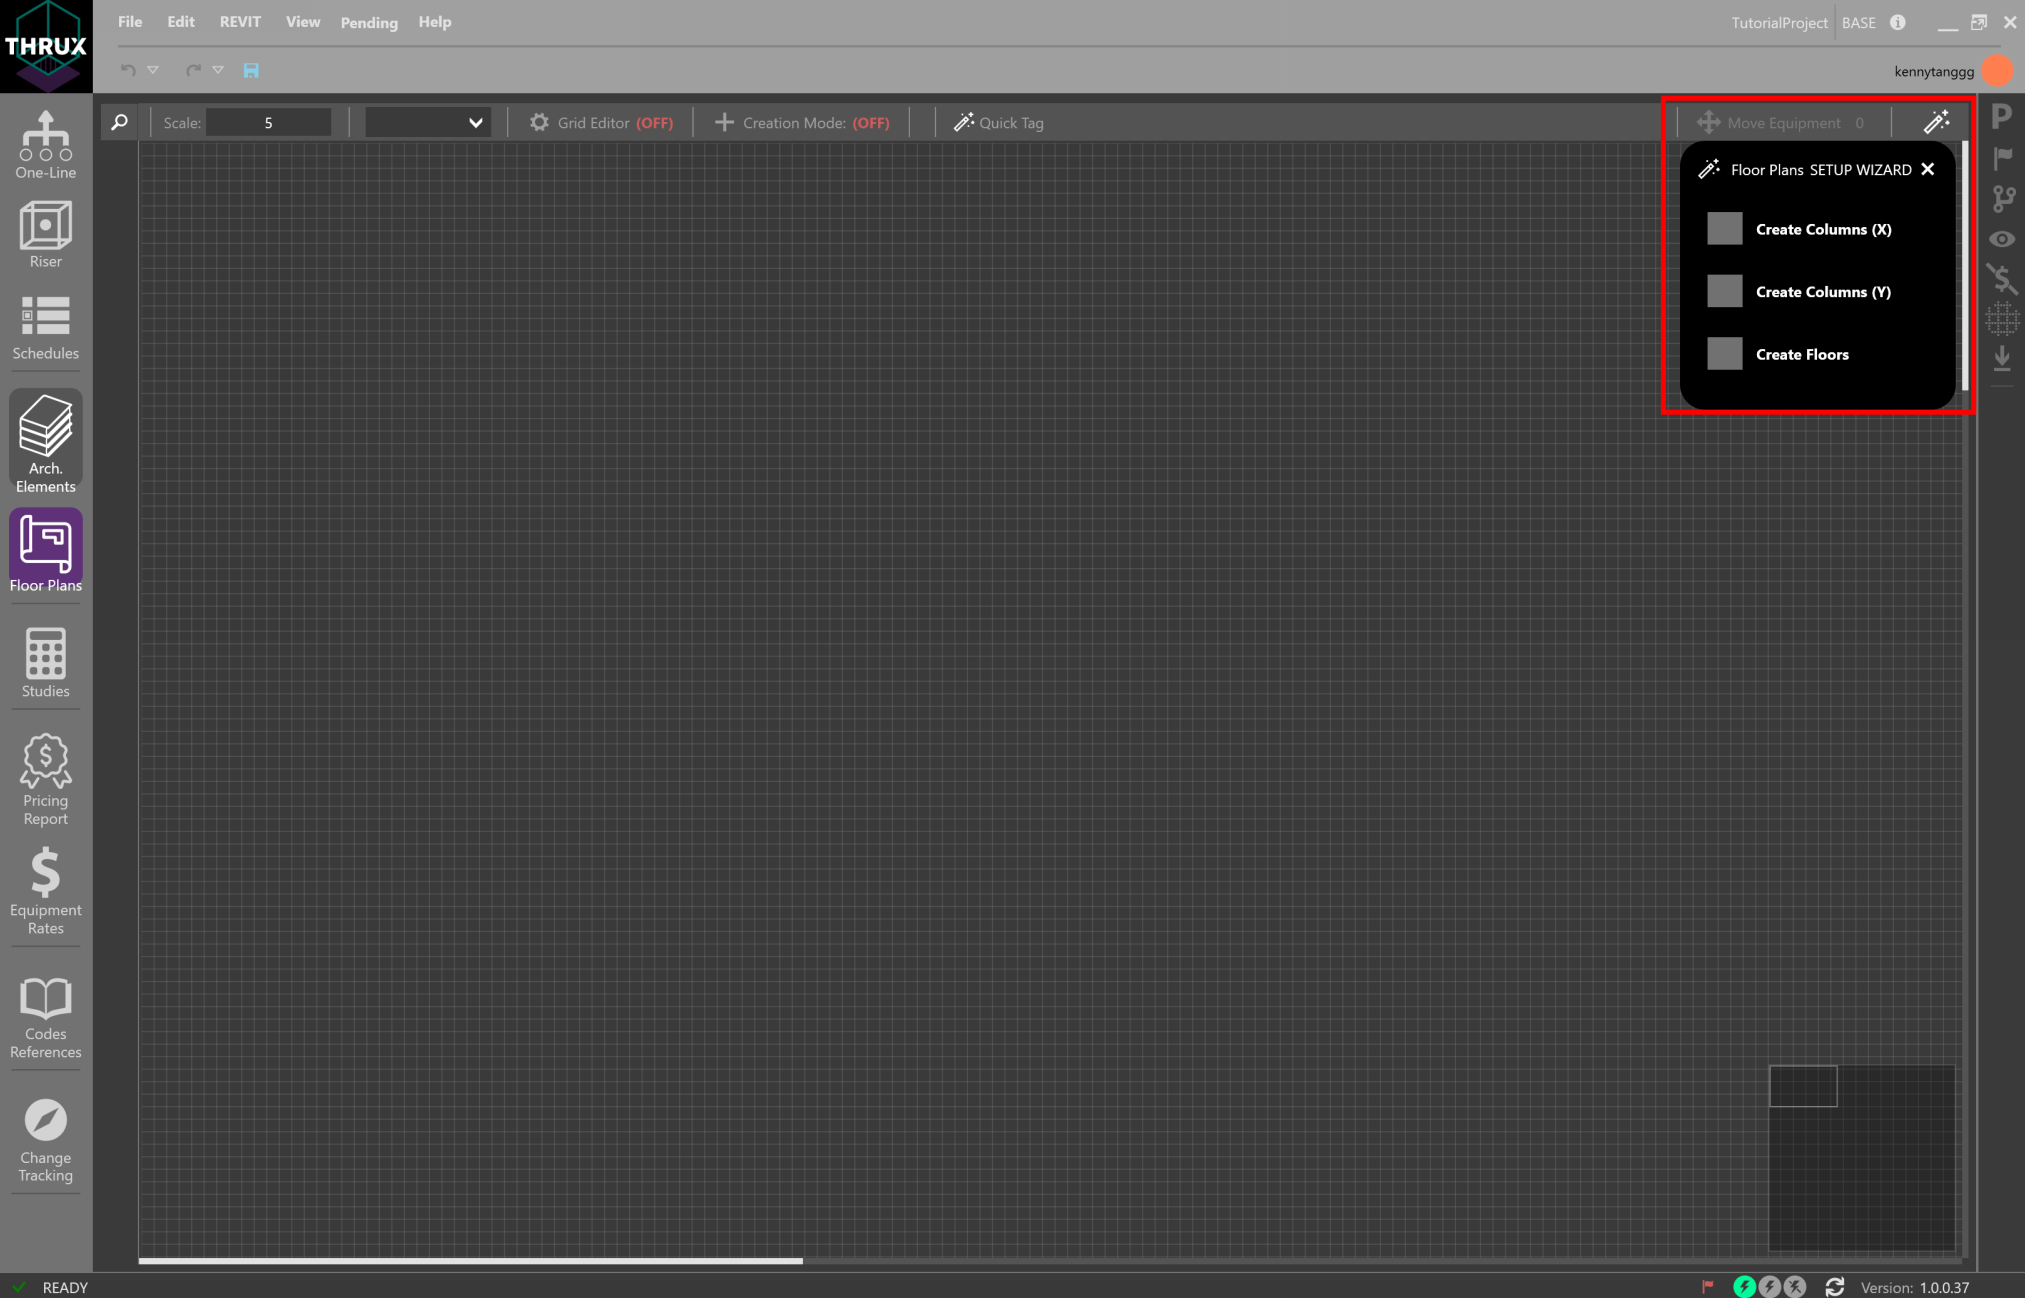
Setup Wizard is accessible by clicking on the wand icon in the top right
Offset is the distance in between each column. The Starting Dimension is the starting X, Y, or Z coordinate.
Create 11 columns, prefixed with the name “X”, with an offset of ten (10), and a starting dimension of zero (0).
Using the Setup Wizard to create columns
After clicking Create, the columns will appear in the Floor Plans.
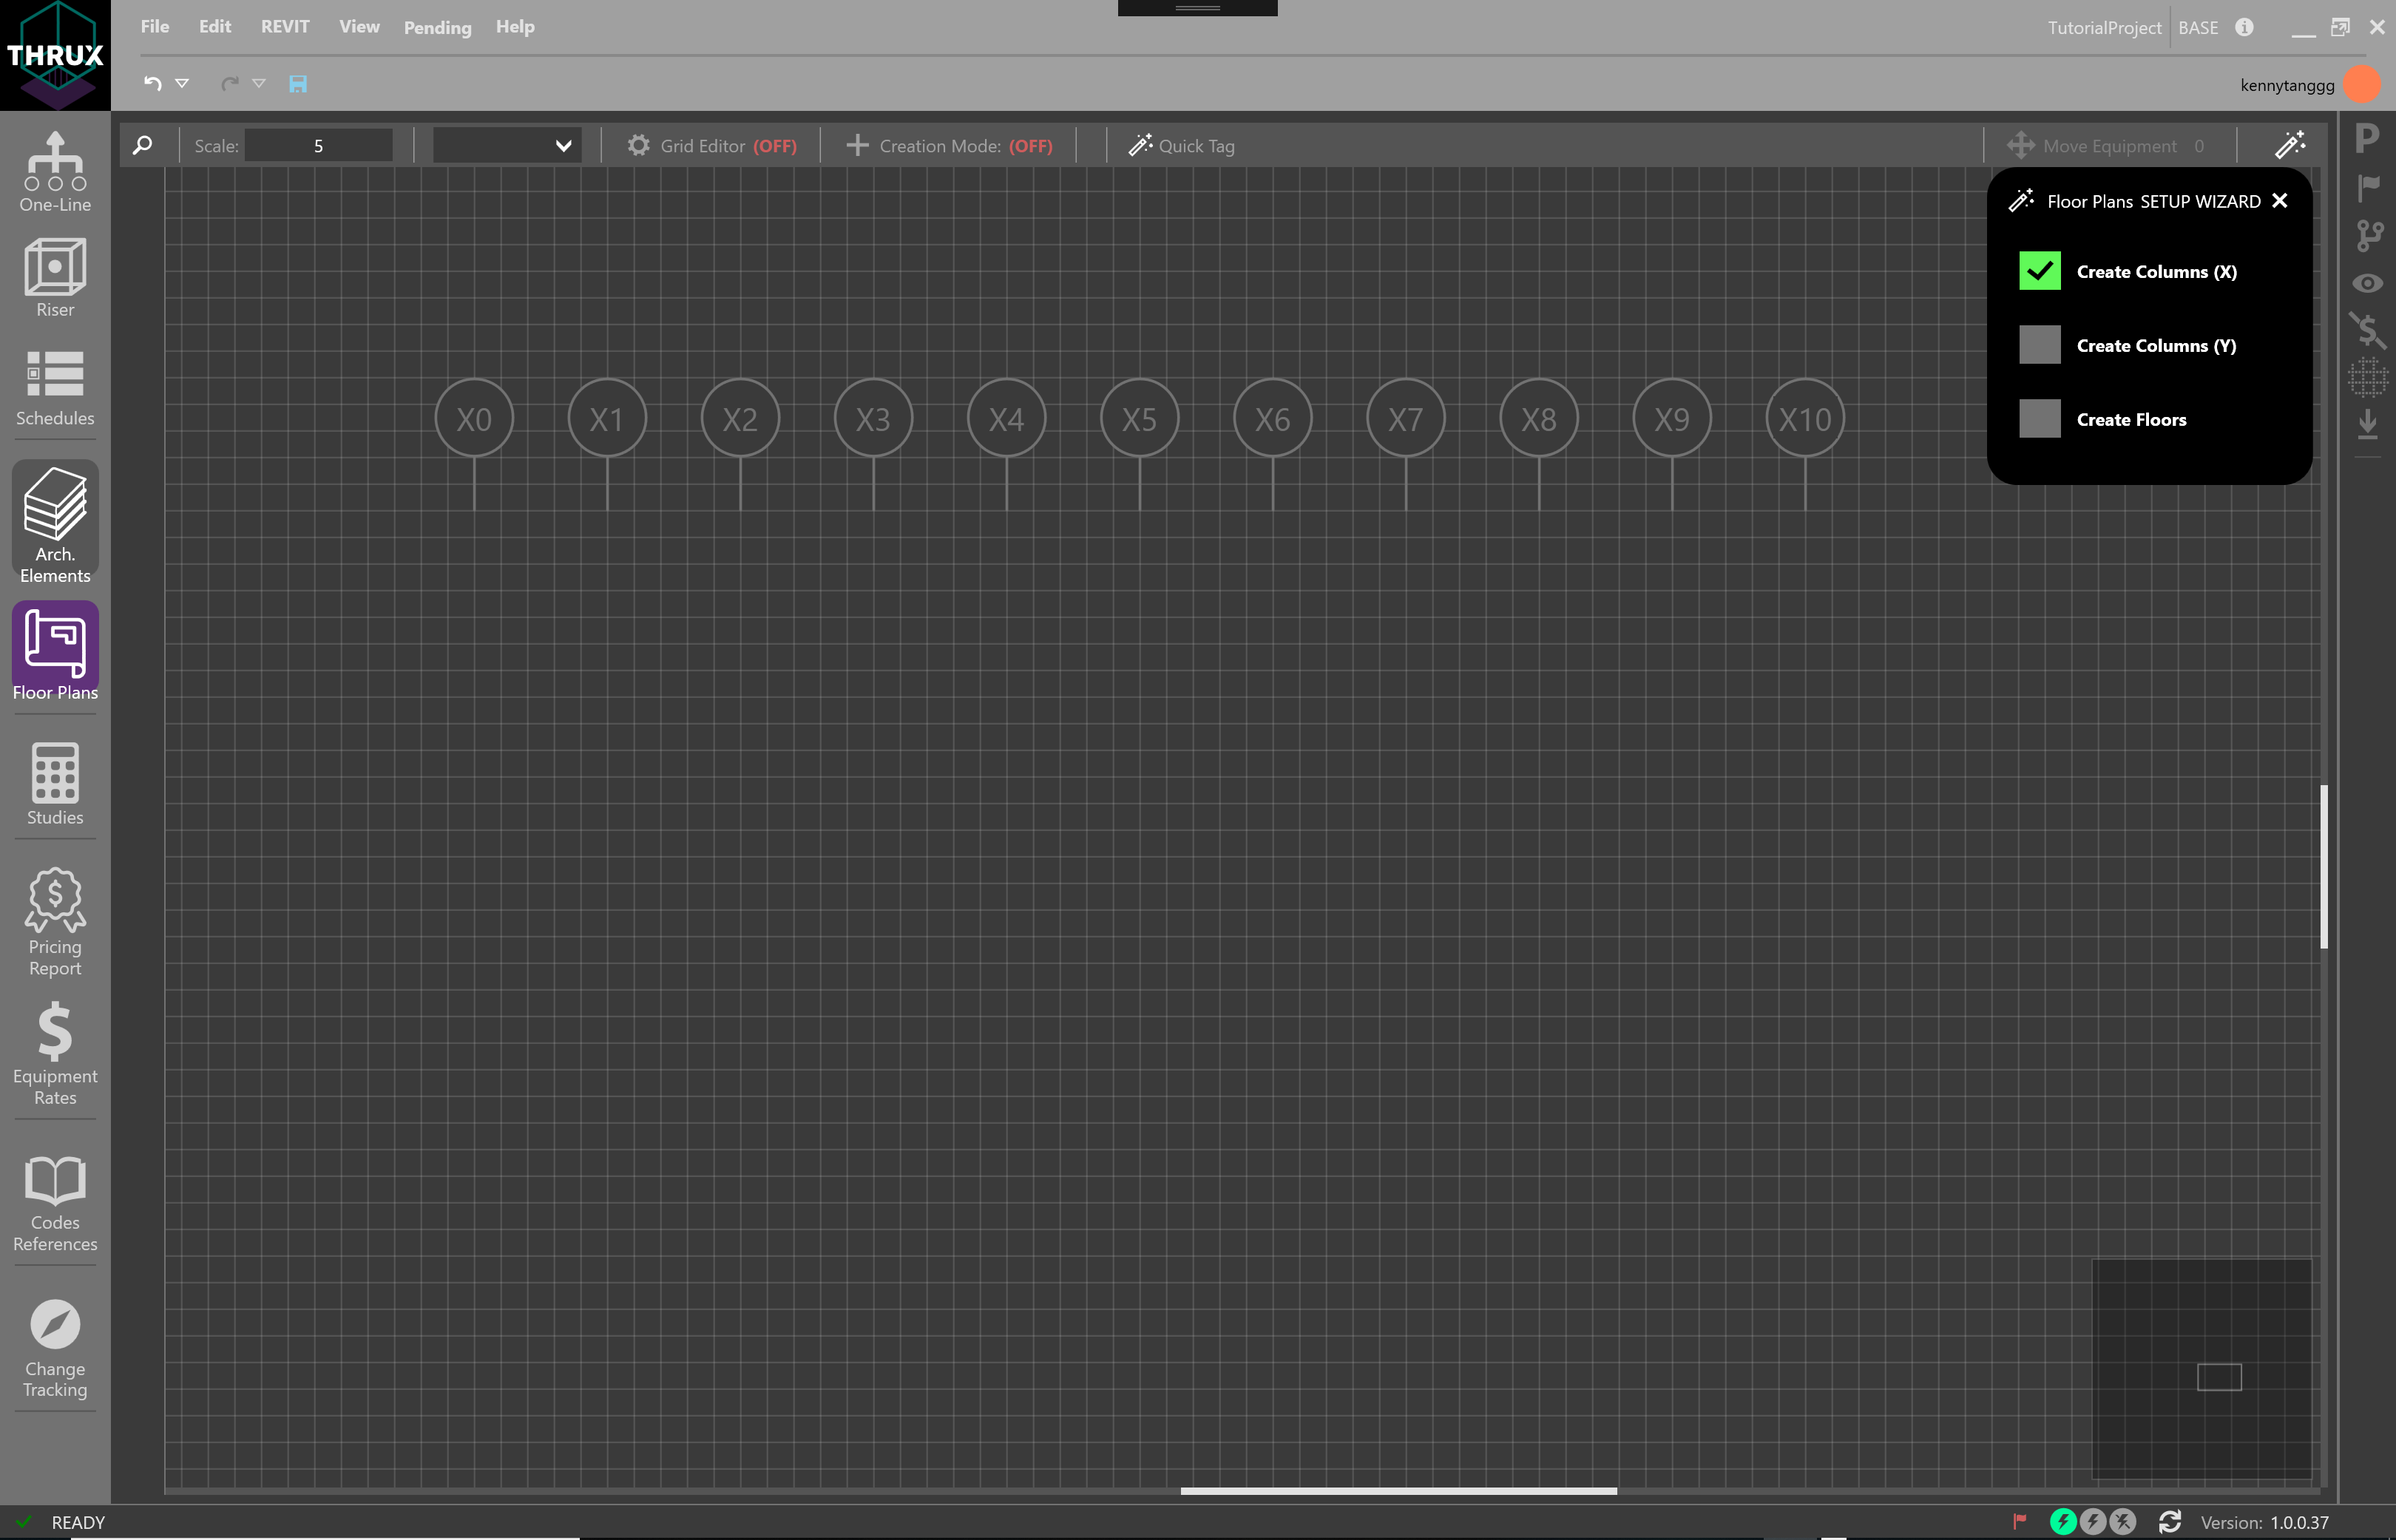
Columns along the x-axis
Click on Create Columns (Y) to repeat this process.
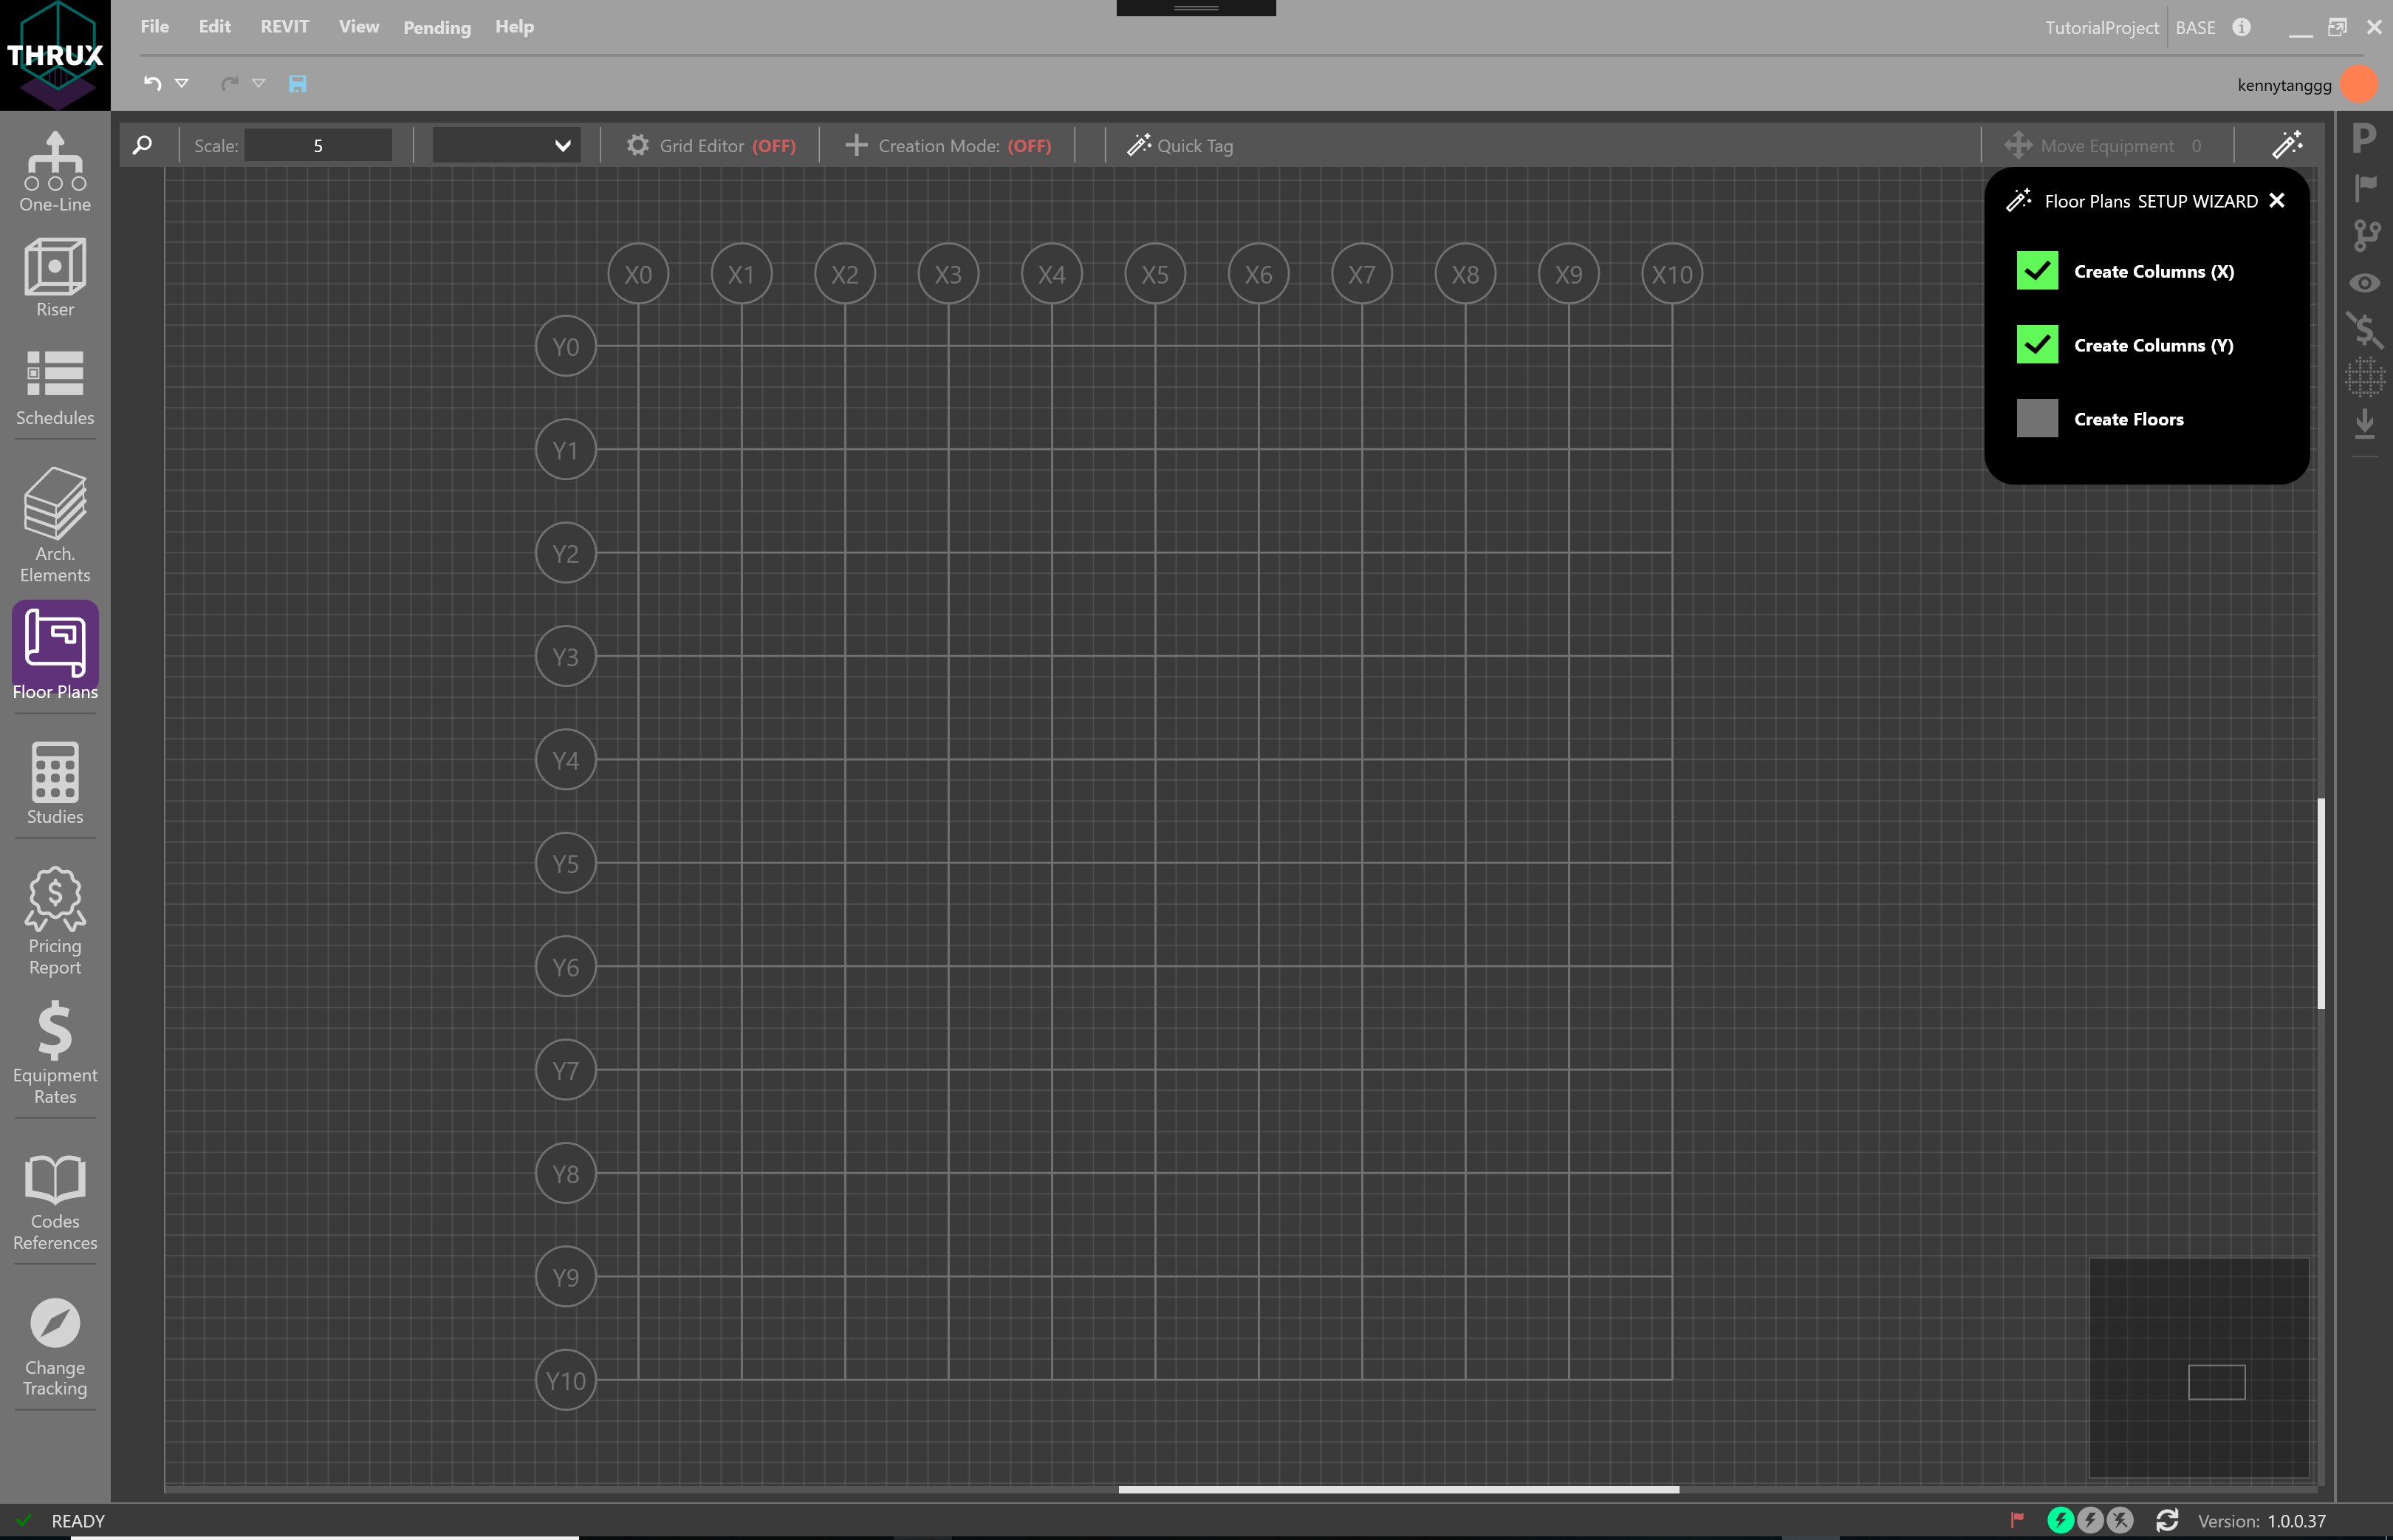
Created columns along the y-axis
Next, click on Create Floors. Create 11 Floors that are also vertically spaced 10 feet apart.
Cycle through Floors by selecting the Floor on the left sidebar.
100 foot by 100 foot by 100 foot building
Grid Editor
Use the Grid Editor to modify the spacing in between columns.
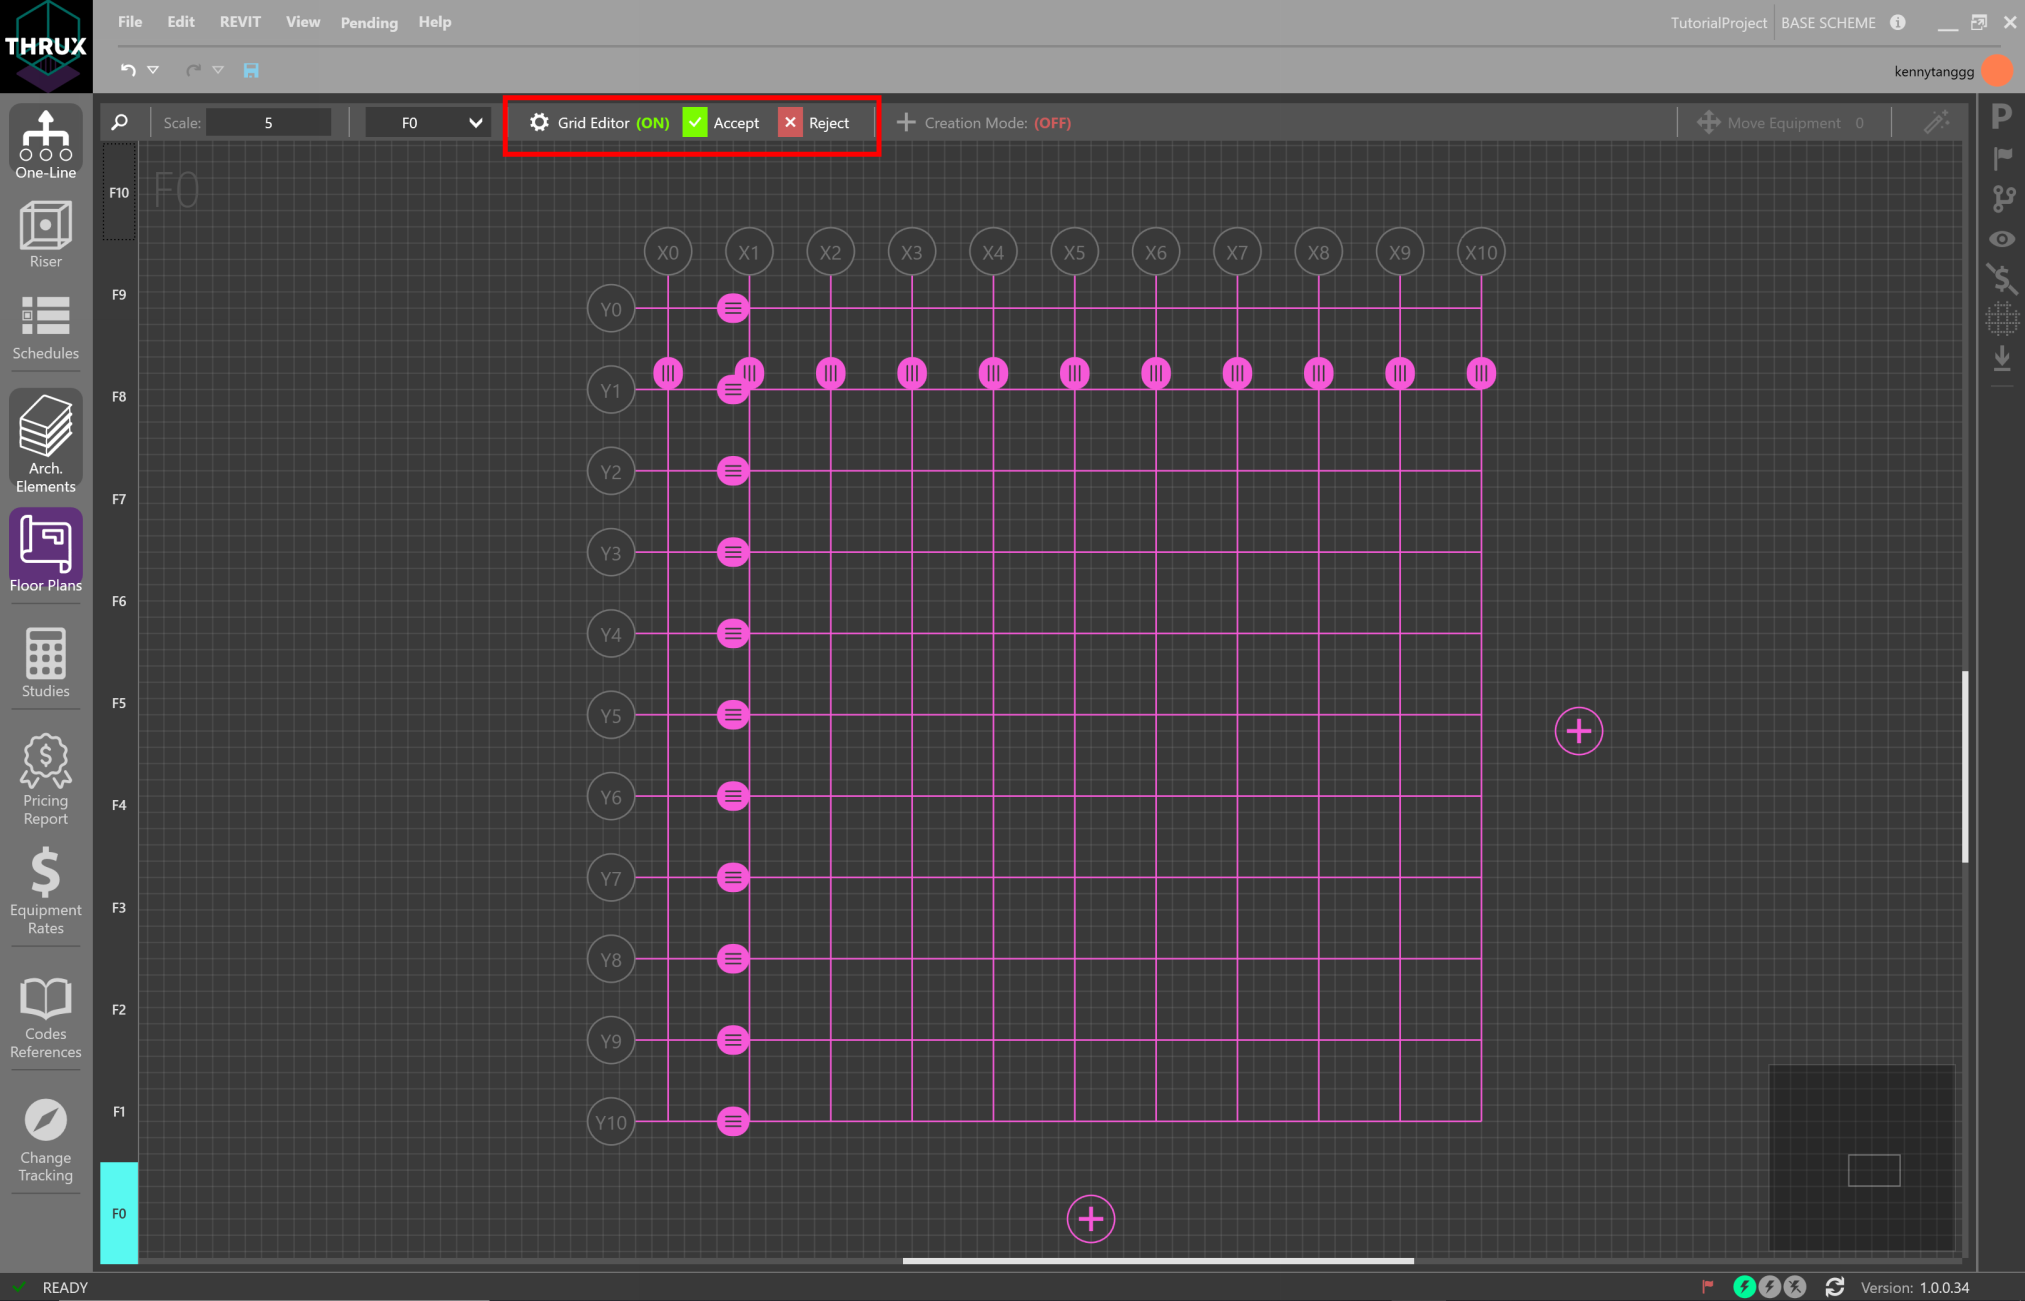
Click on the gear icon to use the Grid Editor
Use the grips to drag columns to change their dimensions.
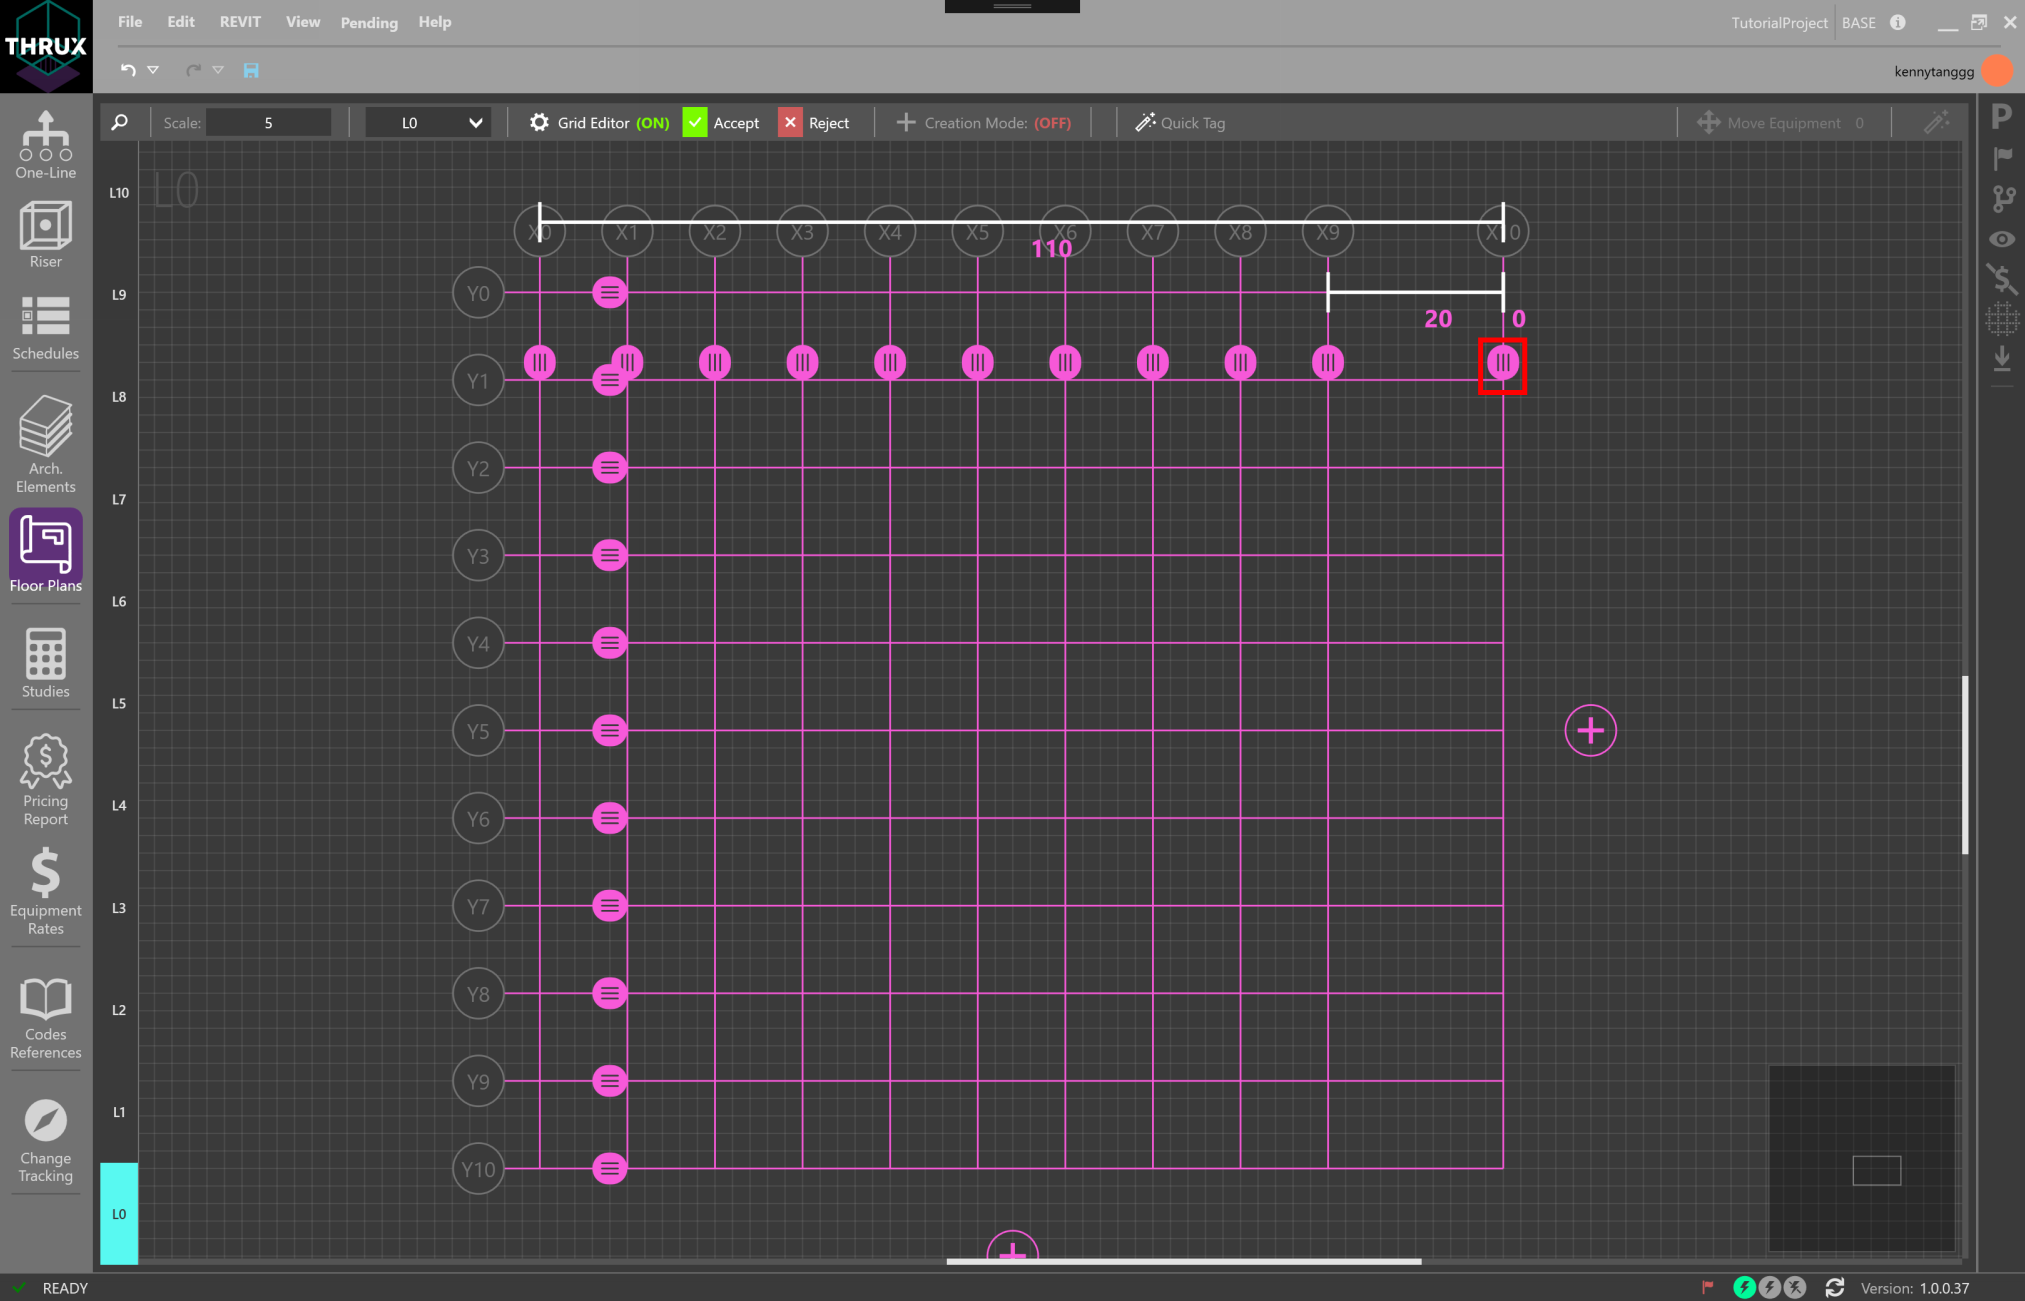
Click on Accept or Reject to keep or cancel changes
Creation Mode
Once Floors are created, enable Creation Mode. This allows you to create Rooms and Risers.
Create a Room by hovering the mouse between column regions and clicking Add Room.
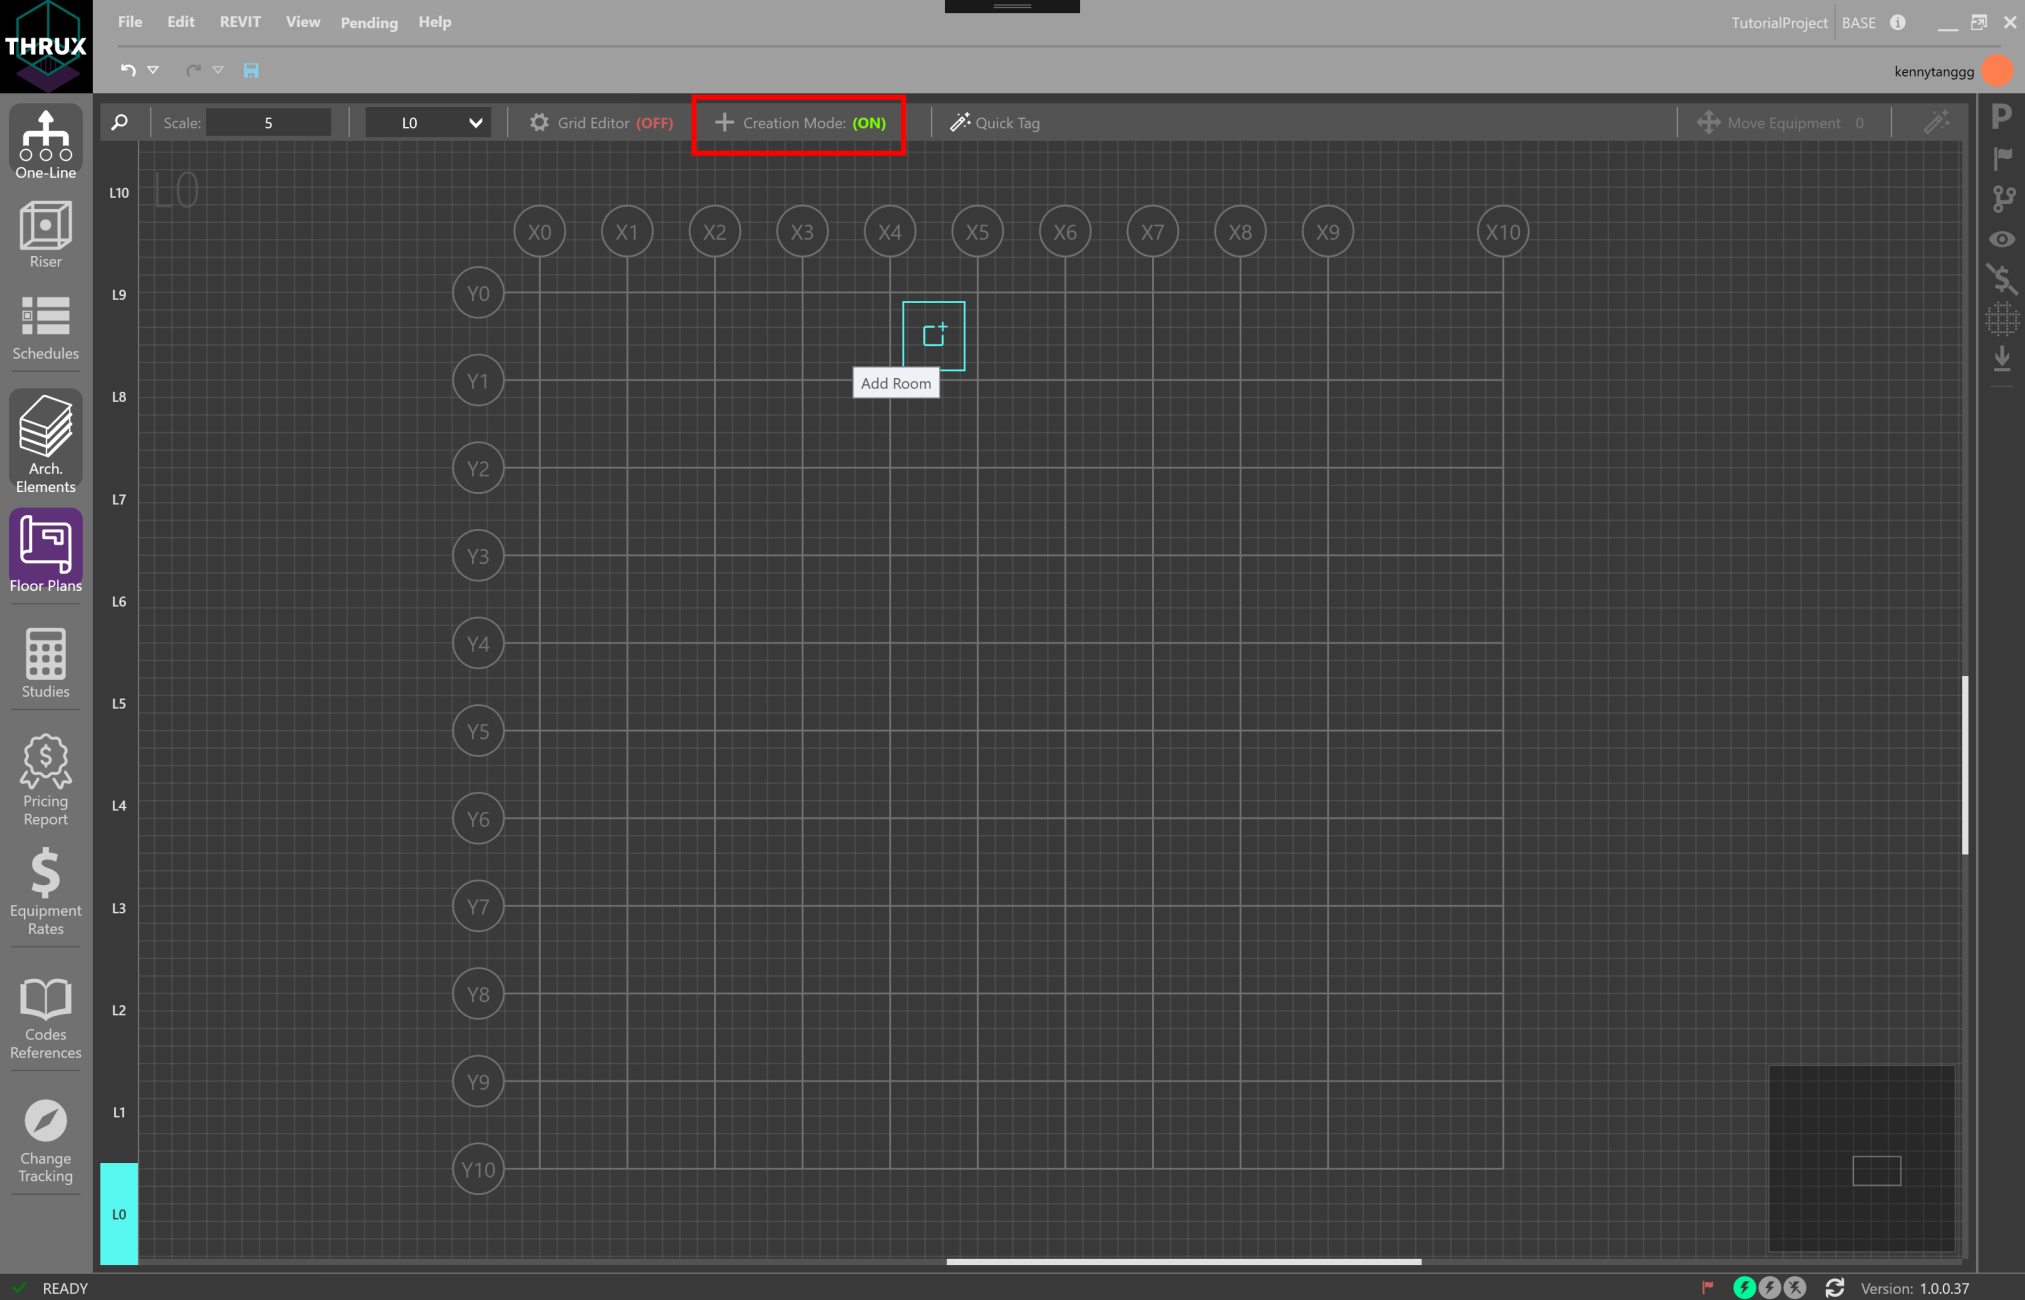
Creating a Room with Creation Mode enabled
To resize a Room, disable Creation Mode and click on a Room.
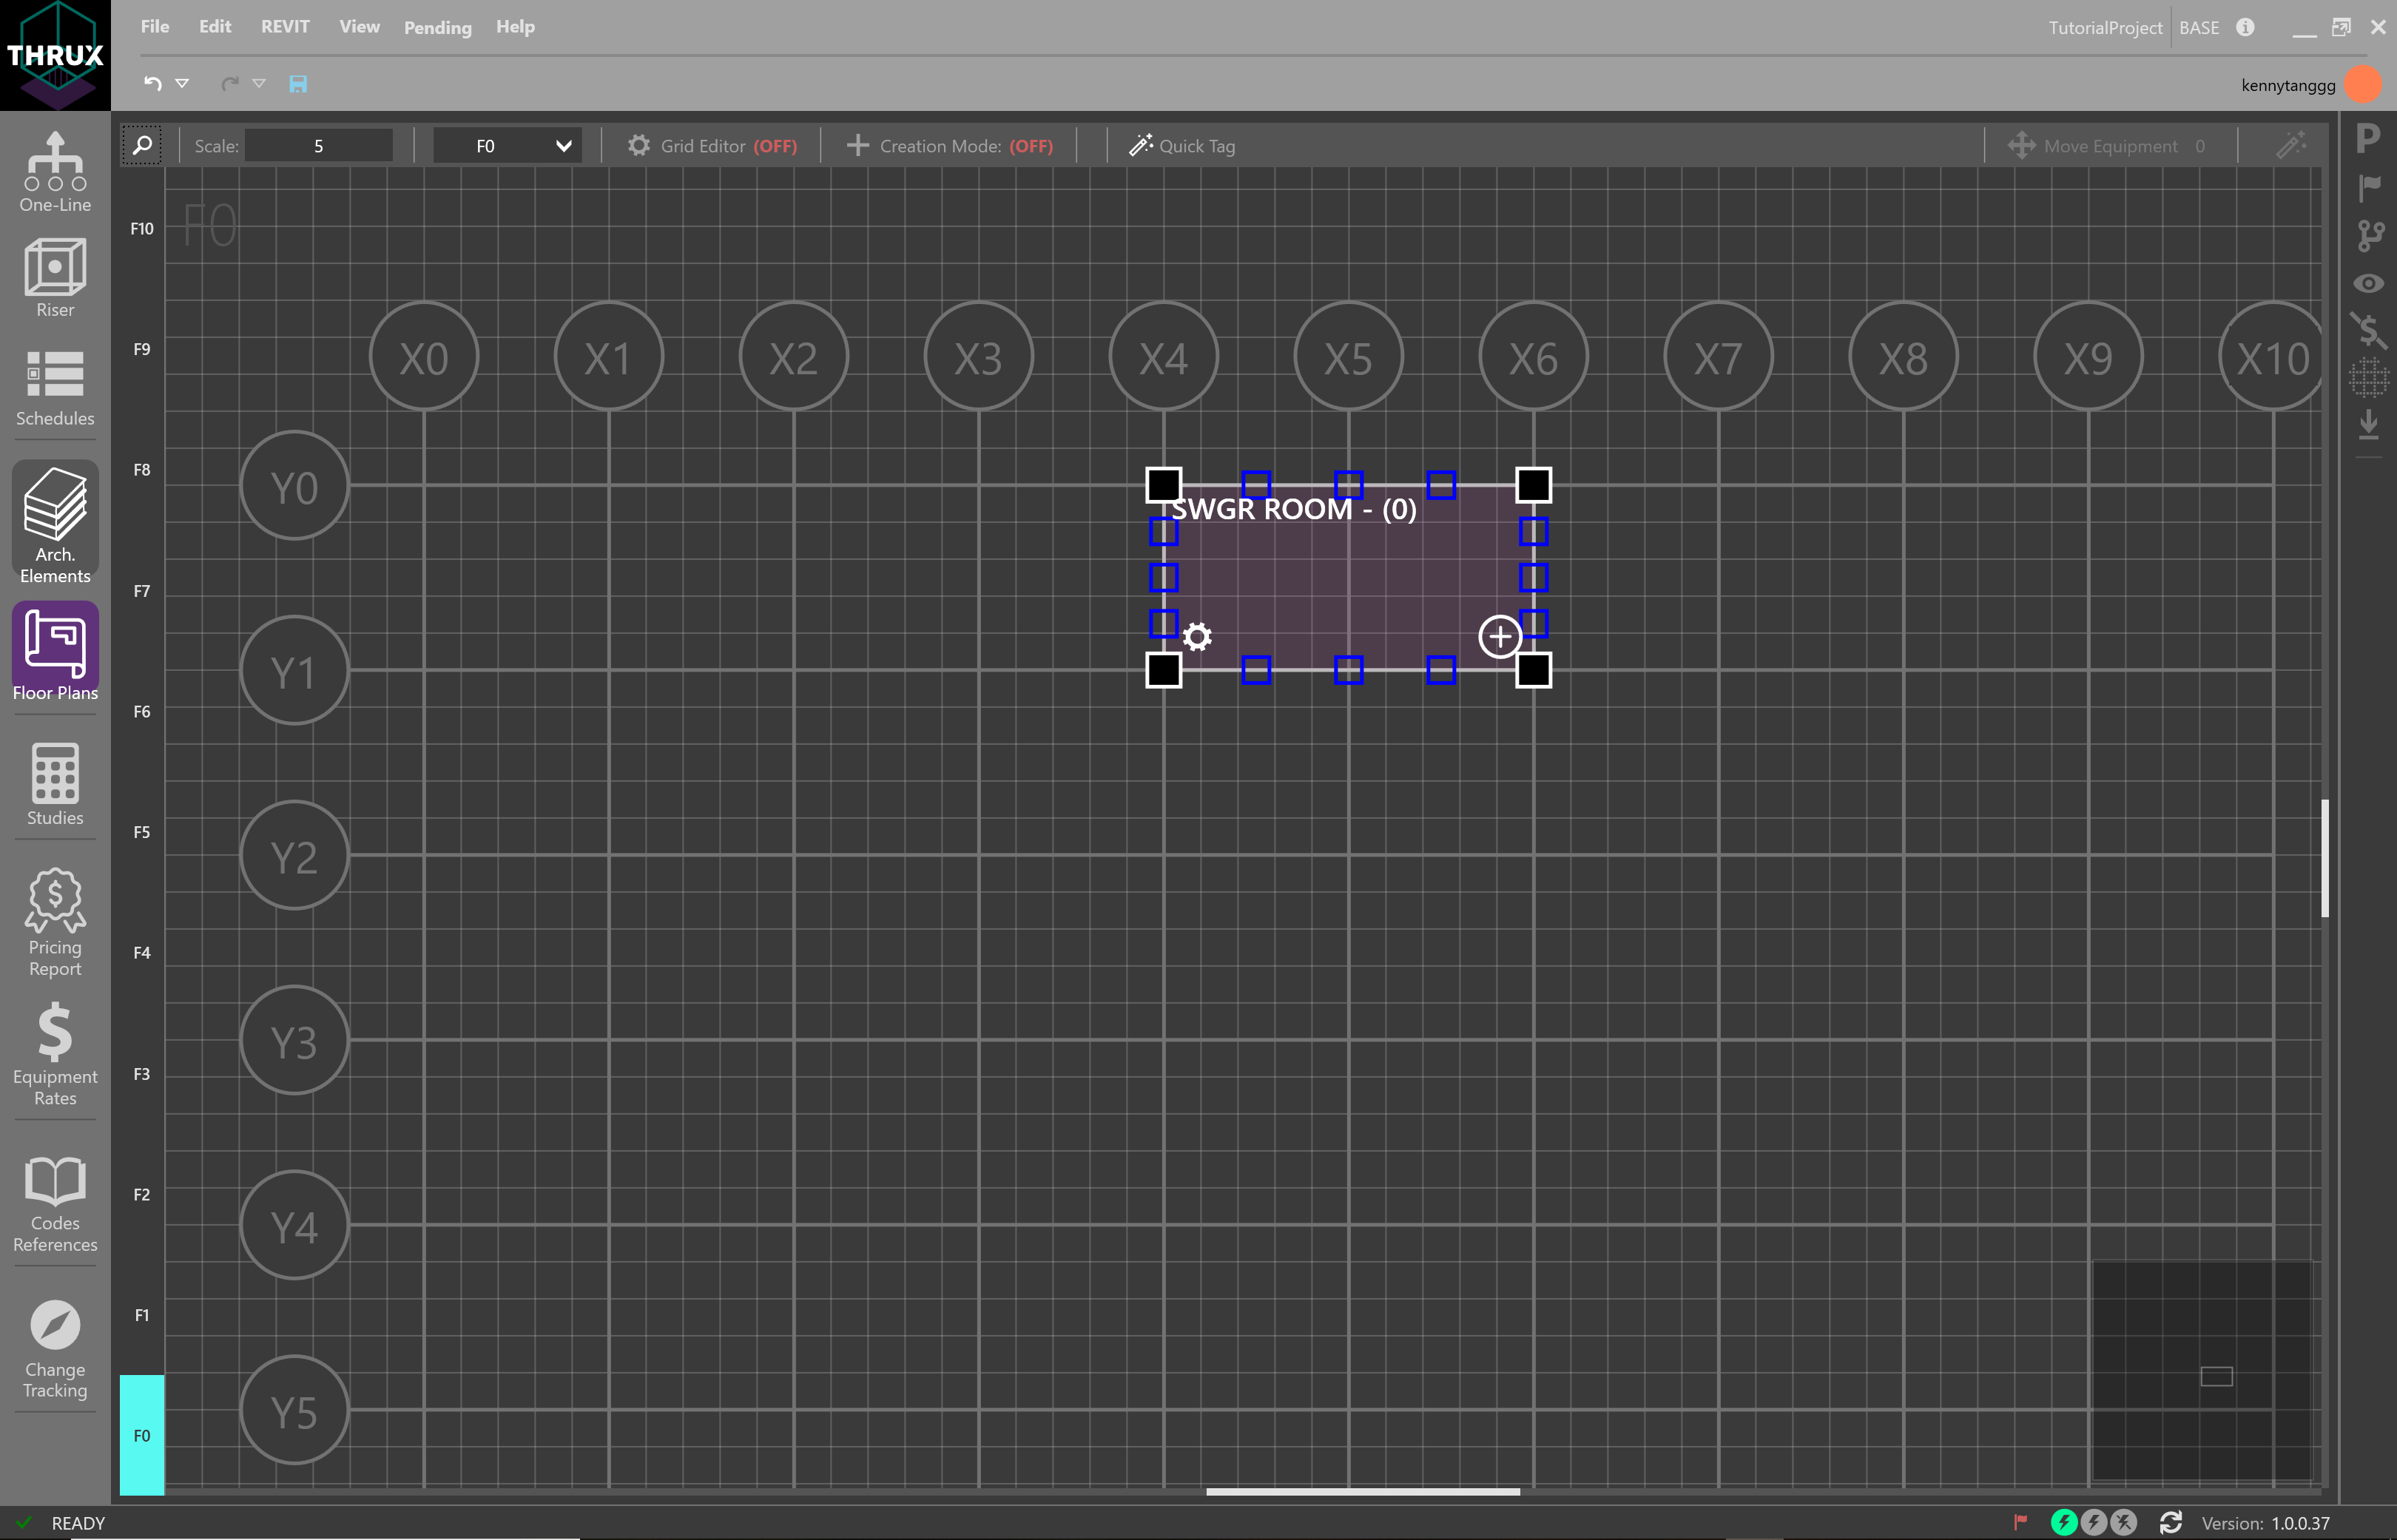
Click and drag the grips to resize a Room
Selecting multiple Floors allows the ability to create Rooms and Risers. Select multiple Floors by using Shift+Click. Then hover over a grid region and select Add Room or Add Riser.
Selecting Add Room will create a Room in a common location which spans multiple Floors.
Create Riser will create a Riser which also spans multiple Floors.
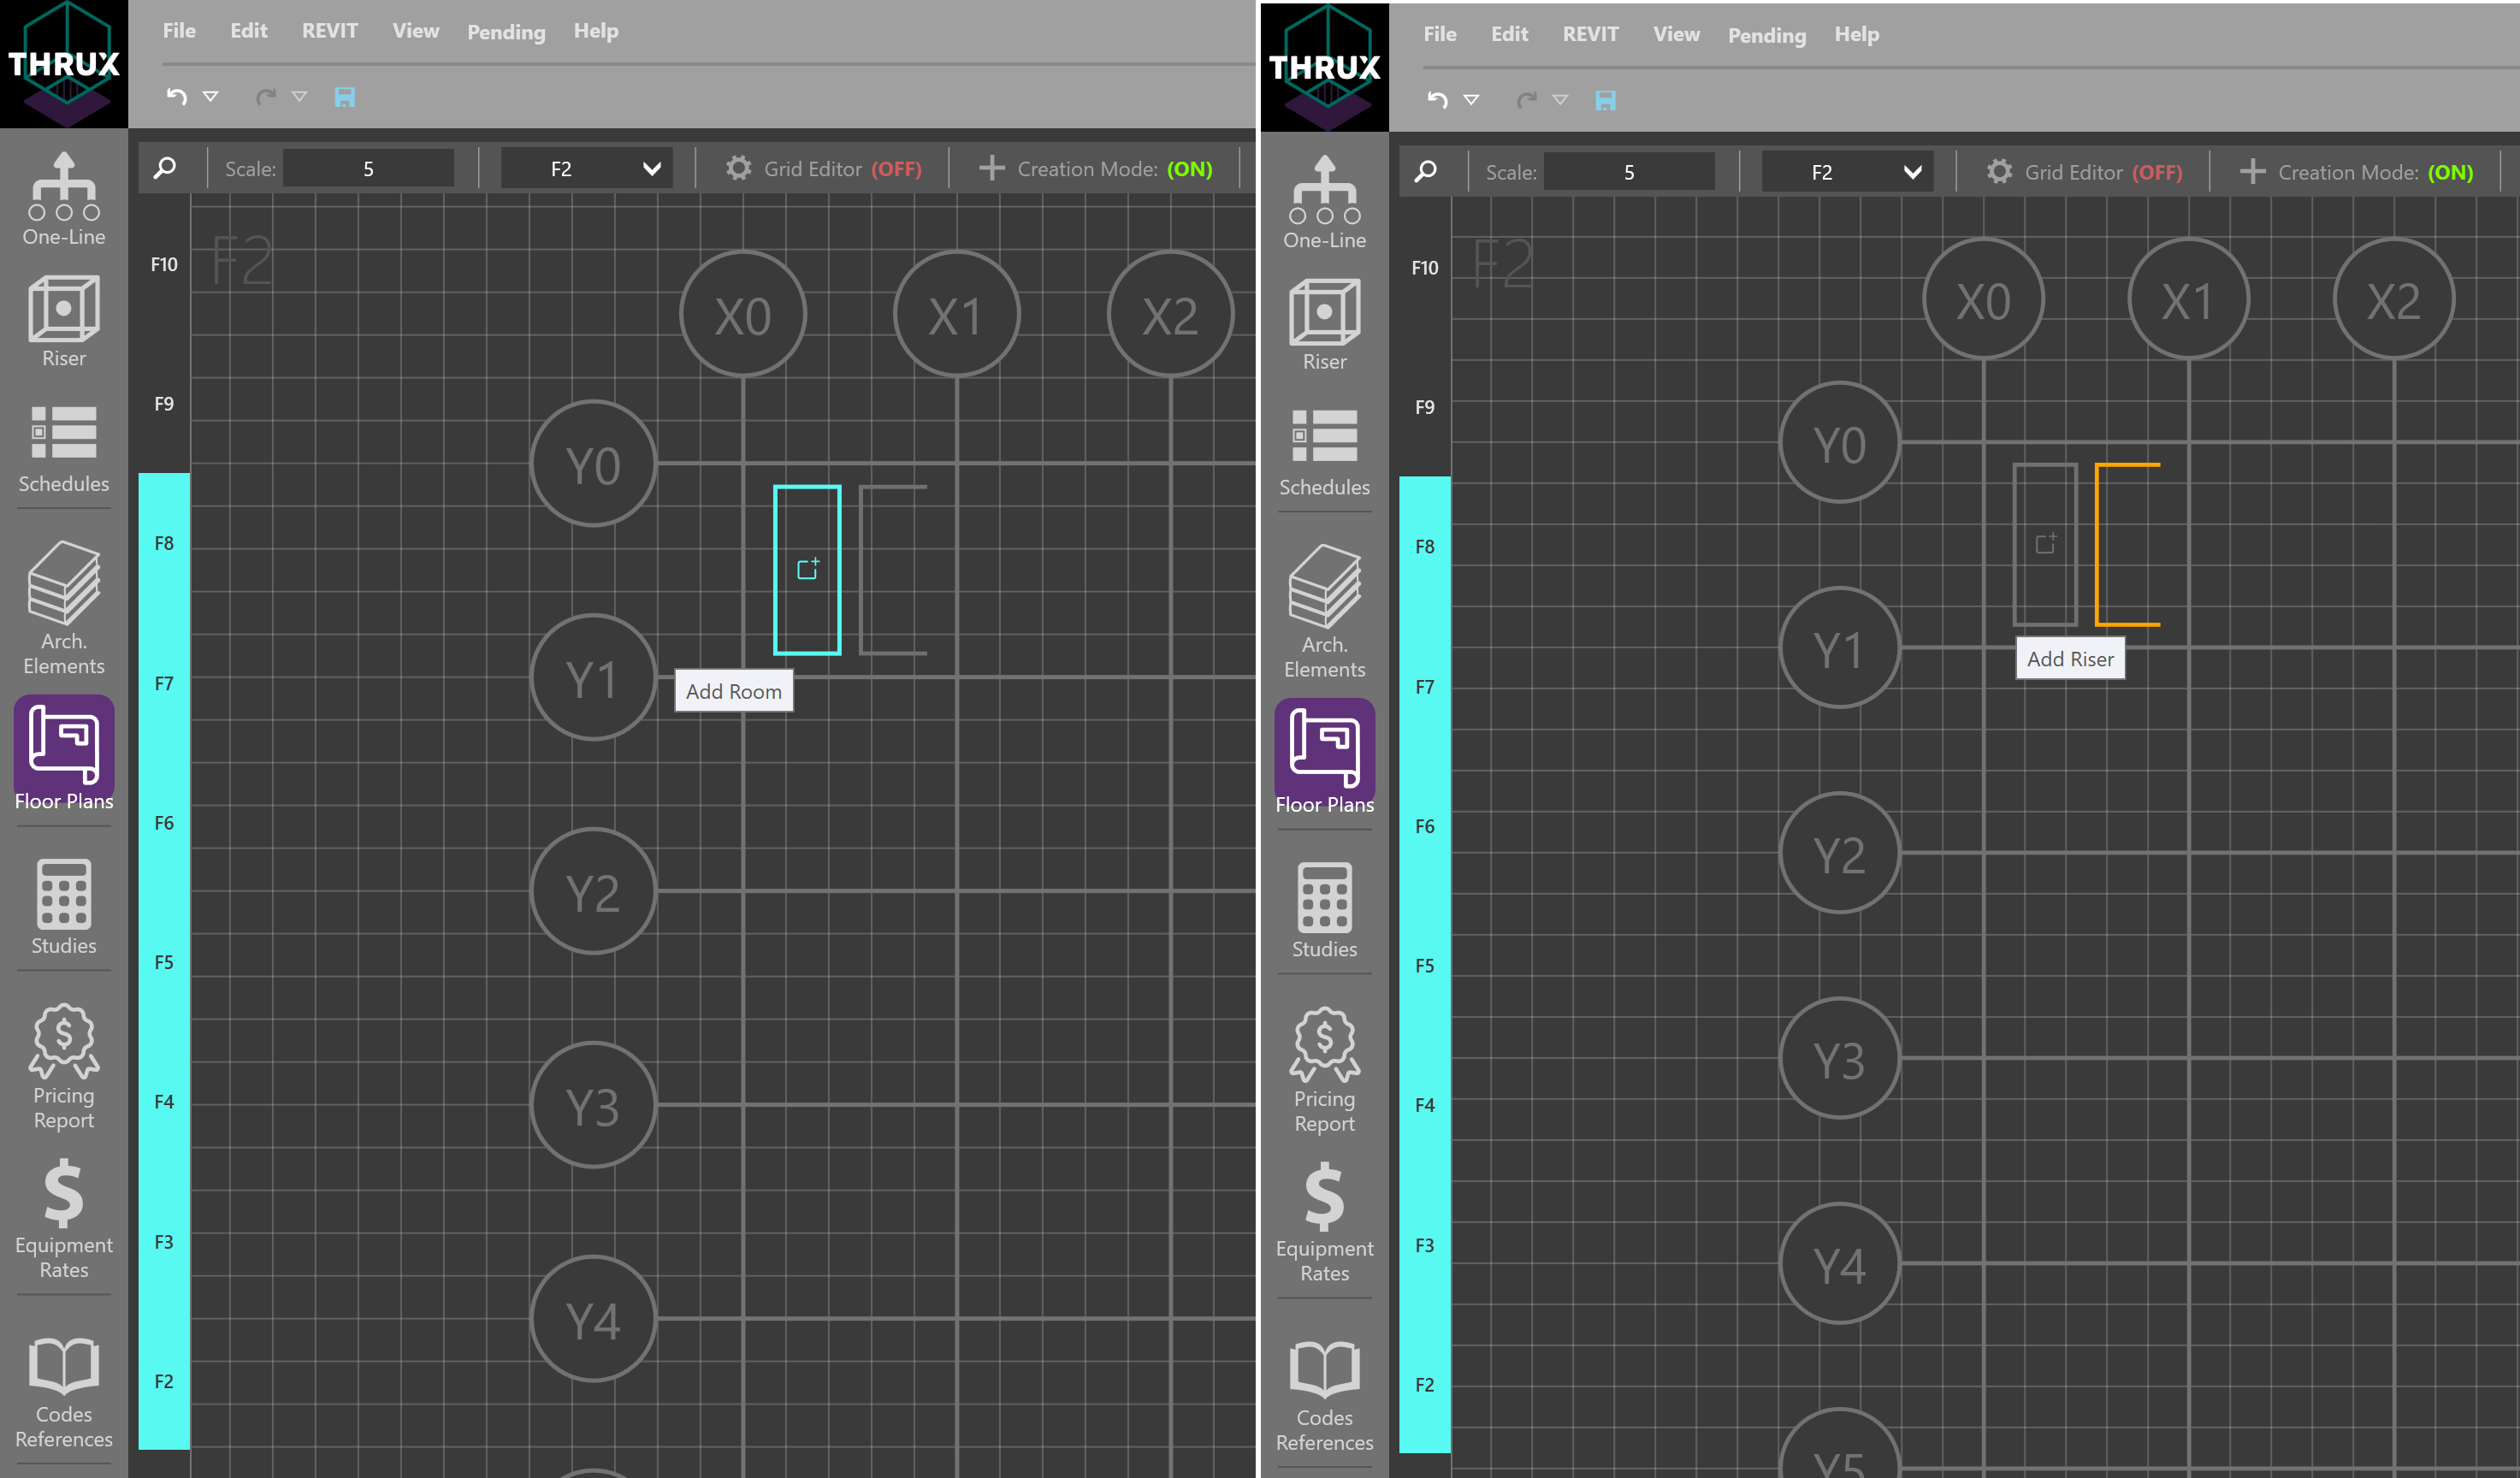
Creating a stacked Room or a Riser while multiple Floors are selected
Equipment Distances
Calculated Length
Distances between Equipment are determined by their respective Room locations. Calc. Length (Calculated) represents the distance between two Rooms via an orthogonal route.
The vertical distance between Rooms is the difference between their respective elevations.
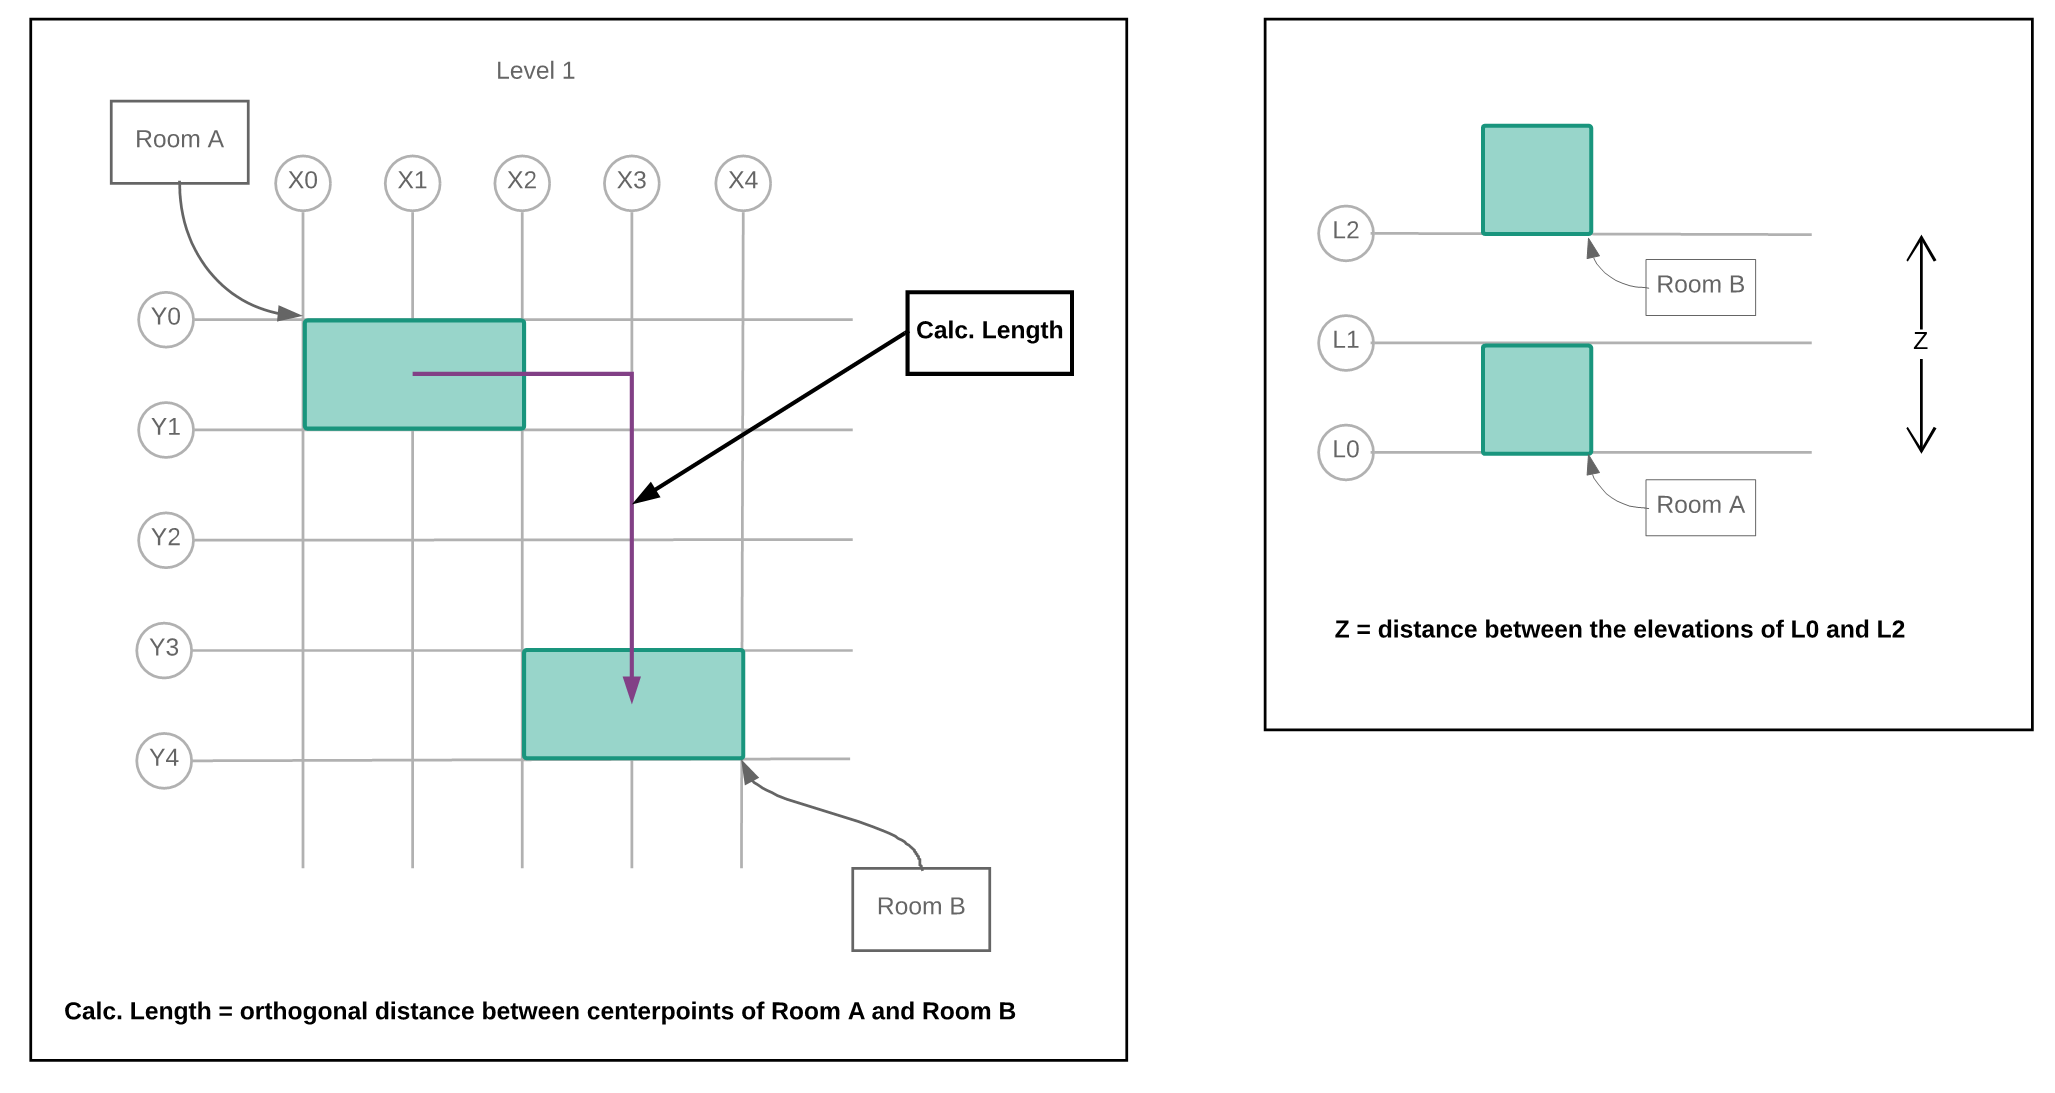
Route between Rooms on the same Floor, and vertical distance between stacked Rooms
It is often necessary to offset through a Riser. The total distance or Net Length is determined by the centerpoints of the respective entities.
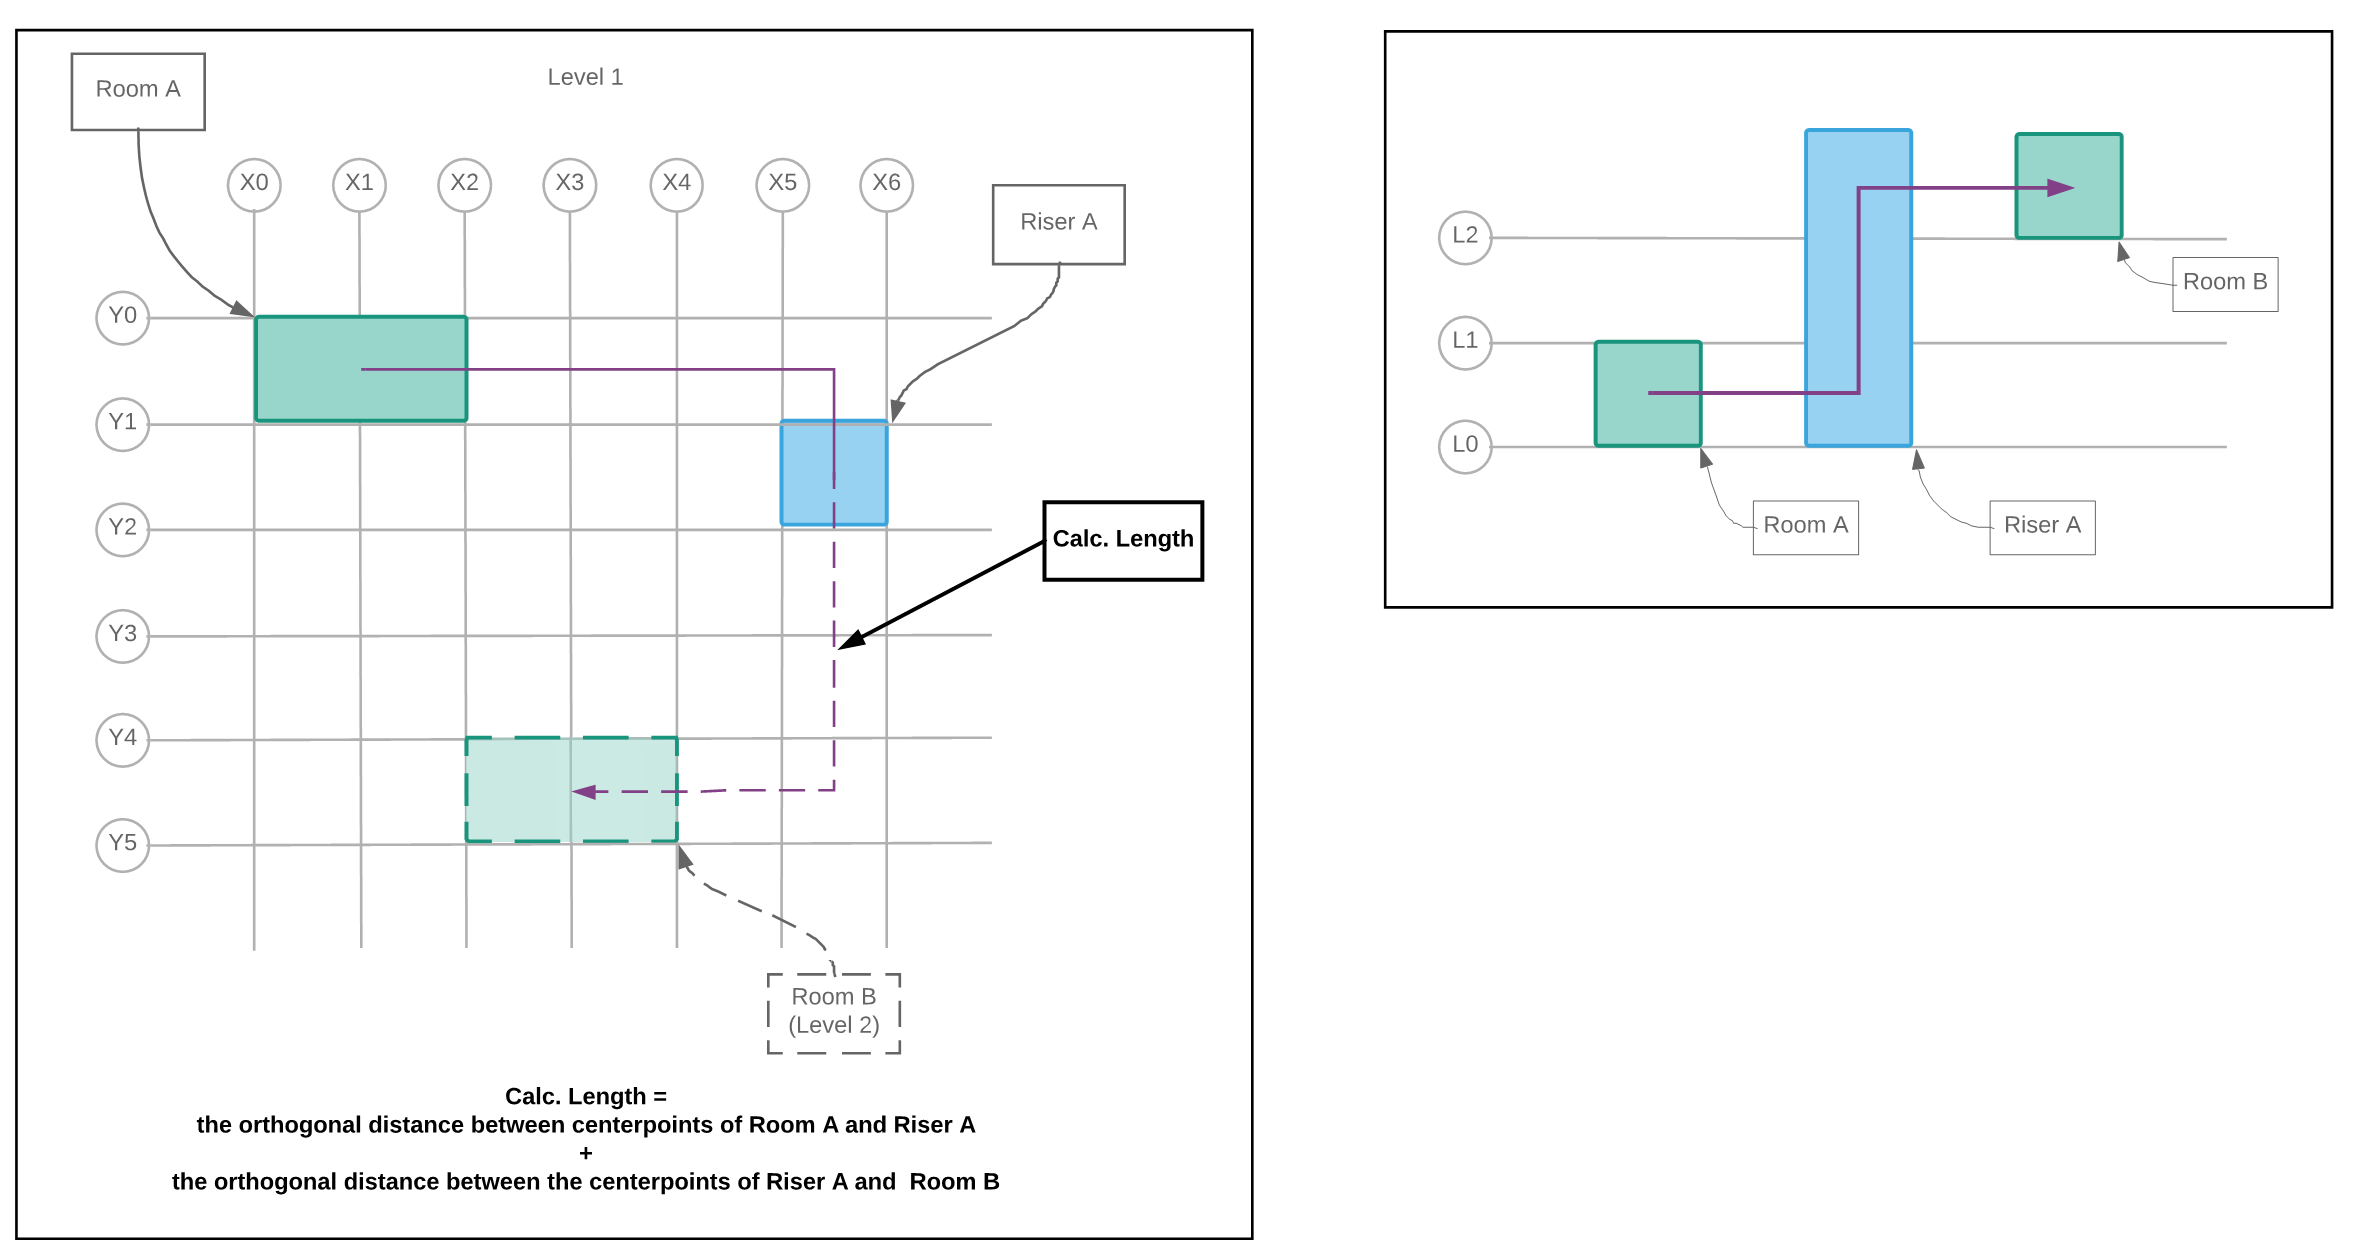
Routing from Room A, through Riser A, and terminating at Room B
Manual Added Length
Manual Added Length is an additional factor which is added to a circuit’s Calc. Length property and is a customizable default setting. See here for more information.
Net Length
The Net Length is composed of the Calc. Length and the Manual Added Length.
Move Equipment
It is a common task to study changing the locations of Equipment. Move Equipment is intended to quickly place Equipment in Rooms.
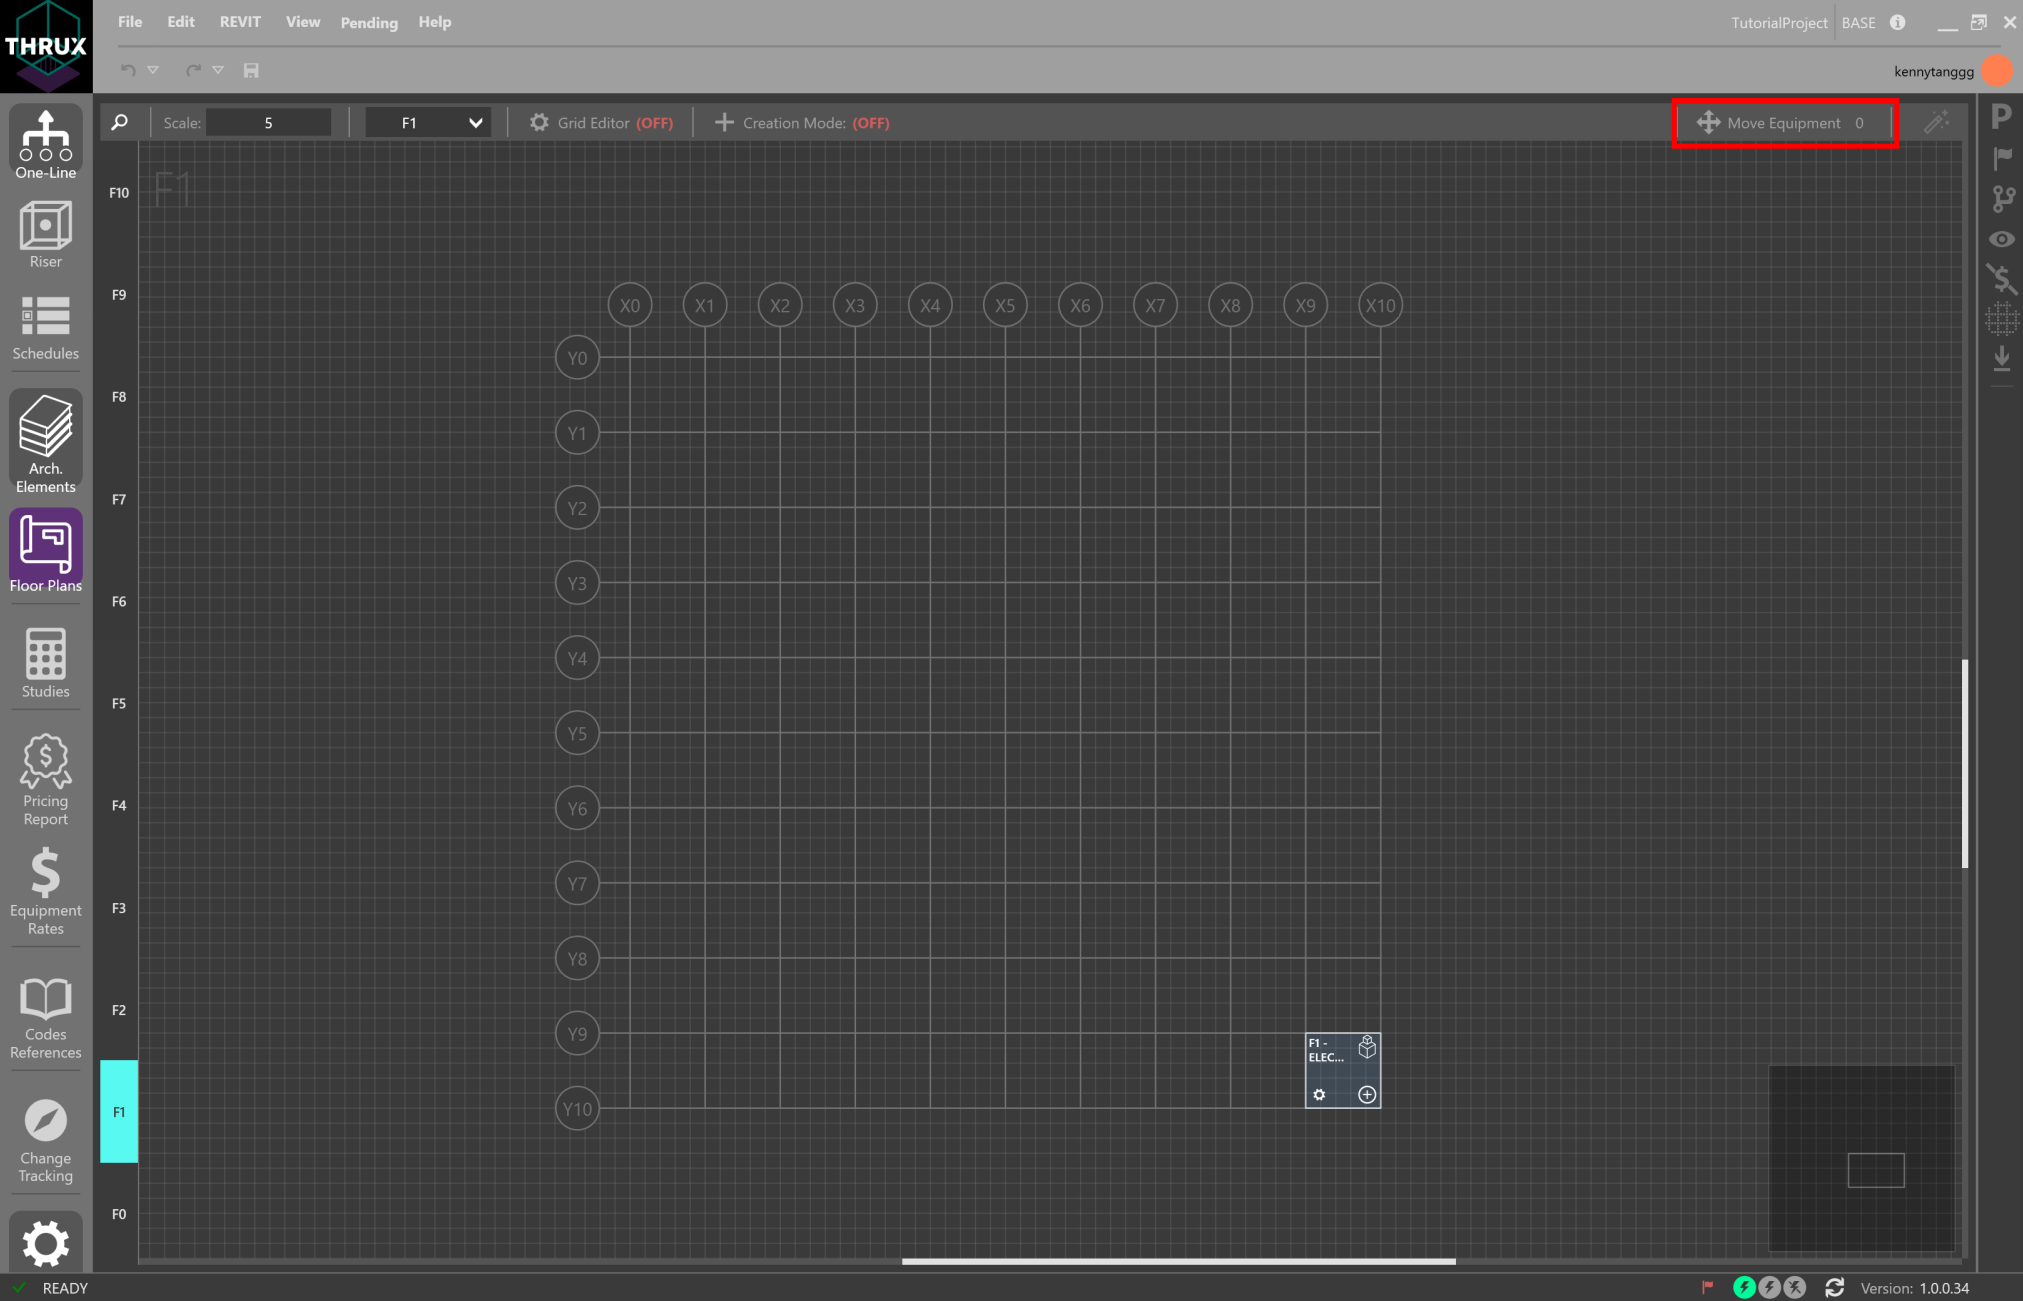
Click Move Equipment in the top right
There are two collections of Equipment: Orphaned Equipment and Hosted Equipment.
An Orphaned Equipment does not have a Room assigned to it while a Hosted Equipment has a Room assigned to it.
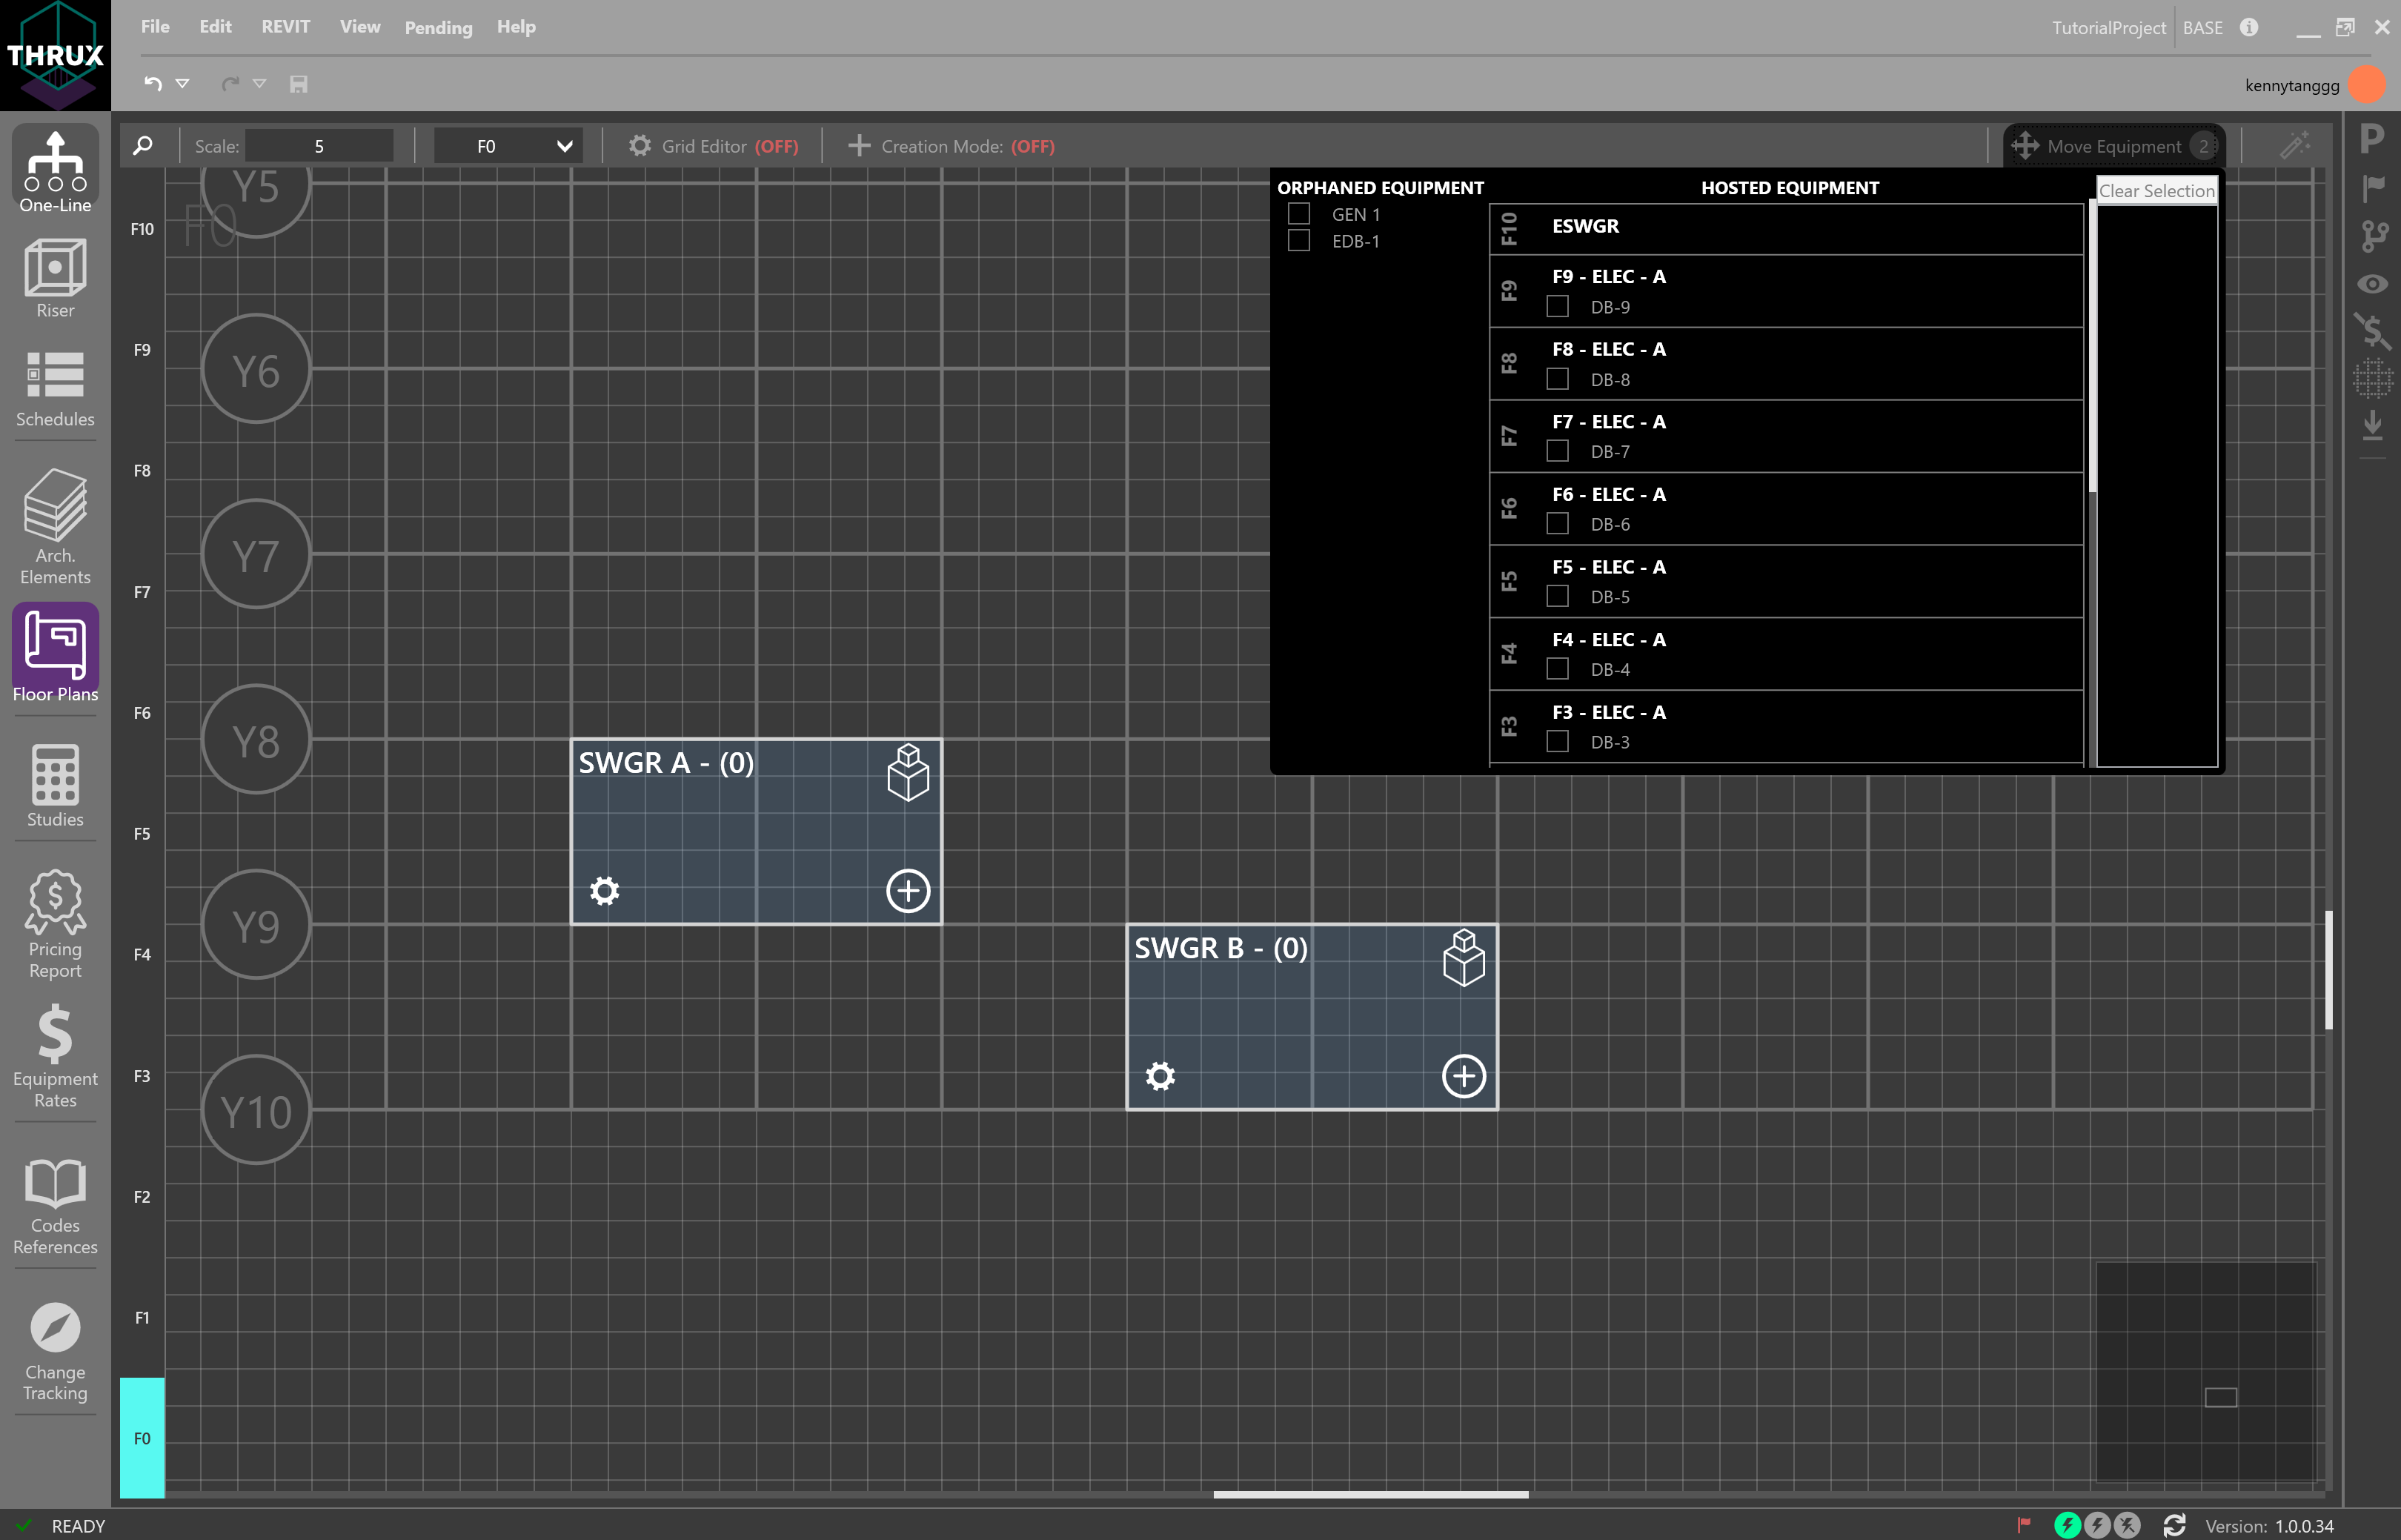
Orphaned Equipment vs Hosted Equipment
Select a single piece of Equipment or multiple. Rooms and Floors will be highlighted in purple.
Hover over a Room and click the Move/Add icon.
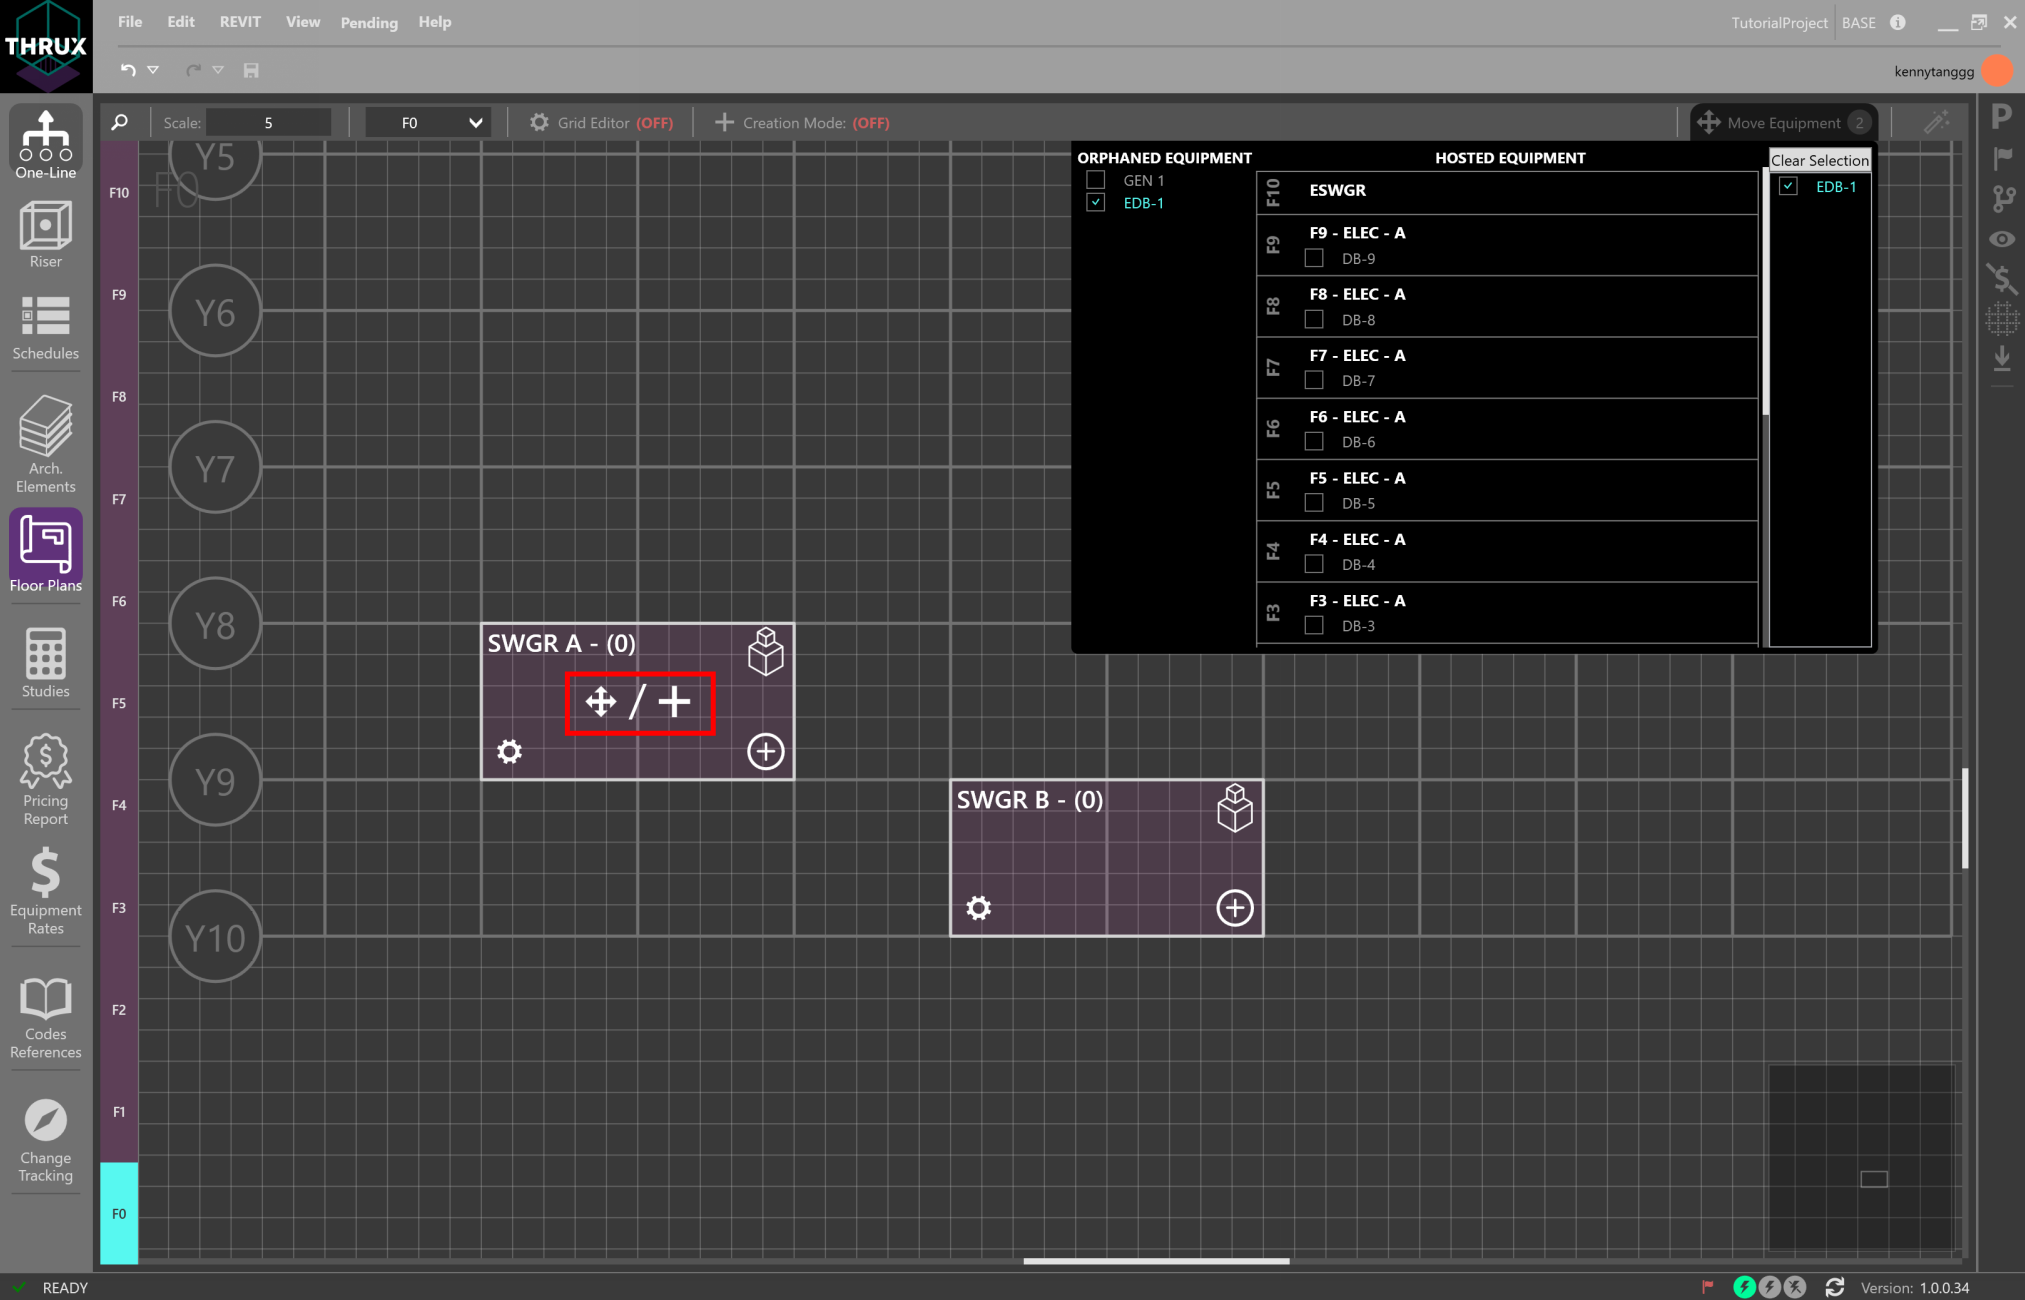
Purple indicates where an Equipment can be placed
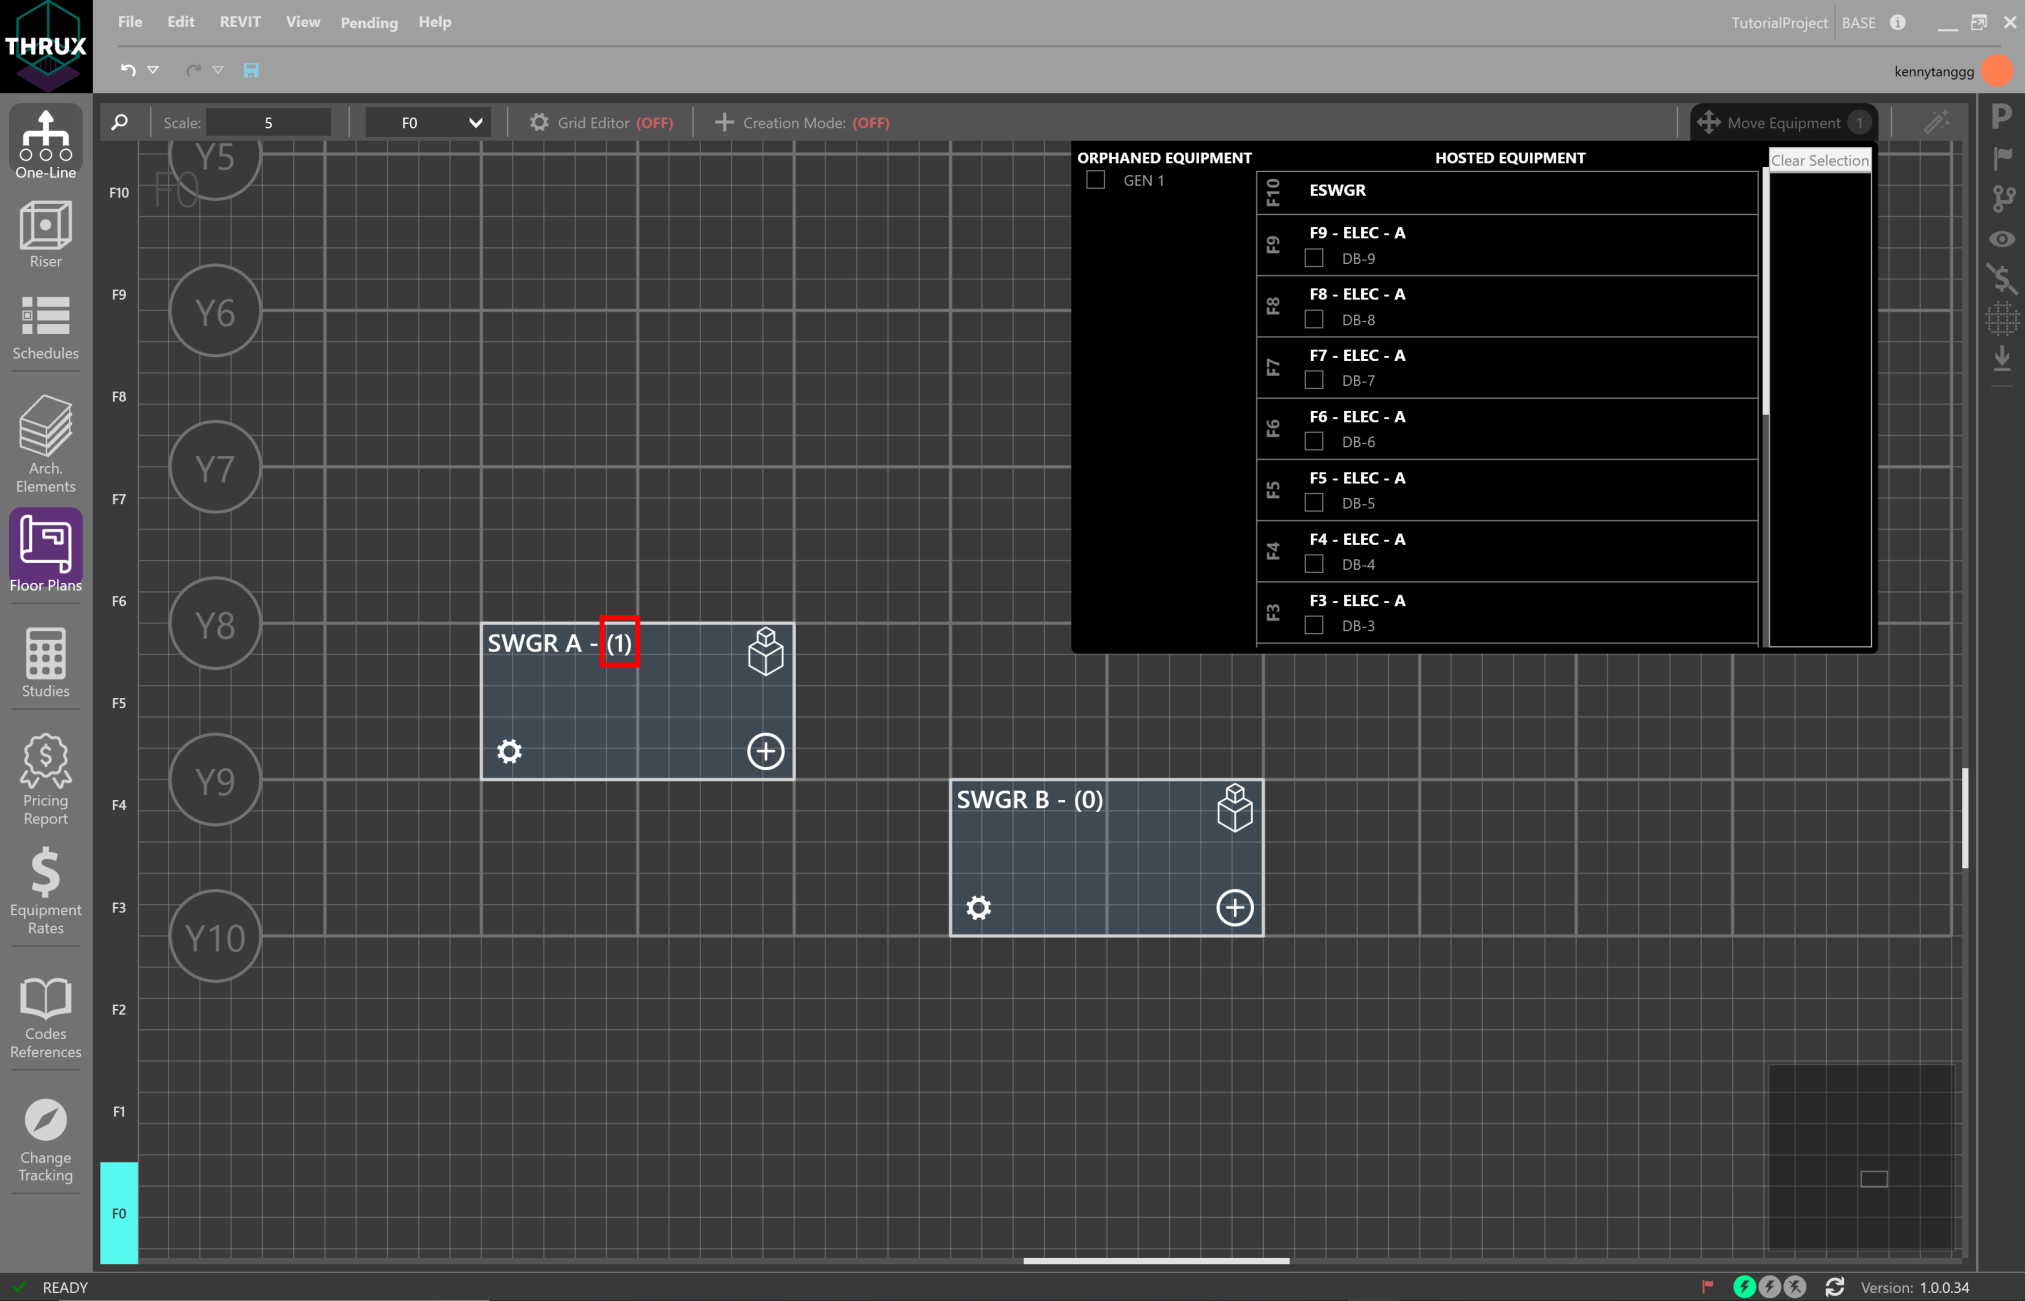
Equipment indicator shows it has been added
Find
Use CTRL+F to search for any entity by name. Finding an Equipment will navigate to its Room. Finding a Room will navigate to its respective Floor.